Educate

Avalanches

Know the Ropes

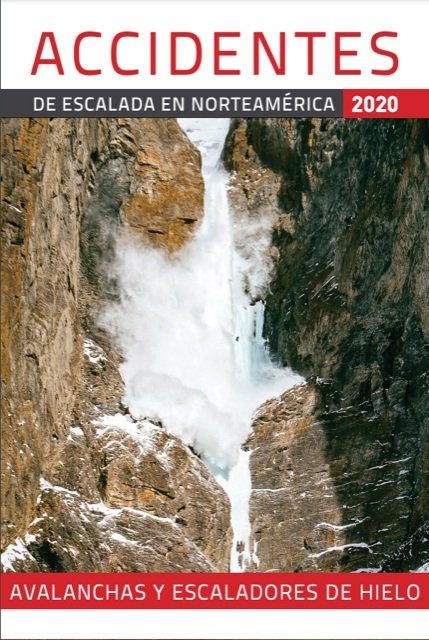
Originally Published in Accidents in North American Climbing 2020

Written by Matt Schonwald

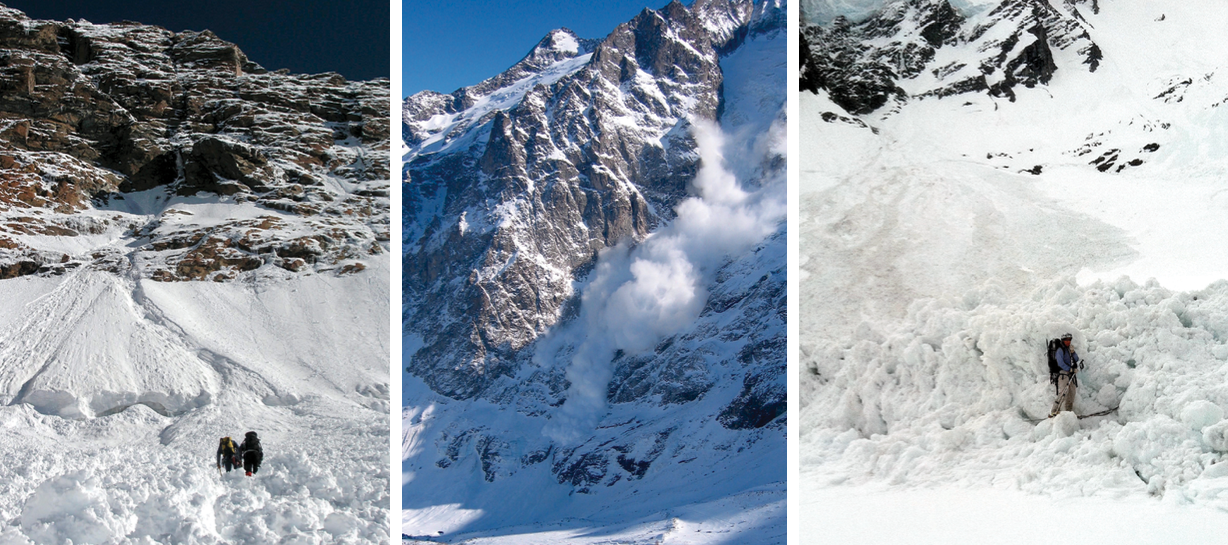
avalanche debris

LAST JUNE I was guiding three people for a ski descent of the Coleman-Deming Route on Mt. Baker. Wind the previous day had exceeded 20 mph, loading fresh snow onto the Roman Wall, the 40° headwall before the summit plateau. I first guided this route in 1999 and knew this slope had seen multiple avalanche accidents, including the first recreational avalanche fatalities in Washington, when five people died in July 1939, entombed in the crevasses below the wall.

We skinned up from our 6,000-foot camp, with an icy wind blowing down from the summit. The new snow was soft and ankle deep, but the wind concerned us—would we have a serious avalanche issue with just eight inches of fresh [snow] in June? There was ample precedent: All of Mt. Baker’s climbing avalanche victims have been killed in May, June, or July. Three hours passed and we arrived at the Coleman-Deming Saddle, just above 9,000 feet. I could see several parties descending from the Roman Wall.

I approached a guide I knew to ask why they were heading down. “A party of three took a 300-foot ride,” he said. “They triggered a slab just below the top of the wall. Luckily, no injuries.” Clouds swirled around the wall and no one could see the full extent of the crown. As we turned to descend, someone asked if we could still go up, since the headwall already had slid, and I took a second to respond. Did they not see the snow was unstable? That the climbers who were caught were lucky they had walked away with their lives and no injuries? I realized there was a real lack of understanding among some mountaineers that summer storms can deposit new snow deep enough to avalanche—and that even a small slide can be deadly.

climber  fatalities by month; avalanche fatalities by month

Chart of U.S. avalanche fatalities involving climbers, showing that these fatal accidents peak in May and June, with Washington and Alaska experiencing the most climber fatalities in the United States. Chart by CAIC, annotated by Matt Schonwald

A SERIOUS THREAT

Although a large majority of avalanche fatalities occur in the winter months, avalanches are not uncommon in the long days of late spring and early summer. According to a national database compiled by the Colorado Avalanche Information Center (CAIC), since 1951 in the United States, 39 out of 44 avalanche fatalities in June and 31 out of 43 in May have involved climbers.

Most backcountry skiers and winter mountaineers in avalanche-prone areas have some knowledge of the hazards and carry basic avalanche safety equipment, such as transceivers, probes, and shovels. Many seek formal training in avalanche avoidance and rescue. But preparation for avalanche hazards in the spring and summer mountaineering season is not as widespread or systematic. Most avalanche training is skewed toward winter travelers, and many avalanches that affect mountaineers occur in terrain not covered by avalanche forecasts or after avalanche centers have shut down for the season.

At the same time, the consequences of an avalanche are at least as great for mountaineers in spring and summer as they are during the winter months. As the winter snowpack melts back, additional hazards are exposed. Cliffs, narrow couloirs, exposed crevasses or boulder fields, and other terrain traps make an encounter with even a small avalanche potentially fatal.

Mountains big and small possess the potential to bury or injure you with the right combination of unstable snow, terrain, and a trigger—often someone in your party. It’s not only important to recognize these hazards but also to have the discipline to respect the problem and choose another route or wait till the risk decreases. In preparing to enter avalanche terrain, the mountaineer must be focused more on avoiding avalanches than on surviving one, and that is the focus of this article.

TRAINING AND EQUIPMENT

In North America, the sequence of avalanche education for recreationalists consists of a one-hour awareness class, a three-day Level 1 course for beginners, a one-day rescue course to improve the skills learned in Level 1, and a three-day Level 2 program for amateur trip leaders, such as those leading groups of friends on a hut trip or overnight climbs. Basic avalanche training helps develop understanding of the risks a particular route might present. A Level 2 course teaches trip planners to assess problems in unfamiliar mountains and in the absence of regular avalanche forecasts.

An avalanche rescue course teaches you how to locate and rescue climbers buried in a slide. Mountaineers must be prepared for the possibility of multiple burials, since avalanches in glaciated terrain and on popular routes have a high probability of catching more than one climber. You can find courses through avalanche.org in the United States and avalanche.ca in Canada.

Some mountaineers leave behind their avalanche safety equipment during the spring and summer season, assuming the relatively stable snowpack decreases avalanche hazard. But, as we will see, there are many reasons avalanches may occur during prime mountaineering season, and safety gear—shovel, probe, and avalanche transceiver—should be used if there is any risk of being caught and buried. (A shovel and probe have multiple other uses, including leveling tent platforms and probing for crevasses.) These should be individual gear items—sharing any of this equipment reduces your ability to be located quickly or to dig out your friend.

Again, given the dangers that even very small avalanches present to climbers, recognizing the hazards and planning to avoid them is the number one survival strategy.

slab avalanche

This huge slab avalanche in July [2020] stripped the north face of Mt. Belanger in Jasper National Park, Canada, down to bare glacial ice. Photo by Grant Statham

AVALANCHE TYPES

Mountaineering avalanches typically happen in terrain steeper than 30°, above treeline (often on glaciers), and in areas subject to winter-like storms. In other words: the terrain that climbers love. In the spring and summer seasons, when mountaineering activity peaks, climbers may face exposure to:

Significant storms leaving more than a foot of new snow on your route
Strong winds( >15mph), transporting snow and building slabs on leeward slopes
Strong UV (solar) radiation, increasing the risk of triggering wet loose and slab avalanches

Understanding the basic mountaineering avalanche types helps us recognize the hazards we face and our potential solutions to mitigate or avoid the problems.

Loose Snow Avalanches These slides, also known as sluffs, frequently occur as point releases (describing how they start from a singular point and then fan out and entrain surface snow, gaining mass and speed as they accelerate downhill). They can be dry or wet. “Dry Loose Avalanches” occur during or after cold winter storms with periods of rapid snowfall (greater than one inch an hour). “Wet Loose Avalanches” result from warming of the snow surface above freezing, loosening the bonds of the snow grains and creating instability; these may be triggered by falling rock or ice. Even tiny loose snow avalanches are dangerous to climbers—more so than skiers—because they can knock us off balance in very unforgiving terrain. Any avalanche is a serious threat.

During the spring and summer, the intense UV radiation from the sun makes wet loose avalanches fairly predictable, as the slopes that heat first will be southeast-facing and the hazard then moves around the mountain like a sundial. Avoiding these slides requires planning your outing so you’re not on a snow slope that you need to travel up or down, under, or across when the sun hits, whether during the climb or the descent. Watch out for soft surface snow that moves easily, and try to cross slopes near or at the top to avoid being swept by heavy, wet debris.

late spring slab avalanche; Rocky Mountain National Park

Late spring slab avalanche in Rocky Mountain National Park. Note the track on the left, which was made by a party of skiers one hour before this slide.

Slab Avalanches occur when cohesive snow rests on a weak layer. If that weak layer fails, the cohesive snow fractures and cracks propagate outward, forming distinct areas that may slide. Slabs are formed from storm snow, which can happen any time of year in high alpine terrain. Wind may build deep slabs on leeward slopes, and warm spring and summer weather can add water to them, making them denser and harder to trigger yet more dangerous when they fail. Spring or summer storms that drop more than one foot of snow, followed by a clear, sunny day, are particularly hazardous. The denser snow near the surface destabilizes the slab and makes it prone to triggering, naturally or artificially.

Wind slabs will form when strong (15+ mph) winds move loose snow into dense layers. Strong winds during storms can turn six to eight inches of new snow into one- to two-foot slabs on leeward slopes such as the Roman Wall on Mt. Baker in the Cascades or Tuckerman and Huntington ravines in New Hampshire, to name a few.

For avoiding slab avalanches, it’s critical to recognize red flags in the recent weather history and forecasts, as is placing camps in appropriate areas before or during storms. Climbers should wait 24 to 48 hours before attempting a route that has had more than a foot of new snow, on a leeward aspect, and/or with exposure to terrain traps.

Cornice Falls create risks for climbers moving along snow ridges or failing to notice a cornice when they arrive on a snowy summit. A cornice collapse also can trigger a slab avalanche on the slopes below. The only solution is to avoid climbing under them or approaching too close, especially during the heat of the day when temperatures are near freezing.

Icefall Avalanches result from a portion of a serac or ice cliff failing in a steep, unstable glacier (think: Khumbu Icefall), creating falling ice hazard. As with cornices, falling ice presents the threat of triggering deep slab avalanches that can run far down a mountainside, threatening camps placed too close to large faces. The random nature of icefalls makes predicting these events very difficult, so the only prevention is to minimize travel time through or under icefalls, especially during the daytime, and to avoid placing camps with exposure to collapsing ice. Learn to measure the “alpha angle” below a peak or face to estimate how far debris from a large avalanche may ow (a good resource is wildsnow.com/10011/alpha-angle-avalanche-safety).

Glide Avalanches occur after a long period of warming, when running water has lubricated the slope underneath the seasonal snowpack, causing it to move down-hill. This movement creates glide cracks, which run through the snowpack from the surface to the ground. Large and destructive glide avalanches may be the result. Glacier-polished slabs in the alpine are particularly susceptible to this problem, requiring route selection and trip planning to limit your exposure.

RECOGNIZING TERRAIN HAZARDS

Most of the “50 Classic Climbs” that are not rock climbs—along with countless other North American mountain routes—offer some seasonal avalanche hazard. In addition, the sheer vertical relief of many alpine objectives makes the possibility of a small avalanche a significant hazard. Many routes cross hanging snow fields with exposed or feature-ridden runouts. Very small loose wet avalanches can travel great distances, entraining loose snow and growing dramatically. You can travel on a valley glacier and still risk burial by these events, because faces over 3,000 feet can turn a small sluff into more than 10 feet of debris.

As you plan a climb or move up a route, look for route features that either make avalanches more likely or increase the hazard of a slide. These include:

*Convexity: Areas where the slope angle increases suddenly—these are places where the tension in the slope will be at its highest, making an avalanche more likely to be triggered
*Concavity: Areas where the slope angle decreases suddenly are also a zone of stress, due to an entire slope held up at this rapid transition from steep to flat
*Slopes with rock features poking through the surface, which can make triggering a storm slab more likely
*Seracs or cornices above a slope—these large, unstable features can injure you or trigger large avalanches
*Cliffs below steep ( greater than 30°) slopes, creating exposure to small avalanches pushing climbers over the edge
*Crevasses below a slope, increasing the chance of a deep burial and fatal outcome

Canada has developed a system to rate terrain based on the exposure to avalanches a party will experience while moving through an area. The Avalanche Terrain Exposure Scale (ATES) is used by Parks Canada, Avalanche Canada, the New Zealand national parks, the Pyrenees in Spain, and in guidebooks and maps published by Beacon Books in the United States.

the avalanche terrain exposure scale

On popular mountaineering routes across North America, from Mt. Hood to Mt. Washington, and from spring routes in Colorado and the Tetons to the classics of the Canadian Rockies, steepness, exposure to multiple avalanche paths, and sometimes glaciation put most routes in the “complex” ATES rating. Such routes generally share three characteristics making avalanche accidents more common:

*Ascents in features such as gullies, couloirs, or large faces where there is no safe way to avoid exposure to avalanches
*Approaches through terrain traps with unavoidable exposure to overhead avalanche terrain, such as creeks, cliffs, moraines, moats, and crevasses
*Descents via a different route where conditions ares ubstantially different

Recognizing and acknowledging that your route travels in “complex” terrain should prompt you to focus on identifying the areas of greatest exposure, as well as decision-making points along the route, where you can stop and evaluate the likelihood of avalanche activity.

PLANNING THE CLIMB

Planning a safe climb requires identifying areas of exposure on your chosen route and linking the prevailing conditions and forecast to an increase or decrease in the avalanche possibilities.

I use a process that starts with a weather and avalanche forecast (if available). I look at wind, precipitation, and freezing levels, as well as the recent past events from local weather stations. Then I evaluate which terrain is likely too exposed, given the current conditions, and look for routes or peaks where I can avoid unnecessary exposure. With this information, I draw up time plans for various options to get out and climb safely. Let’s go into some detail on these tools, and then I’ll give an example of the planning process below.

Avalanche Forecasts An avalanche forecast or bulletin gives you information regarding the avalanche hazard rating, avalanche problems, recent events such as observed avalanches on a specific slope, snowpack synopsis, and weather affecting the possibility of triggering an avalanche. The main difference between a forecast and a bulletin is the frequency they are issued—forecasts are daily, and bulletins are issued several times a week (at most). The forecast/bulletin will discuss the avalanche problems and show where they are located (distribution), size (how destructive), and likelihood of triggering (are you feeling lucky, punk?)

Most avalanche forecasts are issued from Thanksgiving through April, but most mountaineering avalanche accidents occur outside this period. The local avalanche center also may issue bulletins or seasonal recommendations giving general advice for the mountaineering season. More recent updates can be obtained from rangers, climbing guides, and the general climbing community in the area. Before a trip, visit local blogs (such as the Denali or Rainier rangers’ blogs), guides’ reports (such as the ACMG guides website mountainconditions.com), or community outlets such as regional forums and Facebook groups to get a general sense of conditions and perhaps even specific reports from your planned objective.

Weather Conditions When seasonal avalanche centers aren’t issuing forecasts, it’s up to climbers to use the nearest mountain weather forecast to help predict avalanche problems. Forecast sites I use include Noaa.gov, Windy.com, Mountain-Forecast.com, Meteoblue.com, and Spotwx.com; it’s worth learning to use several forecasting sites. The accuracy of mountain forecasts drops off dramatically after 24 to 48 hours, so it is a good idea to check the forecast daily at least a week before your trip to see the overall trend: stormy, warm, etc. Key data to look for when checking the forecast includes:

Freezing Level This tells you where snow will start to accumulate and where avalanche problems will develop.
PrecipitationTotals This often will come in inches of water (or millimeters outside the U.S.) for a 6-, 12- or 24-hour period. (A rule of thumb is that one inch of water equals one foot of snow in temperatures near or below freezing.) Precipitation intensity tells you how fast slopes will get loaded; a rate of one inch or 2.5 cm (25 mm) of snow per hour is considered high intensity.
Wind The predominant wind direction tells you which slopes will get loaded—e.g., southwest winds will load northeast (leeward) slopes. Pay attention to sustained wind speeds over 15 mph and duration over two hours, which may enhance the formation of wind slabs.
Remote Weather Station Telemetry You can access online data about the snowpack and recent snowfall from remote SNOTEL sites across North America. (Find links to SNOTEL locations at wcc.nrcs.usda.gov/snow/ or on local avalanche center websites.) You can look at a full season or just a few weeks of weather history.

In the spring and summer, the snowpack typically goes through multiple melt/ freeze cycles, potentially leading to avalanche problems. Early spring (March to mid-April in North America), when the snowpack is just beginning to warm up, is a very dangerous period, as old weak layers can be reactivated, leading to large, destructive avalanche cycles in alpine zones. Key red flags to research and observe include:

  • Persistent weak layers, such as melt/freeze crusts, within the top three feet of the snowpack

  • Early warm-ups when the winter snowpack has not adjusted to the extra heat input from longer days

  • Temperatures above freezing for 24 hours in starting zones. If slopes don’t freeze, the chances of wet avalanches go up dramatically.

  • Large rainstorms (greater than one inch of water in 24 hours)

planning map CalTopo

Planning map created on CalTopo for the Disappointment Cleaver route on Mt. Rainier, showing hazard zones and safer rest stops.

Time plans help you figure out what time you need to leave camp in order to safely travel up and down your route and to avoid hazards that increase in likelihood as the day warms. Web-based planning tools such as Caltopo and Hillmap offer the ability to measure distance and vertical gain on your planned route. With this information, you can estimate how much time it will take to go up and back.

I use a method I learned from the NOLS Wilderness Guide, in which you plan an hour for every 1,000 feet of climbing, plus rest breaks. Other systems include the Naismith Rule and the Munter Formula, which takes into account terrain and travel method. The Guide Pace app will do the calculations for you. Whichever technique you learn, a time estimate will help you determine when to start the day, especially when there are definitive spots on the route you must reach by certain times.

PUTTING IT ALL TOGETHER

A good route to examine is the Disappointment Cleaver on Mt. Rainier, as it possesses an enormous volume of objective hazards as well as a history of avalanche accidents, including the deadliest climbing avalanche in Washington history, when 11 were swept away and killed in June 1981.

Before a planned climb in the third week of June, I watched weather forecasts and noticed that temperatures had been cooler than normal and it had rained in Seattle the first two weeks of the month. Low temps and rain at sea level would mean snow up high. I checked the weather stations and saw that several feet of new snow fell between June 8 and 12, with strong winds at Paradise (5,400 feet) and Camp Muir (10,000 feet). Along with the regular climbing challenges, I added wind slabs and loose wet avalanches to my risk assessment and planned to make snowpack observations a part of my travel plan.

The first day on the Disappointment Cleaver route, from the Paradise parking lot to Camp Muir, gains 4,600 feet over 4.5 miles. I estimated our travel time at 5 hours 15 minutes (4.5 hours of movement plus three 15-minute breaks). Our first break will be below Panorama Point, giving us a chance to evaluate slopes that frequently are loaded after new snowfall and wind.

Day two on the DC route gains 4,400 feet and another four miles or so to the summit. The time plan might seem like it should be close to day one’s plan, but roped glacier travel, crevasse hazards, and the higher altitude will slow us down, so our travel time might be closer to six to seven hours to the summit, then three to four hours back. Timing matters, because right out of camp we will travel under the upper headwall of the Cowlitz Glacier. The aspect is southeast, requiring us to consider our return time if there is enough fresh or soft snow to entrain large debris with wet loose activity. There are three more avalanche paths to cross along the route, exposing us six more times to slides (going up and down). We’ll try to reach the summit by 7 or 8 a.m., so we can be back down by 10:30 or 11 a.m., greatly reducing our chance of being under sun-baked slopes.

My map is marked with the route and rest points, along with known avalanche terrain, so I can plan where to stop and make snowpack and terrain observations. A crucial decision point is Ingraham Flats, where I can assess the Ingraham Glacier and Disappointment Cleaver before entering the last big avalanche exposure and the one with the most history. Many ghosts remain in the crevasses here.

ALTERNATIVE PLANS

An essential step in the planning process is considering alternatives. Make a list of possibilities on the same peak or in the same area to maximize your options as conditions come into focus in the last 24 to 72 hours before your climb. If the conditions don’t look good, it’s time to choose an alternative.

What often causes problems at this point is that big climbs are planned days, weeks, or even months in advance. Climbers may travel thousands of miles to climb a specific peak or route, only to find that conditions aren’t right, despite it being the traditional “ideal” climbing season. A warm winter followed by a cold wet spring can lead to lingering avalanche problems well into June and July. Large summer storms can drop several feet of snow in the high alpine. The mountain weather does not know how much preparation and sacrifice you have put into this trip—being humble means seeing the conditions for what they are and not what you wish them to be.

RED FLAGS ALONG THE ROUTE

Sometimes, even when the forecast and conditions reports are positive, red flags may appear immediately before a climb, during the approach, or at camp the night before:

Recent avalanche activity is Mother Nature’s number one sign of instability. Observe the aspect and elevation of slides (similar to your route?) and other characteristics (how big? what layer slid? what type of avalanche? human or natural trigger?).

Lack of overnight freeze to stabilize the snow

Rapid warming (temperatures fast approaching freezing); watch for rollerballs

Heavy rain on steep (>30°) slopes

Isothermal snow, i.e. crotch-deep wet snow, with no cohesion

Storm snow greater than 12 inches (30 cm) in 24 hours and/or precipitation intensity of greater than one inch per hour. Shooting cracks or whumping (rapid collapse of the snow under foot) are signs of unstable storm snow.

Wind speed over 15mph during a snowstorm, creating wind slabs. These will feel denser than the surrounding snow in the lee of large boulders or cliffs.

RESPECT THE PROCESS

If red flags are observed or develop while you’re on a climb, it’s time to consider an alternative route or a nearby peak with less avalanche exposure. Perhaps your schedule allows time to move to a drier part of the range. On expeditions, red flags may mean waiting or even abandoning your climb while other teams go up. Trusting the process requires not believing that other groups know something you don’t; many times these other parties are driven by various human factors often found in accidents.

Human factors that contribute to poor decision-making include the Dunning-Kruger Effect, in which people overestimate their knowledge and ability in the face of complex problems. We’re also prone to attributing “expert” status on people moving through an area we’re not sure about, in order to avoid the doubts we may feel. We may feel time pressure leading to overconfidence (“we’re here, so let’s just do it”).

Such cognitive biases impact your ability to identify risk and consequences. It’s the reason you may continue up a climb despite staring at multiple red flags. My personal trick to keep bias in check is to treat all climbs as predators that are hunting me. If I can’t be confident that I will avoid becoming their meal, I back away.

The most important avalanche safety tools are your judgment and your willingness to recognize red flags and accept that they are pointing to an avalanche problem. Be humble in the face of natural hazards and you will find that as one door closes another will open, whether it is another route, peak, activity, or epiphany. Being open to change will help you climb for a long time—which is the point, after all!

ABOUT THE AUTHOR: Based in Seattle, Matt Schonwald is founder of BC Adventure Guides. He is a certified ski mountaineering guide, a certified instructor with the American Avalanche Association, and a member of the Northwest Avalanche Center Forecast team.

Protection: The "Ins and Outs" of Sport and Trad Climbing Protection

By Ron Funderburke and Karsten Delap, AMGA Guides

types of climbing accidents

Along with a rope, protection is the most essential part of the climbing system. A bolt and quickdraw, a cam or nut—these are the things that keep climbers from taking dangerous ledge falls or hitting the ground. While not the most common cause of incidents reported in Accidents, failures of a lead climber’s protection system occur frequently.

In 2012, for example, Accidents recorded data on 11 incidents where protection pulling out was the immediate cause of an accident. Placing no protection or inadequate protection were contributory causes for 27 accidents. Similar numbers were reported in 2013. So the lead climber’s protection system, or lack thereof, is clearly worthy of consideration as climbers strive to be more skilled, more prudent, and less accident-prone.

While many climbs present rock features that cannot be adequately protected, the vast majority of failures of the protection system do not happen on such routes. As accident statistics continue to demonstrate, an error in judgment, a misunderstanding of protection systems, or lack of technical prowess are more often to blame when the protection system fails in some way.

In this installment of Know the Ropes, we will present perspectives and concepts designed to consolidate best practices in the implementation, evaluation, and reliance upon a lead climb- er’s protection. We will cover the two main genres of rock climb- ing: sport climbing and traditional climbing. 


SPORT CLIMBING

While sport climbing is not the most easily categorized genre in climbing, we will rely on this definition: On sport climbs the entire protection system involves bolts and quickdraws; all bolts adequately protect the lead climber from ground or ledge falls (except in cases of human error); and the anchor components are fixed and permanent.

Sport climbing was created to optimize physical and athletic difficulty by de-emphasizing equipment challenges. Since the lead climber does not need to evaluate the rock, place his or her own gear, or make choices about the frequency and position of those placements, how is that accidents still occur? What kinds of protection-related best practices could reduce the number of sport climbing accidents?

Clip Quickdraws Correctly

clipping second bolt; protecting ground fall; belaying

When a leader climbs up to a quickdraw and connects the climbing rope, there are two main variables: (1) where the leader’s body is positioned on the climb relative to the quickdraw, and (2) how the climbing rope interacts with the carabiner being clipped.

The first variable is easy to imagine. If the lead climber falls before he/she can successfully clip a quickdraw, the fall length will be shorter if the quickdraw is at the leader’s waist or chest level. If the lead climber reaches overhead to clip the rope into a quickdraw, extra slack will be needed, thereby increasing the fall length if the leader fails to make the clip. Often, doing one more move to reach a good hold will make for an easier clip and less rope to pull up. If this is imprudent or impracticable, the lead climber should be hyper-vigilant and careful when clipping overhead.

If the leader finds he or she can’t reach a good clipping hold or must clip from an out-of-balance stance, two temporary measures may be useful:

when sport climbing clip at your waist; clipping sport climbing

(1) Use a “stiff draw,” in which a stick or other stiffener is taped to the quickdraw so it can be grasped low on the draw, giving the leader a few extra inches for clipping out-of-reach bolts.

(2) Clip a quickdraw to a distant bolt and then extend it with one or two additional draws clipped to the first. This allows the leader to clip the rope without pulling up additional slack. For redpoint attempts, a longer draw or sling can be left in place.

In both of these cases, the leader should place a normal quickdraw on the bolt and clip the rope to it as soon as he or she reaches a better stance.

The second important variable in clipping is found in the simple connection between a climber’s rope and a bolt. Common errors include backclipping, gate interference, and carabiner leverage. To avoid all of these errors it is important to remember a few critical concepts.

First, the lead climber’s rope should always travel along the plane of the rock, enter a carabiner from the rock side of the carabiner, and connect to the climber on his/her side of the carabiner’s plane. If the rope is “backclipped” [ see photos below] it can unclip itself from the carabiner when the rope runs over the gate during a leader fall.

Second, a quickdraw should be clipped to a bolt so that the carabiner gates are oriented away from potential interference from rock features like knobs or other protrusions.

Third, to mitigate the risks of a carabiner coming unclipped from either the bolt or the rope, it’s important to assemble your quickdraws so that both carabiner gates are oriented in same direction. The quickdraw always should be clipped to a bolt so that the gates of the carabiners are oriented in the opposite direction from the leader’s anticipated direction of travel. This helps to prevent the rope from rubbing over the gate or pressing against the carabiner’s gate in the event of a fall, potentially unclipping. This also helps prevent the lead climber’s motion and the corresponding rope action from levering the carabiner gate against the bolt hanger, possibly causing it to unclip [see photos below].

Here’s an example: If a climber is ascending a corner and all the bolts are on the left wall, which way should the gates on the quickdraws face? Answer: All the gates should face to the left, away from the climber.

Be cognizant of the different ways the lead climber’s rope and body movements can jostle and alter a carabiner’s position. In the case of a bolt, for example, a quick upward movement can cause a carabiner to load horizontally, backclip from the bolt, or be levered by the bolt hanger. Take a quick look at the draw after you move past it to make sure you didn’t move it into a dangerous position.

back clipping; how not to back-clip

If a route causes unusual concern about quickdraws unclipping, assemble a quickdraw with one or two small locking carabiners. Some climbers like to use a quickdraw with locking carabiners on the first bolt of every sport climb—or the first bolt above a ledge.

Finally, even though most sport routes are intended to be climbed without supplemental protection, in some cases placing an additional piece can prevent dangerous run-outs—or simply ease the mind. Check the guidebook for gear recommendations—does it suggest a particular nut or cam? 

how to clip; rock climbing; sport climbing

Use Reliable Bolts

Bolts can fail for a number of reasons. Maybe they were placed improperly, they could be past their useful life, the rock around them could be compromised, or they could be corroded. While it is tempting to regard bolts as “bomber” protection, all climbers should consider the blind faith they place in these critical links.

Since the developer of a given route is usually not on hand to ask directly, how should lead climbers evaluate a bolt’s integrity? There are three main clues: corrosion, the rigidity of the bolt stud, and the tightness of the hanger.

Many bolts were not designed to be used in an outdoor setting, and extensive visible corrosion should be an immediate warning for a lead climber. Bolts also may be corroded inside the rock with no visible damage. Corrosion is especially common in marine settings (like seaside cliffs), wet or humid venues, or bolts placed in consistent seeps or drainages; climbers should be particularly vigilant in these environments.

If the bolt stud moves up and down, pulls in or out, or if it has visibly damaged the surrounding rock, due to leverage, there is clearly a problem. A quick outward pull on the hanger will usually reveal these weaknesses.

Spinning hangers can be a sign that something is not quite right with the bolt. It is possible a hanger is spinning because the bolt stud has pulled out of the rock slightly. Or a hanger might be spinning because the nut that is supposed to be pinning it against the rock has loosened. In either case, a quick test of the bolt stud, with an outward and side-to-side pull, will suggest whether there is a real hazard. Nuts that have simply loosened from continuous use should be tightened; a slight turn of a wrench should do the trick—the nut should be snug but not over-tightened.

If you suspect a bad protection or anchor bolt, never rely on that bolt alone. Back it up, if possible, or downclimb to better protection before retreating. (Leave a carabiner/quickdraw on a good bolt and lower to the ground.) If you spot a bad bolt and don’t have the tools or expertise to fix it yourself, let the local community know with a note or online post. 

testing bolts; checking bolts for damage

Avoid Worn Or Defective Carabiners

Through repeated use, carabiners eventually become worn and grooved. Deeper grooves create sharper edges, and particularly sharp edges can knife the sheath off a climbing rope or sever it altogether. Similarly, repeatedly clipping an aluminum carabiner to a steel bolt or cable can cause burrs, abrasions, and rough teeth on the carabiner’s otherwise smooth surface. Much like any serrated material, these burrs can seriously damage a climbing rope.

With the increasing popularity of pre-hung draws on sport climbing projects (this includes chain, cable, and nylon quickdraws), more ropes are being cut by carabiners that have been worn and have sharp edges. For example, in 2010, in the Red River Gorge, a leader clipped his rope into a quickdraw that had been left earlier on the first bolt of a difficult route. When the leader fell before the second bolt, his rope severed on the badly worn carabiner in the fixed draw and he hit the ground, suffering head injuries.While technology continues to make carabiners lighter, this can also cause them to wear faster.

when to retire carabiner; inspect carabiner for damage; sharp carabiner

Ideally, every carabiner in the protection system should be carefully inspected before use, though this is not always practical (especially when attempting onsights). Yet some climbers still blindly head up every route assuming the fixed gear is in good condition. While the send is important, it is not as important as making sure the equipment is in good shape. 

It is advisable for lead climbers to always hang their own quickdraw on the first bolt of a sport climb equipped with “perma-draws.” The angle between the first quickdraw and the belayer tends to sharpen the carabiner on a permanent quickdraw here much faster than the carabiners higher on the route. If the first bolt is left empty as a standard practice, much of the deep grooving caused by the rope can be avoided, or at least concentrated on the leader’s personal quickdraws. This also makes for easier stick-clipping.

Additionally, any fixed nylon quickdraws should be considered suspect unless you know their history. Damage from UV radiation can degrade nylon and cause the dogbone on a quickdraw to fail.

Burrs and grooves on carabiners are not only problematic with fixed draws but with your personal quickdraws as well. For example, bolts can cause abrasions in the carabiner’s aluminum frame that can shred a climbing rope. To reduce this risk, dedicate one carabiner on each draw to clipping the bolt and one to clipping the rope. 

how to inspect carabiners; when to retire carabiners

Avoid Unnecessary Risks

Stick-clipping the first or even the second bolt of a route is a great way to prevent a ground fall. If the first bolt is 15 feet off the ground, the next bolt should be no more than 5 feet higher if it is going to protect a leader from ground fall, given rope stretch and displacement of the belayer as he or she catches the fall. But many sport routes do not adequately protect a leader from ground fall in the first 20 feet. If they haven’t stick-clipped, lead climbers then have to make a personal choice about whether to proceed. Too often, climbers rely entirely on their own ability to get them out of trouble. When a hold breaks or moves prove to be harder than predicted, it is too late to make an informed decision.

Sometimes, when the main difficulties of a sport climb have passed, lead climbers will confidently saunter into ground-fall or ledge-fall terrain, eschewing protection along the way. Skipping bolts and taking victory whippers are two common examples of unnecessary risks. 

avoiding risk lead climbing; safely lead climbing; how to lead climb

TRADITIONAL CLIMBING

Every protection failure that can occur in sport climbing can also occur in traditional climbing. A climber should be just as concerned about faulty equipment, clipping hazards, fixed hardware, and making informed choices in a traditional environment as at a sport crag. Moreover, traditional climbing involves vastly more variables, decision-making, and risk management. Creating and managing the protection system in traditional climbing takes expertise, craft, and artistry. Sadly, failures of the protection system usually result from human error.

In this section, we will discuss some important factors in creating a reliable protection system. We will discuss the placement decisions that result from an understanding of rock quality. Lastly, we will discuss fixed gear and route selection.

Protecting The Pitch

trad climbing

Protecting the pitch is a term that is thrown around a lot, but what a climber is actually doing is creating an integrated protection system. For example, most climbers understand that the terrain before the first piece of protection has an unavoidable ground-fall consequence. From the first piece on upward, the lead climber is creating an integrated protection system that is supposed to mitigate the risk of ground fall, ledge impact, or other incidental impacts (hitting a slab, swinging into a corner, etc.). Unfortunately, lead climbers often climb into ground-fall terrain again before placing their second piece, or fail to protect sections altogether if the climbing feels fairly easy.

As in sport climbing, if you place a piece of gear 12 feet off the ground, your next piece must be no more than 4 feet above this to avoid a potential ground fall. (This is also true of any protruding terrain features like ledges.) Once you are well above the ground you can start to space gear farther apart, but it is prudent to always have a couple of pieces keeping you off the ground in case one fails. (If you find yourself with less than optimal protection, doubling up a placement is a good way to work some redundancy into the system.) In general, climbers should consider the consequences of going more than 10 feet between protection placements—falls of 20 feet or more may easily generate the kinds of forces that can seriously injure a climber, especially on less-than-vertical terrain.

Special consideration must be given to the first piece of gear. It should be able to hold an upward force as well as downward force to prevent zippering. Zippering is when multiple pieces of protection pull out as the rope impacts them in a fall— protection may zipper downward or upward. Depending on the angle between the belayer and the first piece, upward force may be generated when a fall happens and the first piece can be yanked up and out. In some cases, the subsequent pieces may fail in succession due to a similar angle in the rope. [See photos above.] In severe cases, it is possible that the only piece left would be the one that the climber fell onto, thereby reducing the entire protection system to a single piece of protection. Thankfully, most modern cams are designed for multidirectional pulls. They make excellent choices for the leader’s first piece. 

trad climbing; first piece on trad climb

Placing Protection

It would be impossible in an article of this length to fully discuss the placement of removable protection. Suffice to say, all removable protection generally relies on the same principles. When protection fails, it is almost always because one or more of those principles was ignored, overlooked, or misinterpreted. Removable protection requires sound rock quality (discussed later), security and stability, optimal surface contact between the piece and the rock, and an orientation that anticipates the loads that will be applied to it. Trad climbing is full of delightful trickery, but efficient leaders recognize that square pegs pretty much go in square holes.

Orientation: Cams, nuts, tricams, and hexes should all be placed in ways that anticipate the loads that will be applied to them. Nuts should be placed in constrictions in the rock that point downward. Cam stems should point toward the fall line. Hexes and tricams should lever along the fall line. Make no mistake, a lead fall will load the top piece of a protection system along the fall line, so it should be placed accordingly. 

placing trad gear; how to place cams; how to place nuts

Security and Stability: Once a piece of protection is placed, a variety of forces interact with that placement. Some of those forces can alter the orientation and quality of the placement. The rope, drawing through a carabiner, can swing a placement back and forth. In the case of cams, this side-to-side action can cause cams to “walk” out of their optimal placement. If the swinging motion of the rope creates an outward pull on nuts, hexes, or tricams, they can be lifted out of their constrictions. Managing the path the rope follows is essential if cam and nut placements are to be secure. An appropriate length of extension (usually a long quickdraw or standard 24-inch or 48-inch nylon/dyneema sling) usually can mitigate this problem, because rope action tends to interact directly with the sling, instead of the placement. Another common tactic with nuts, hexes, and tricams is to give a light tug on the placement, thereby mashing the aluminum unit into the rock slightly. (Tugging too hard can make the unit difficult to remove, however.) Lastly, try to place cams in parallel features where you don’t anticipate they can walk.

Square Pegs in Square Holes: It is vital, in terms of efficiency and effectiveness, to place protection in the most obvious ways, in order to optimize the amount of surface contact between the unit and the rock, to make timely choices and placements, and to get the most potential holding power and security. For example, all trad leaders should think of placing a cam when they attempt to protect a parallel feature in the rock. They should think of placing a nut or hex when they see a constriction, and they should think of placing a tricam in oddly shaped pods, pockets, or flares. Cams should be placed within their camming range. Nuts and hexes should have surface contact on all sides of the unit. Tricams should be placed and set within their rotational range. Clearly, there are ways to make any trad piece work in almost any placement, given enough inventiveness. But, when trad leaders resort to putting square pegs in round holes, it should be for unique and demanding reasons, and there should be an understanding of the risks and time cost of these choices. Trad trickery can be an incredible waste of time—and dangerous—if it is indulged too whimsically. It should be needless to say that if gear is so tattered by use and abuse that one can no longer tell if the pegs are round or square, the gear should be retired. When cam slings become visibly damaged or decomposed, they should be replaced. (A professionally sewn replacement sling is an option.) Similarly, frayed trigger wires, nut cables, and hex cables should be replaced with appropriately strong cord or webbing. 

how to place trad gear; loading trad gear


Fixed Gear

Many traditional climbs are replete with abandoned nuts and cams, pitons, and aid climbing gear such as copperheads. These can be efficient to clip, but there can be great hazard in using them as well. Leaders always should be suspicious of fixed gear. Some fixed protection can be visually inspected, but, as with bolts, the key components of fixed gear may be obscured or buried. Imagine the wire on a nut that has rusted completely through, a sling that is mostly cut, the axle of the cam that is broken, or a piton that has completely decomposed or destroyed the rock around it. It is wise to back up fixed gear whenever possible.

Pitons are a remnant of the past in most rock climbing venues but are still placed infrequently in the alpine arena. Pins should be considered no good unless they can be tested with a hammer, which most free climbers don’t carry. Pins can degrade behind the surface but still present a good-looking piece. Any corrosion on the pin can be an indication of corrosion deeper in the placement. Is the piton eye bent or cracked? Is there is any movement up and down? Does it wiggle side to side? Back up pins whenever possible. 

rock climbing on fixed gear; inspecting fixed gear; pitons


Managing The Rope Line

Unlike sport climbs, protection for traditional climbs may be placed along a wandering crack or other line of weakness, a traverse, a series of overhangs, or other variable features. As a result, keeping the rope running in a straight line is often an intricate challenge. A traditional lead climber should understand that excessive rope drag not only encumbers the leader’s movement, it also decreases the dynamic properties of the protection system, thereby increasing potential impact forces on the protection and the lead climber.

A simple assortment of quickdraws will not suffice. Instead, lead climbers must use a variety of tactics to keep the rope running as straight as possible: placing slings of various lengths; possibly climbing with more than one lead rope; and sometimes downclimbing to remove lower protection once a good piece is placed higher up.

A lead climber should also understand that every sling or extension comes with a consequence: If the distance between the protection point and the attachment of the rope increases, the fall distance increases too. Prudent leaders learn to extend only when necessary to straighten the rope line—and only as far as necessary. 

how to prevent rope drag; extending your trad placements

Rock Quality

Evaluating the rock is at least as important as knowing how to place gear in it. Often, lead climbers are simply trying to get up a pitch and don’t always use all of their senses. Take a look at the rock, first at the big picture and then narrowing to the micro setting. Is this a solid crack or a flake of rock sitting on top of another rock? Can you see debris, ice, or vegetation inside the rock? Look at everything.

Next, how does the rock sound? Using a larger cam or nut to bang around the rock can help determine if a rock is loose, hollow, or perfectly solid. (An open palm or door-knocking motion also works.) The rock provides valuable clues about the viability of a placement. Is it loose? Crumbly? Slimy? Icy or wet? Try to use as many senses as possible to create a complete portrait. 

When a leader must resort to placing gear in less than ideal rock, passive gear may create less prying forces on the rock than cams will; passive placements also may be more secure in flakes or jumbled boulders. Look around for other options. A solid placement off to the side of the route—with appropriate extension—may offer better protection than a placement in poor rock directly on the line. In softer rock (desert sandstone, for example), the leader should place pieces closer together to minimize fall forces. Double up on smaller pieces to decrease the odds of a catastrophic failure. 

evaluating rock quality; avoid loose rock when trad climbing

Route Selection

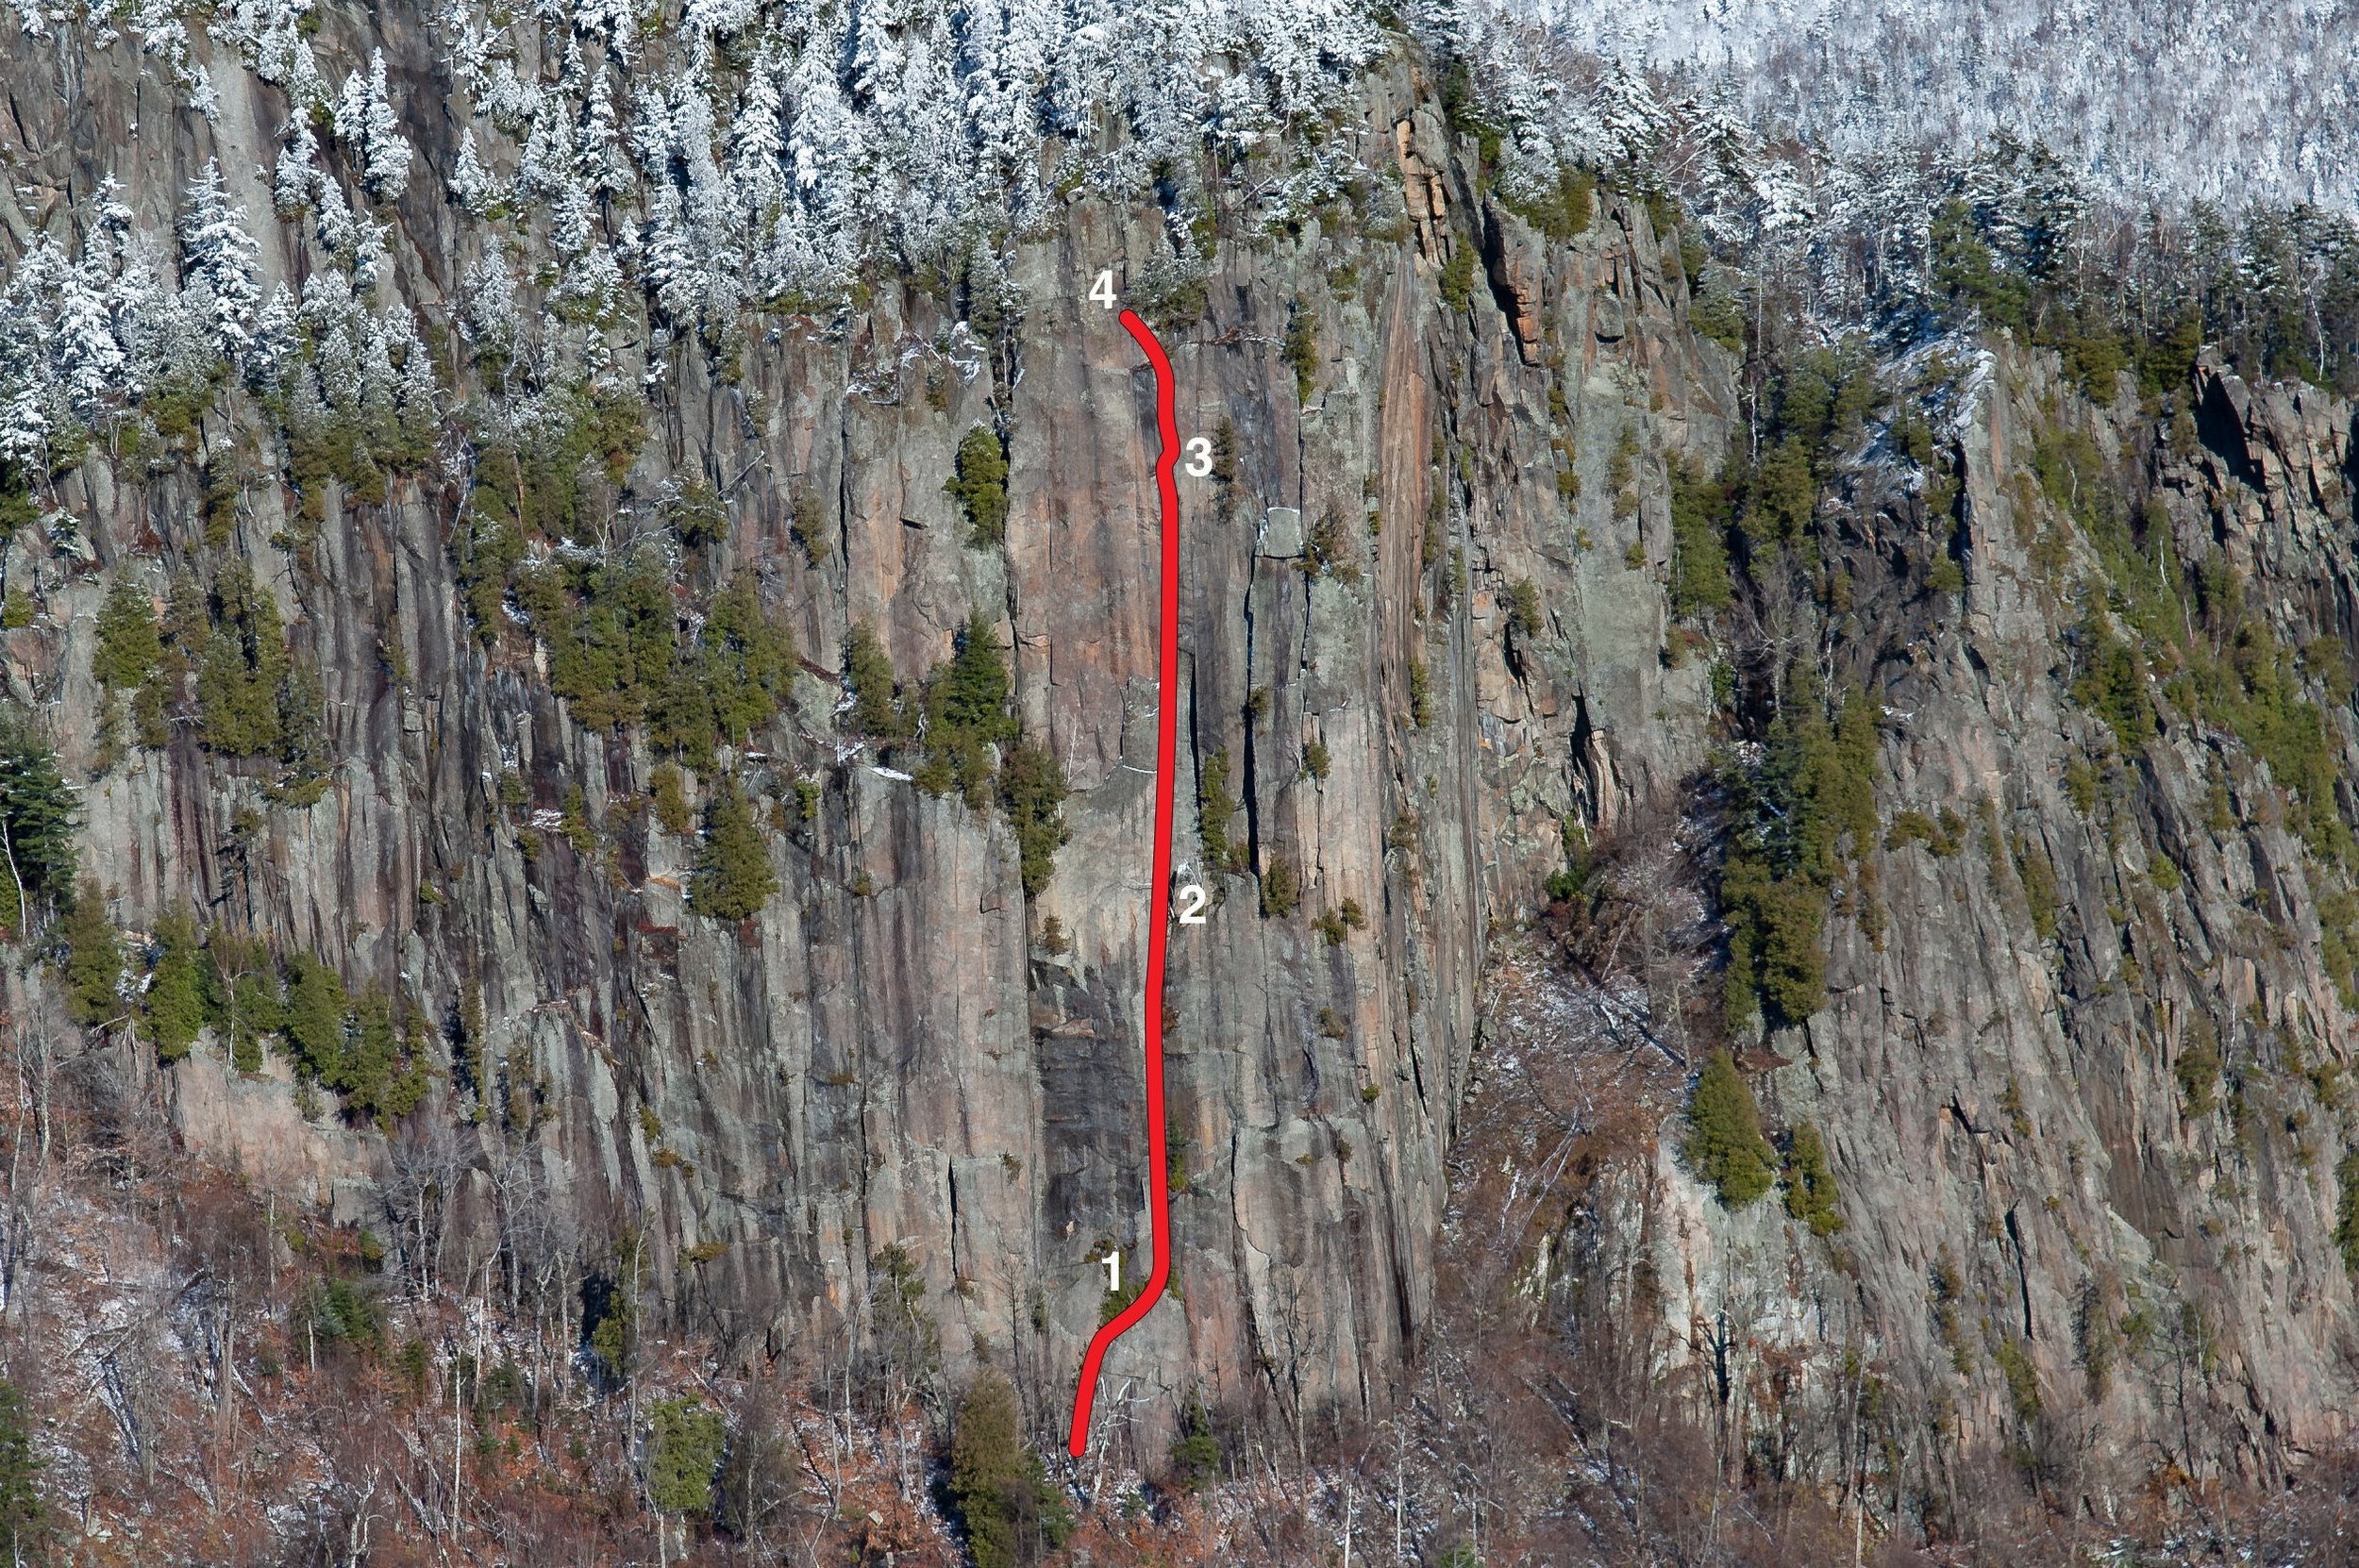
When we head out to the crag we should pick routes within our climbing ability, risk tolerance, and technical ability. For example, take the Original Route on Whitesides Mountain, North Carolina, which is rated 5.11a or 5.9 A0. If you are a 5.12 climber but are uncomfortable with long runouts or multi-pitch climbing, this may not be a good route for you. Any of the pitches could be considered “R-rated,” and the first pitch, while only 5.7 slab, is mostly a free solo. However, if you are a solid 5.10 leader with extensive traditional climbing experience, and these pitches are within your risk tolerance, this can be a very manageable route.

To develop your skills as a leader, work up through styles and difficulties of routes to gain situational awareness. Reading topos and getting info from guidebooks and online resources also will help you pick an appropriate adventure and start the risk management process. 

route selection; picking a rock climb; how to choose a rock climb

PUTTING IT ALL TOGETHER

If there is a theme that unites all of the strategies in this article, it is simply that informed decision-making is a huge part of safer climbing. Before a lead climber makes any move, there should be an understanding of the stakes of that move. What happens if a hold breaks? Where is my next protection? Given my strength and skill, what is the likelihood that I will make this move without falling? Stress, fatigue, social and performance pressures, and blind faith all are distracting, and these circumstances inhibit sound decision-making in any sport. But in climbing the consequences can be especially severe. While risk in climbing is inevitable, understanding and following the practices we’ve addressed in this article will mitigate that risk and prevent many accidents.


About The Authors:

Ron Funderburke is an AMGA-certified Rock Guide and the Discipline Coordinator of the AMGA SPI (single-pitch instructor) program. He lives in Mills River, North Carolina, with his wife, Mary, and sons Burke and James.

Karsten Delap is an AMGA-certified Rock and Alpine Guide and co-owner of Fox Mountain Guides and Climbing School. He lives in Brevard, North Carolina, and guides rock and alpine routes throughout the United States. 

Lowering

By Mike Poborsky, UIAGM/IFMGA

Graphics By Rick Weber

This article was originally printed in the 2013 edition of Accidents in North American Climbing.

Lowering a climbing partner is among the most common situations leading to injuries and rescues reported in Accidents in North American Mountaineering, whether it’s lowering a climber after she tops out on a sport route or a partner in difficulty on a multi-pitch climb. In this year’s (2013) Know the Ropes section, we will look at common causes of accidents related to lowering, and provide some best practices for preventing them.

lowering; rock climbing

Why is it so important to have a good understanding of lowering skills and techniques? Think about how often we lower a climbing partner. We all do it frequently in single-pitch climbing, whether top-roping, gym climbing, or lowering the leader after he finishes a sport, ice, or traditional route. We tend to emphasize the belaying aspect of these activities, when in fact data shows there is substantial risk of an accident occurring during the lowering phase. Think about it in these terms: If all goes well during the climb, we don’t even use the safety systems in place. They are simply there “just in case” the climber falls. Once the lowering process starts, however, every component in the system engages and is critical to the safety of the climber. Then, of course, there are unlimited scenarios in multi-pitch climbing—whether rock, alpine, or ice—where lowering can be an effective tool to increase the speed of the party or to help a frightened or incapacitated partner.

Based on the incidents reported in Accidents over the past decade, the four most common causes of lowering accidents are: a rope that’s too short, miscommunication, an inadequate belay, and anchor failure. We’ll look at each of these issues and provide basic and advanced skills and techniques to address some of these common problems. Regardless of whether we are lowering from below or above, or are in single or multi-pitch terrain, many of the same skills and techniques are required.

Rope Too Short

More than half of all lowering accidents reported in Accidents in the past decade occurred when the rope end shot through a belay device and the climber fell uncontrollably. It is very easy to misjudge the length of your rope and/or the height of the anchor in vertical terrain. However, most of these unfortunate accidents could have been prevented simply by closing the system. This will make it impossible for the rope to unintentionally pass through the belay device.

FIGURE 1: The triple overhand knot is an excellent stopper knot for the end of a belay rope or rappel ropes.

In a typical single-pitch climbing scenario, where the pitch length is less than half the available rope, the ground closes the system by default, meaning your partner is going to make it back to the ground before the belayer gets to the end of the rope, so closing the system is unnecessary. The problem comes when the anchor is near or above the midpoint of the typical rope. This is increasingly common as new routes are established with anchors above 30 meters (half the typical modern rope length). For some climbs, a 70-meter rope is now mandatory to lower safely. Before trying an unfamiliar single-pitch route, read the guidebook carefully, ask nearby climbers, and/or research the climb online to be sure it doesn’t require a 70-meter rope to descend safely. When in doubt, bring a longer rope or trail a second rope.

Another scenario frequently leading to single-pitch lowering accidents is a climb where the difficulties begin after scrambling five or ten feet to a high starting ledge. The anchors at the top of such routes may be set in such a way that there is plenty of rope to lower the climber back to the ledge, but not all the way to the ground. Or the belayer may need to be positioned on the starting ledge in order to have enough rope to lower the climber safely. Again, do your homework, ask other climbers, and always watch the end of the rope as you’re lowering a partner.

If there is any doubt about the length of the rope being adequate to lower a climber safely, tie a bulky stopper knot in the free end so it cannot slip through the belay device. (The triple overhand knot is a good choice; see Figure 1.) Better yet, the belayer can tie into the free end, thus closing the system.

As you belay a lead climber on a long pitch, keep a close eye out for the middle mark so you’re aware of whether there is enough rope to lower the climber. Once the middle of the rope passes through your belay device, you and the climber need to be on high alert. Rope stretch may provide a little extra room for the climber to be safely lowered to the ground, but in such cases the system should always be closed as discussed above. When in doubt, the climber should call for another rope and rappel with two ropes.

As the climber lowers, it’s natural to keep an eye on her, but as the belayer you should also be watching the pile of free rope on the ground. Once there is less than 10 or 15 feet remaining, make a contingency plan for safely completing the lower. For example, will the climber have to stop on a ledge and downclimb? Will you need to move closer to the start of the route? Never let the last bit of rope slip through the device if the climber is still lowering, even if she is only a foot or two off the ground—the sudden release of tension can lead to a free fall and tumble.

When lowering in the multi-pitch environment, the belay system must be consciously closed by having the non-load end of the rope tied to the belayer, the anchor, or something else to prevent it from passing through the belay device. In a multi-pitch rappelling scenario we close the system by knotting the ends of the rappel ropes, making it impossible to rappel off the ends.

Miscommunication

The three key problems with communication between climber and belayer are 1) environmental, 2) unclear understanding of command language, and 3) unclear understanding of the intentions of the belayer and climber.

Environmental problems include the climber and belayer being unable to see each other because of the configuration of the route and/or the distance between the two; weather conditions such as wind, snow, or rain; and extraneous noises, such as a river, traffic, or other climbers shouting commands or chatting nearby.

In popular climbing areas with many parties on routes near each other, climbers sometimes mistake a command from a nearby party as coming from their partner. It’s always a good practice to use each other’s names with key commands: “Off belay, Fred!” or “Take, Jane!” When one climber is at the top of a single-pitch climb and rigging the anchor for a lower-off, top-rope, or rappel, it can sometimes be helpful for the belayer to step back temporarily so he can see his partner at the anchor and improve communication. When the climber is ready to lower, the belayer can move back to the base of the climb to be ideally positioned for the lower.

Especially with a new or unfamiliar partner, it’s essential to agree on the terms you’ll be using to communicate when one climber reaches the anchor. What do you mean by “take” or “off” or “got me?” Avoid vague language like “I’m good” or “OK.” Agree on simple, clear terms and use them consistently. One common misunderstanding seems to be the result of the similar sounds of “slack” and “take.” When top-roping, consider using the traditional term “up rope” instead of “take” for more tension in the rope, as the former won’t be confused with “slack.”

Before starting up any single-pitch climb, it’s critical that belayer and climber each understand what the other person will do when the climber reaches the anchor: Will the climber lower off, and if so what language will she use to communicate with the belayer? Or, will she clip directly to the anchor, go off belay, and rappel down the route? Many accidents have resulted when the belayer assumed the climber was going to rappel instead of lower, or the belayer forgot that the climber planned to lower, or he misunderstood a command (“off” or “safe” or “I’m in direct”) as an intention to rappel. Before taking the climber off belay, the belayer must be certain that this is the climber’s intention. If you have agreed that the climber will rappel, wait for the climber to yell “off belay,” and then respond “belay off,” and only then remove the rope from your device.

When you reach the anchor at the top of a climb, don’t just clip in, shout “take,” and lean back. Make sure to hear a response from the belayer indicating that he has you on belay and is ready to lower. If you can’t see the belayer, sometimes it is possible to extend your anchor connection or lower yourself a little, holding onto the “up” rope, until you can get into position to make visual contact with the belayer and assure you’re still on belay.

A consideration when lowering someone from above is that the belayer and climber become farther apart during the lowering process, and this may compromise communication. To mitigate this potential problem, I like to position myself where I can see, and hopefully hear, the climber being lowered from start to finish. In some terrain this requires extending the anchor’s master point.

Belay System Errors

A common cause of lowering accidents is belayer errors, especially when the belayer is inexperienced, inattentive, or unfamiliar with the operation of a particular type of device. Make sure your belayer—or any belayer you observe— knows what he’s doing and pays attention until his climber is safely back on the ground or at an anchor. Don’t accept or ignore shoddy belaying!

On single-pitch routes, two things that may cause problems are belayers positioned too far back from the base of the climb—and thus getting pulled off balance and possibly losing control when the climber weights the rope—as well as using an unfamiliar device. Switching between tube-style devices, such as an ATC, and assisted-braking devices like the Grigri can cause inexperienced belayers to mishandle the device. Beware of loaning your device to a belayer unless you are confident that he is well-trained in its use.

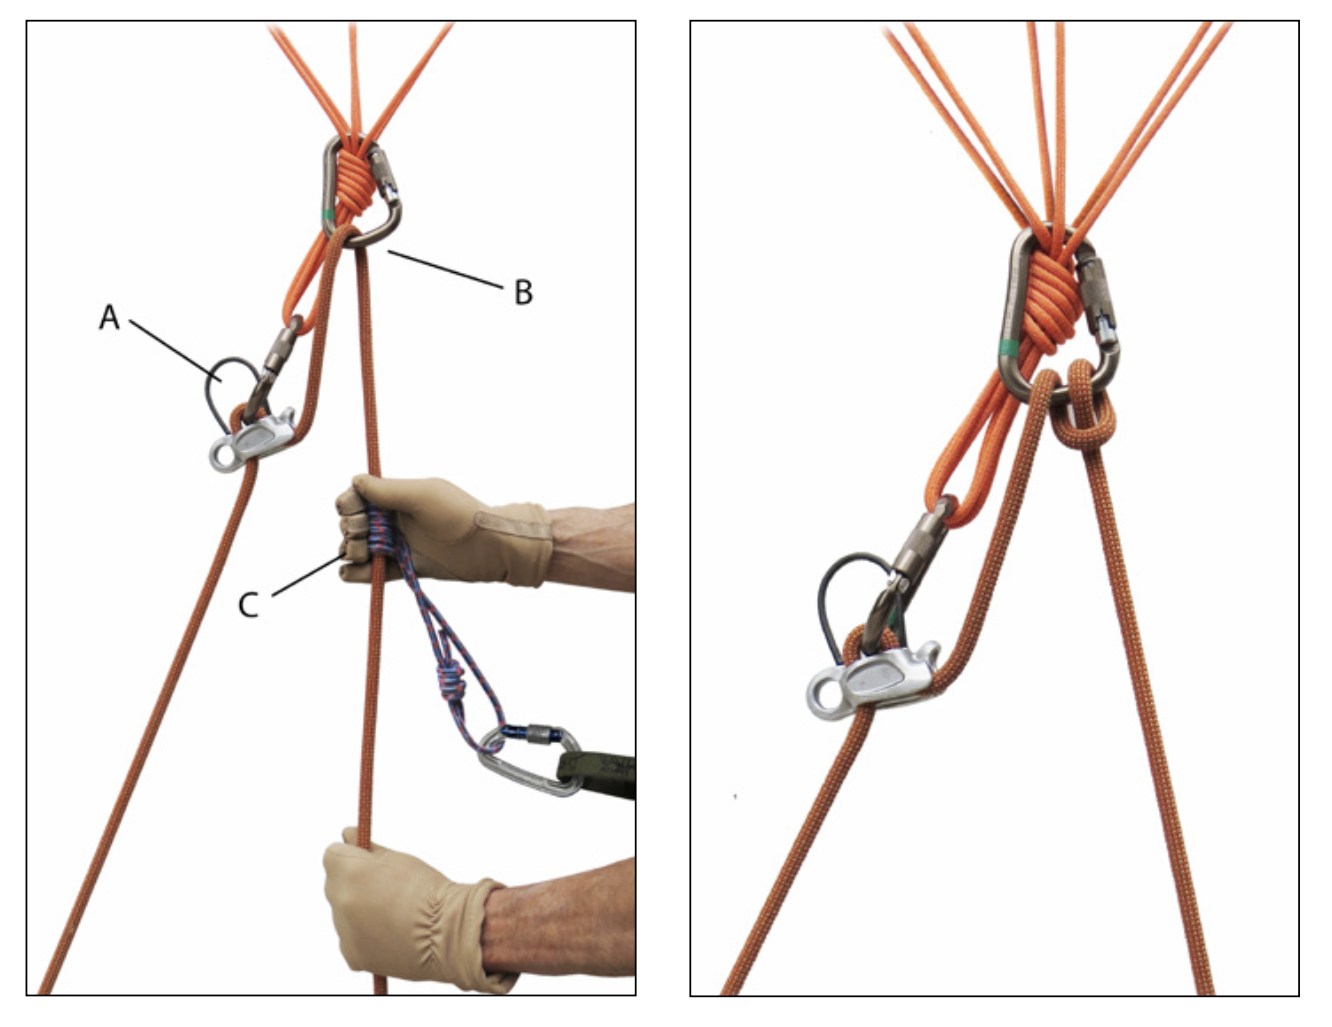
What is the appropriate lowering brake for lowering your partner? It’s one that provides adequate friction to control their descent over very specific terrain. In some alpine terrain situations, the redirected hip belay may be totally sufficient for a short, moderate-angle step with high friction. Conversely, lowering directly off an equalized multi-point anchor with a backup may be required in steeper terrain (see Figure 2).

FIGURE 2: Lowering a partner from above with a redirect and backup. A) Belay/ rappel device with locking carabiner clipped to master point. B) Redirect through carabiner clipped to anchor. C) Prusik knot clipped to belay loop as backup—useful for heavier partners or wet or icy ropes.

FIGURE 3: Increasing friction for a lower with a thin-diameter or wet or icy rope, using a Munter hitch on a locking carabiner clipped to the anchor above the belay/rappel device.

In some cases, the most important belay issue may be anchoring the belayer against a violent upward pull in the event of a leader fall or a falling or lowering top-rope climber who is much heavier. In this situation I like to be tied directly into the climbing rope and use a clove hitch to attach myself to a bottom anchor. This way the length is adjustable so I can be exactly where I want with no slack in the system, and the rope provides shock adsorption if the system becomes loaded.

Most people tend to underestimate how much friction is needed to lower their partner in a safe and controlled manner. How do we gain the experience required to be safe? Through time and practice in varied terrain. Be conservative at first and anchor the belayer, increase friction, use a backup—or all three—until the belayer has confidence in judging how much friction is needed. It’s easy to back up a new climber’s belay by holding the brake strand a couple of feet beyond the belayer and feeding the necessary slack. This allows you to closely monitor the belay and provide additional braking if the climber starts going too fast or the belayer starts losing control.

Do you have experience lowering with wet or icy ropes? Do you have experience lowering with modern small-diameter ropes? If not, then I would recommend increasing friction when lowering someone from above (see Figure 3), as well as backing up the lower with a prusik, until you gain adequate experience. Bottom line: If the consequence of losing control of the brake strand is bad, add friction and back it up.

Prior to committing to any lower, consider some “what ifs.” For example, what if something happens when I’m lowering my partner and I need to be mobile? How easy is it for me to escape the system? What if I need to transfer this lower to a raise? Does this system allow me to make this transition easily?

Anchoring Issues

There is much to consider when constructing an anchor, but the bottom line is that it absolutely must not fail, period. (The Know the Ropes article in the 2012 Accidents is a great reference on constructing anchors.) What are some of my concerns when choosing a possible anchor? 1) Will I be using this anchor for climbing and lowering or rappelling? 2) With the resources available, can I construct an adequate anchor in a given spot? 3) How will the rope run once lowering starts? 4) Will the belayer and climber being lowered have visual and/ or audio communication for the duration of the lower?

The ERNEST anchoring technique

I have long used the ERNEST acronym as guidance when constructing an anchor. E = Are all pieces in the anchor equalized and sharing the load? R= Is there redundancy in the anchor, meaning that if one piece fails other pieces will take the load? NE= If one piece does fail and the other pieces take the load, will this be done with no extension or shock loading of the remaining anchor? S= Is the anchor material (tree, rock, ice) and/or protection solid and strong? T= Can this anchor be constructed in a timely manner? Just remember, ERNEST should be used as guidance, not a checklist—adjust as necessary. Once an anchor has been established, we must decide how to connect the rope to the anchor.

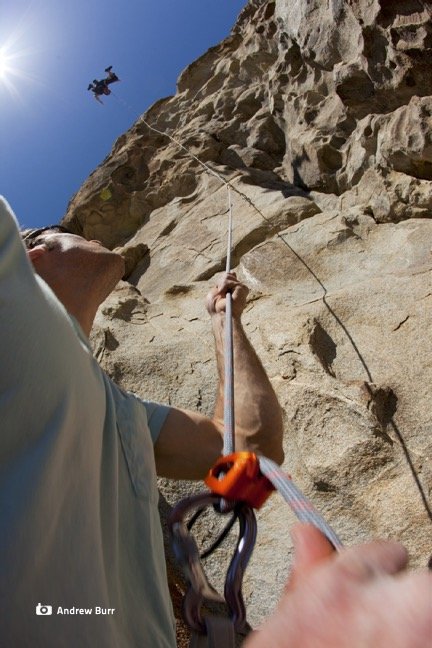
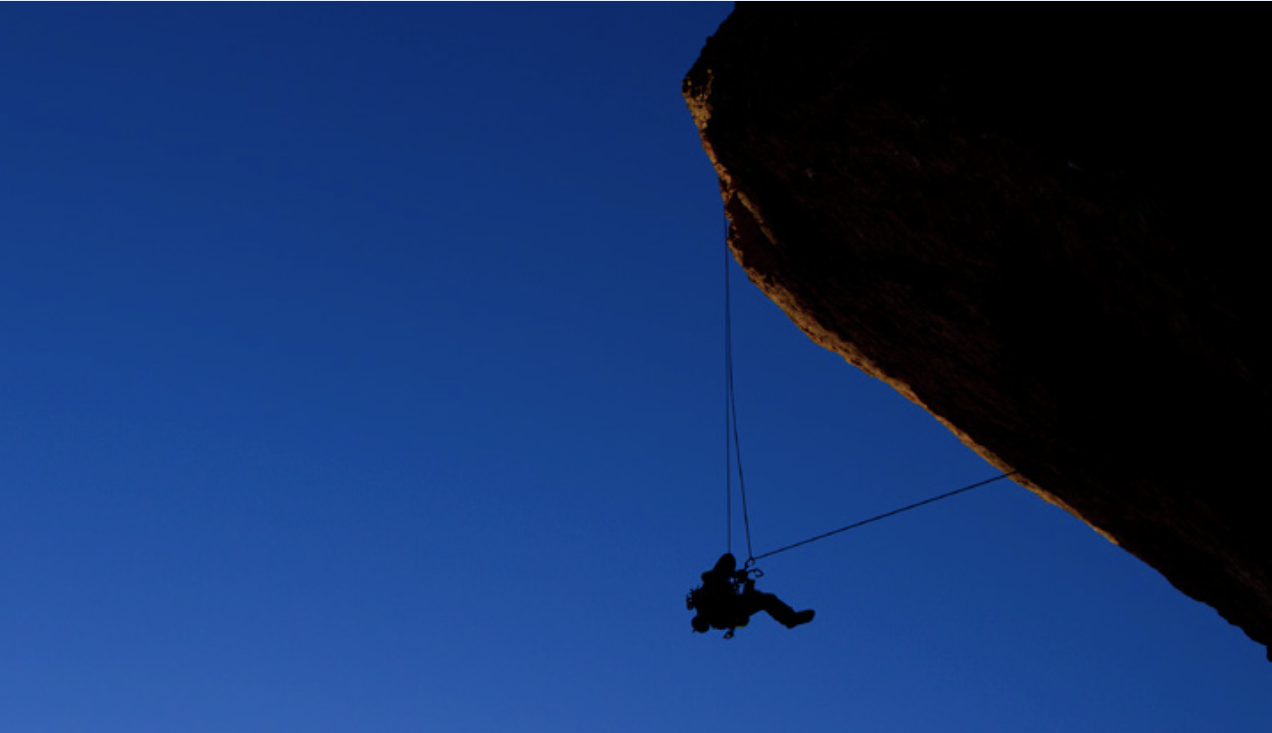
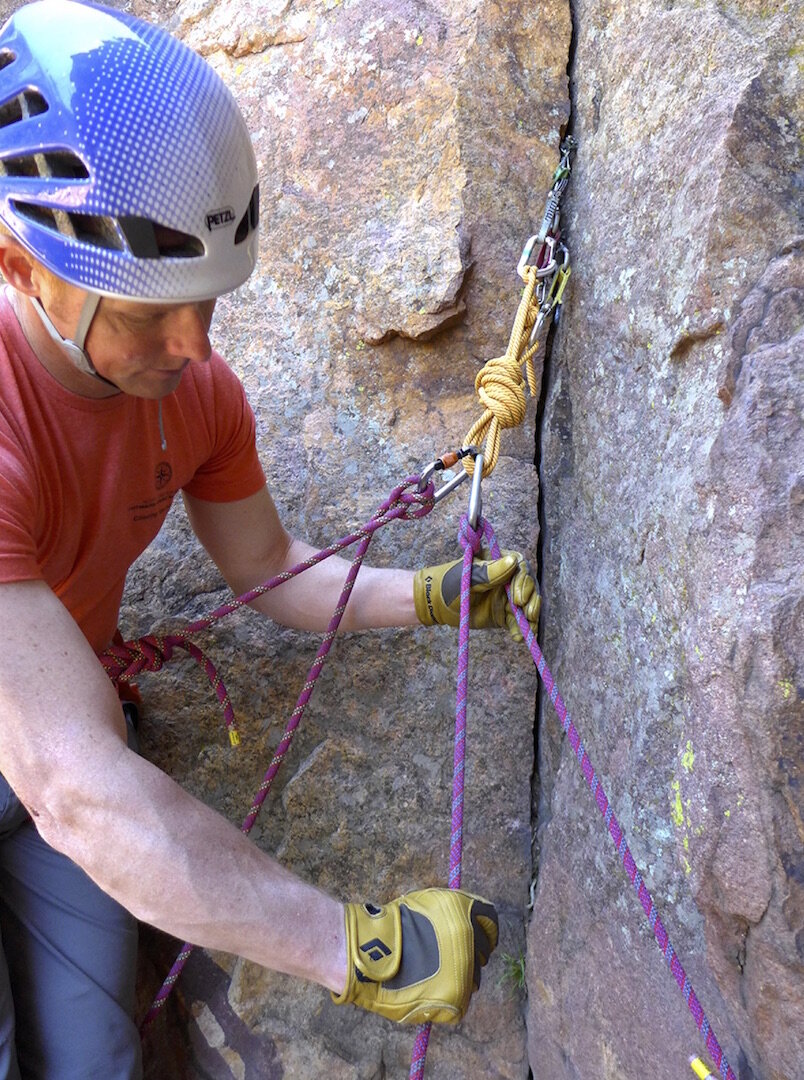
Sometimes a route may be too overhanging or traverse too much to clean by rappel. In such cases, it may be necessary to clip into the belay rope while lowering (a.k.a. “tram in”) to stay close to the wall and remove each piece. Be sure to communicate each step clearly with your belayer, and never unclip from the belay rope when you are away from the wall (as shown here), because you will plunge straight downward when the tension is released, possibly hitting the ground. Instead, only unclip from the belay rope when you’re clipped into a bolt or the belay rope is taut against the cliff face. Make sure to do this in a place where you won’t hit a tree or the ground when you swing off. PC: Andrew Burr

All top-roping should always be done through the climber’s removable gear, such as carabiners attached to quickdraws, runners, or a cordelette, and not through the fixed hardware of an existing anchor system. The fixed anchors should only be used for rappelling, where the ropes will be pulled without load. A dirty rope running through the anchor system under load causes unnecessary wear at fixed anchors. In fact, at some sandstone climbing destinations where sand easily works into the weave of the rope, locals are reporting 50 percent wear of steel quick- links in a couple of climbing seasons. So whether you are top-roping or topping out on a sport climb, be responsible and climb or lower on your own removable gear. Whenever possible, the last person to climb should rappel rather than lower off once he is finished with the route.

Before leading a sport climb, decide what extra gear will be needed for the anchor. To set up for lowering and top-roping, I like to carry two quickdraws designated for the anchor, one of them equipped with two locking carabiners. Before following a sport climb, decide what extra gear will be necessary to clean the top anchor. I girth-hitch two 24-inch nylon slings to my harness and add two locking carabiners. When I get to the anchor, I clip a locking carabiner to each rappel ring. Now I can thread the rope through the fixed anchor and rappel. There are a variety of techniques for accomplishing this. Regardless of the one you learn, I recommend practicing while on the ground and using the same system every time you clean the anchor.

One subtle but very important difference between rappelling and lowering is that in rappelling the rappel device is moving over a stationary rope, because the person rappelling is simply sliding down the rope. In lowering, the rope is the object in motion and is moving through a stationary belay device. This means the rope is moving over terrain that may have loose rock and/or sharp edges. In general a taut rope over a sharp edge is not a good idea, and one that is moving over sharp edges is just asking for trouble. Before lowering, take extra care to position the rope so it avoids any edges or loose blocks. And, finally, never lower with the rope running directly through an anchor sling—the hot friction of nylon on nylon will quickly melt through the sling, with disastrous consequences.

Be Prepared!

As climbers we all need to take ownership in the ability to problem-solve and be self-sufficient at the crag and in the mountains. This starts by critically thinking about what gear we carry on a given objective. For example, I choose to use an assisted-braking device (such as the Petzl Grigri) for top-roping, sport routes, and gym climbing because of the added security and comfort for holding and lowering a climber. In the mountains and on traditionally protected climbs I use an auto-blocking device (such as the Black Diamond ATC Guide or Petzl Reverso) because it is lighter, much more multifunctional, and it allows the rope to slip a bit when catching a fall, helping to reduce impact forces. Another example: I use accessory cord to tie my chalk bag around my waist, so I always have a cord I can easily convert into a prusik if I need to back up a lower or rappel.

In addition to my harness, protection, quickdraws, and shoulder-length slings, here’s what I typically carry on most multi-pitch climbs, giving me the tools to deal with most situations that might arise:

  • Small knife or multi-tool

  • Auto-blocking belay/rappel device with 2 locking carabiners

  • 2–3 extra locking carabiners

  • 5–7mm* cord to tie on chalk bag, doubling as a prusik cord

  • 5–7mm*, 18-foot cordelette with a non-locking carabiner

  • Two 48” slings, each with a non-locking carabiner

  • 1 extra 5–7mm*, 18-foot cordelette with rappel rings (for multi-pitch

    alpine routes)

  • 24” nylon sling for racking gear

    * As a general rule, a cord or cordelette needs to be 2–3mm smaller than the climbing rope in order to provide adequate friction for a prusik.

FIGURE 4: When using an auto-blocking belay device in guide mode to belay a second climber, it may be necessary to “release” the locked device when it’s under load, in order to lower the second so he can reach a ledge or retry a move. Thread a thin sling through the small hole opposite the clip-in hole on the device, redirect it through the anchor, and clip it to your harness so you can use body weight to release the device. For additional control of the lower, always redirect the brake strand through the anchor. As a back-up, tie a friction hitch onto the brake strand and clip it to your harness. PC: Sterling Snyder

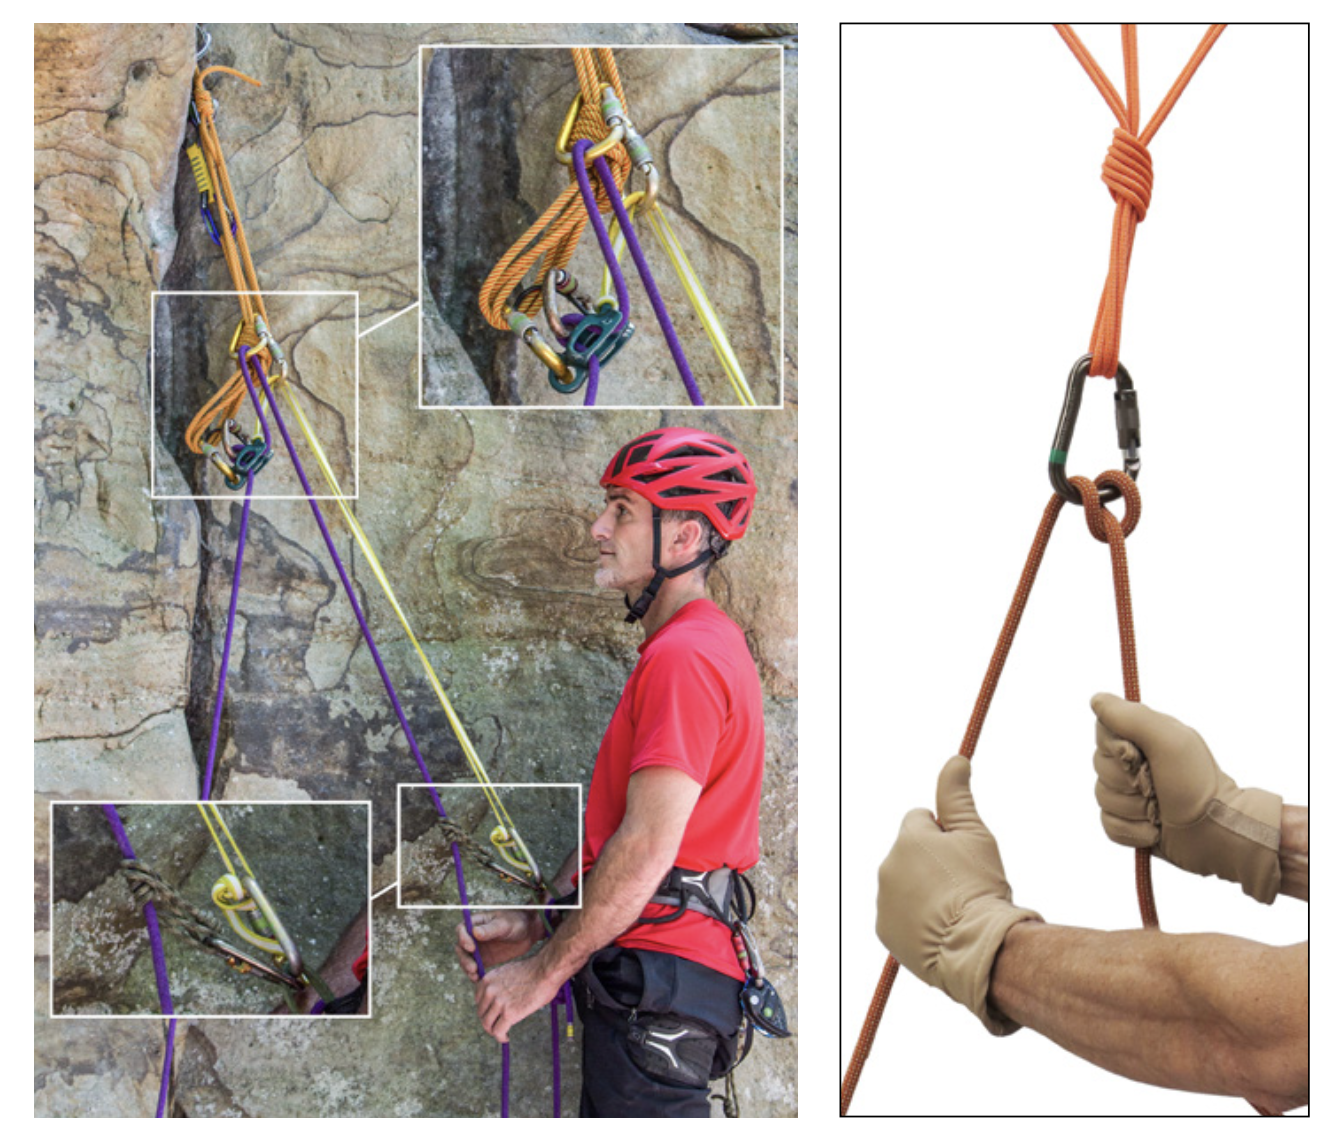
FIGURE 5: The Munter hitch can be used instead of a device to belay or lower a climber. It’s preferable to orient the hitch with the load strand on the gate side of the carabiner.

Since we are somewhat limited in the amount of gear we carry on a given objective, it makes sense to maximize our understanding of the gear we typically use. One of the most utilitarian pieces of modern equipment is a belay/rappel device with an auto-blocking option, like the BD ATC Guide, Petzl Reverso, or similar. This single piece of equipment has a variety of uses, including the following:

  • Standard belay from harness

  • Auto-blocking belay from an anchor (see Figure 4)

  • Lower from anchor with increasing friction (see Figure 3)

  • Lower from anchor with a backup (see Figure 2)

  • Simple 3:1 hauling system

  • Ascending

  • Rappelling

    What if you drop your belay/rappel device? A key technique to know is how to tie a Munter hitch and use it to belay, rappel, or lower from a locking carabiner clipped to an equalized anchor (see Figure 5). When possible the Munter hitch should be tied so the load strand of the rope is on the gate side of the carabiner and the brake strand is on the spine side.

    All of these skills and techniques should be practiced and perfected at your house, in the climbing gym, or at the local crag, in a setting that has minimal consequences if you get it wrong. And please take the time to read the instruction manuals that come with your equipment. They are packed with invaluable information and tips.

    Through time, practice, observation, and reflection we start developing the necessary skills to be a truly competent partner, with the skills to use an alternative system when we, or our partner, can no longer climb, belay, lower, or rappel due to circumstances. I know for certain that we cannot possibly plan for everything that might happen in the mountains, but we all have a responsibility to our partner and the entire climbing community to be as prepared as possible when unexpected situations do arise.


    About the Author

    Mike Poborsky is an internationally certified rock, alpine, and ski guide, and is vice president of Exum Mountain Guides, based in Jackson, Wyoming.

Managing Risk

Managing Risk

Last year millions of viewers were awed by Free Solo, the feature film that documented Alex Honnold’s historic solo ascent of El Capitan. We were stupefied by the level of free climbing ability and mental strength required to even conceive of this feat, much less achieve it. We also were captivated by the debate that ensued. Many commentators viewed Alex’s climb as a moral failing, and many harangued the system that would allow such an ascent and the society that would laud it.

Rappelling

Rappelling was once considered a prerequisite skill for any climber navigating 5th class terrain. It was a mainstay of introductory texts, climbing classes, and novice climbers were often taught to rappel before they ever climbed their first pitch. 

Much of that has changed, and large numbers of climbers enjoy all kinds of outings where rappelling is both unnecessary and perhaps unwise. Many toprope venues do not require rappelling during setup, many sport climbing venues are equipped to quickly clean anchors by lowering, bouldering usually does not require any form of technical ropework (much less rappelling), and most modern climbing gyms flatly disallow rappelling. As a result, rappelling is something that many climbers understand conceptually (having lowered each other) but fewer have actually experienced. As a result, when rappelling accidents happen to beginners we often discover that the contexts of rappelling were not perfectly understood, the fundamental physics of rappelling were confused, and the variability of the rigging was understated or oversimplified by mentors and instructional materials. 

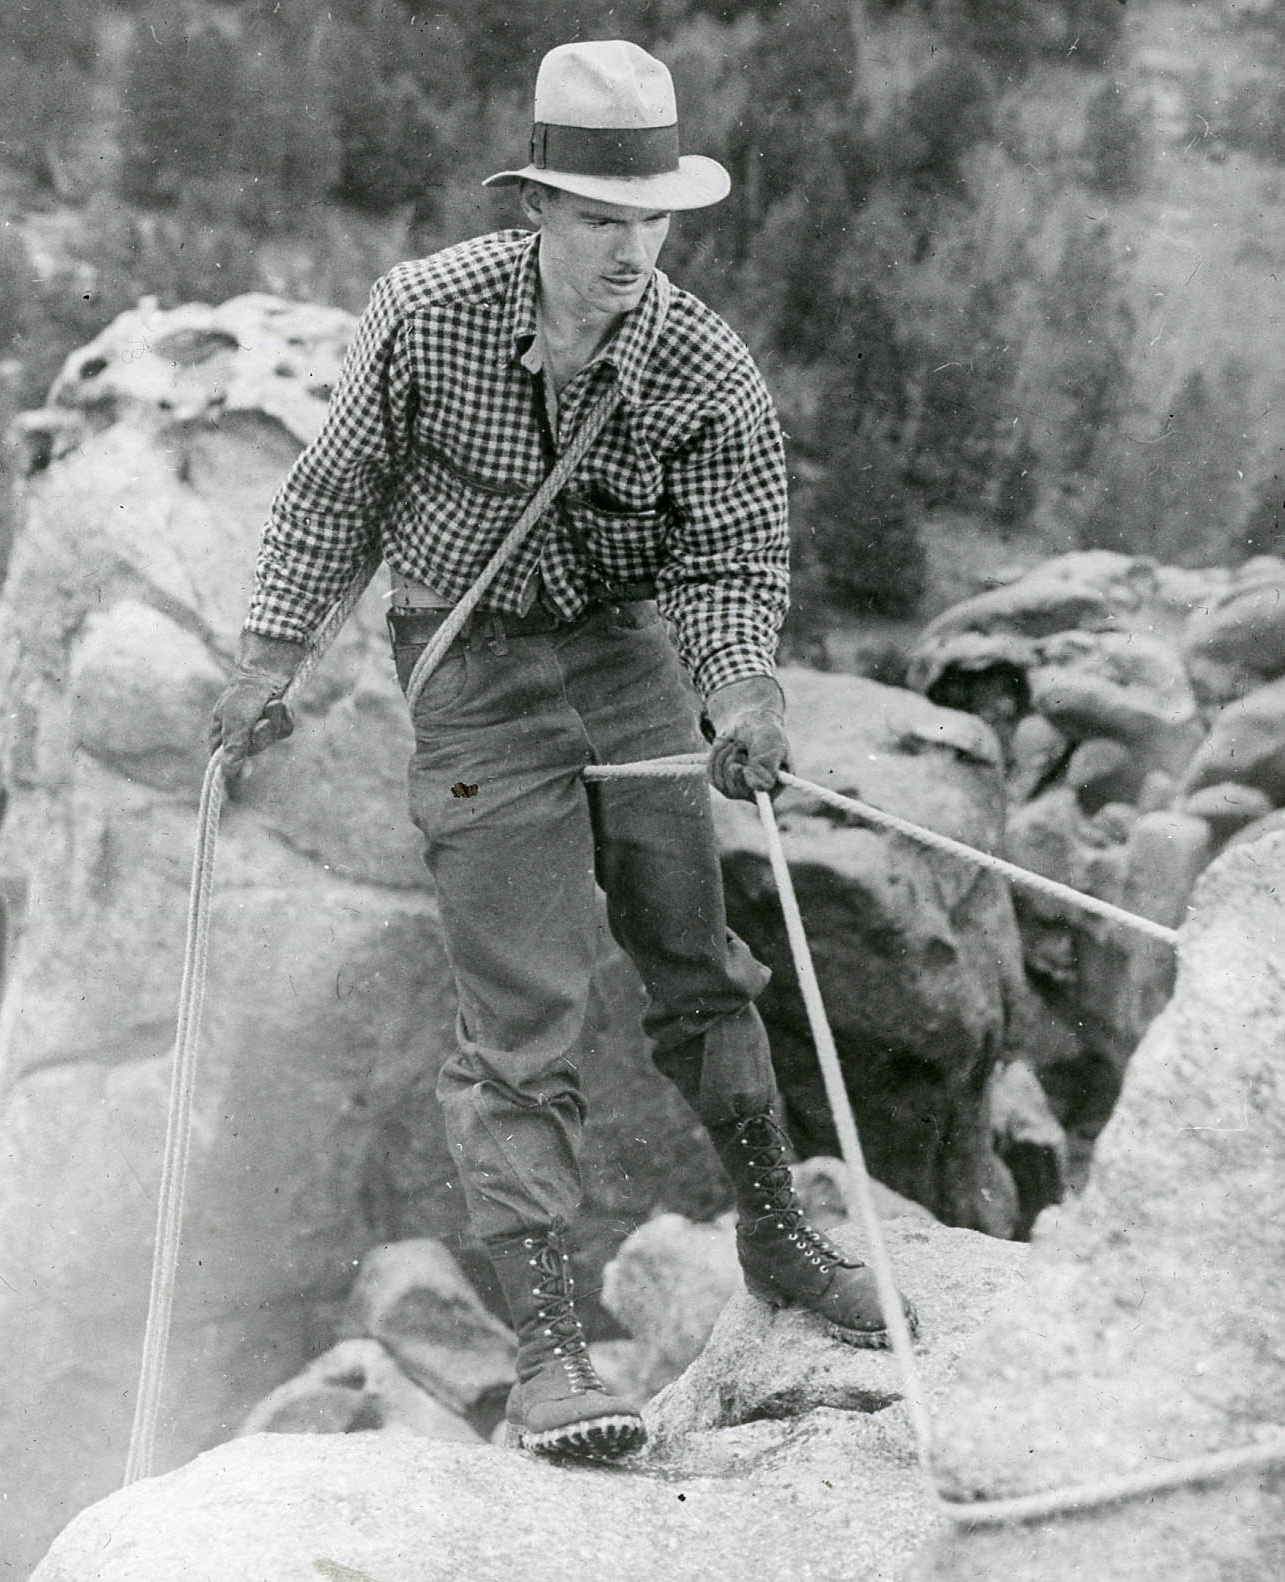
A generation ago, every climber learned to rappel.  Early rappel techniques, like the Dulfersitz, helped climbers learn the relationship between the body and rope friction.  These techniques still work, but they don't provide many options …

A generation ago, every climber learned to rappel. Early rappel techniques, like the Dulfersitz, helped climbers learn the relationship between the body and rope friction. These techniques still work, but they don't provide many options for backups or added security.

By comparison, experienced climbers have often rappelled hundreds or thousands of times, but an unfortunate number of us also seem to be randomly involved in rappelling accidents. In these cases, preventative practices like knotted rope ends, using backups, and a system of careful double-checks were often overlooked or ignored, even though the value of these techniques is undisputed. 

In this article, we hope to create a resource for novice climbers to understand what rappelling is, the contexts in which it happens most commonly, and a set of principles that should govern the rigging. We also hope to address any reader that may be well into their rappelling career. Perhaps some will find reasons to adopt practices that they have historically ignored, or revise the practices they are currently committed to using regularly. In some cases, this article may simply validate what a reader is already doing, but in that case we hope it might also give them a vernacular for communicating with their friends, students, and mentees. 

What is rappelling?

To put it most simply, rappelling is just lowering your own mass down a climbing rope. In belaying, the belayer remains stationary and the rope moves. In rappelling, the rope remains stationary, there is no belayer, and the rappeller is the thing that is moving.

Once a climber has rappelled a few times, these distinctions seem painfully obvious. But, as thousands of climbing instructors will attest, until a person has experienced the fundamental difference between being lowered and rappelling, it’s not obvious at all. A rappeller has independence, agency, and control in a way that a person being lowered does not. That can be advantageous, but it also means that rappellers sometimes lose the advantages and redundancy of team work.

There are two main variations to rappelling mechanics: fixed-line rappelling and counterweight  rappelling. In fixed line rappelling, a climbing rope is connected to an anchor, the rope remains stationary, and the rappeller can rappel all the way down to the other end of the rope. In counterweight rappelling, a climbing rope is not fixed.  Instead the rope runs freely through a rappel station, set of carabiners, or around an object. In this arrangement, a rappeller must capture both strands of rope within the rappel in order to counterweight around the rappel anchor point, and the rope can be retrieved from below.

a visual of counterweight rappelling

In counterweight rappelling, a rope runs freely through a rappel fixture.  As a result, a rappel device must capture both strands of the rappel rope. The rappeller effectively counterweights themselves. 

a visual of fixed line rappelling

In fixed line rappelling, the rappel rope is affixed to an anchor, so the rappeller does not need to effect a counterweight. The rappeller can rappel a single strand of rope.

When do climbers rappel?

Climbers rappel for two main reasons, in two primary contexts: single pitch rappelling and multistage rappelling. Both options are slightly different, and a climber learns to adapt the rigging, the device selection, and the anchoring accordingly.

Multistage rappelling happens when climbers ascend a multipitch climb and descend the feature through a sequence of rappels. They climb a big wall, up up up, in sections, and then they rappel, down down down, in sections. 

Single pitch rappelling. Climbers also occasionally rappel when they clean anchors in a single pitch setting. Sometimes, local custom or policy require climbers to rappel when they clean. Sometimes, lowering is not an option. Sometimes, rappelling is needed in emergencies. 


The first step in avoiding any climbing incidents is good prior planning.  Get all the information you can from the guidebooks.  It is also a good idea to take a copy of a route topo—even if you have done the route before.  And consider looking at blogs and talking with friends or acquaintances for information.

Equipment inspection before each season—and before each climb—is always important. Is it time to retire your ropes, slings, or harness? Look closely at all the gear to see if there are any obvious wear and tear issues and consult the manufacturers for recommendations.

Double-check any critical system carefully before committing to it.  Look through and inspect all critical links, carabiners, the rope’s integrity, the harness’ key points (buckles, belay loops, and connection points).  It’s always helpful to have a partner nearby so that climbers can double check each other.

Decide how the climbing team will communicate before the need for communication arises, minimize the amount of words needed to relay information unambiguously, and focus on communications that initiate action.
— Rob Hess, UIAGM/IFMGA. From Accidents in North American Mountaineering 2012.

Fundamental Principles of Rappelling

  1. You should be secure during the setup because rappels are often rigged in proximity to cliff’s edges and precipices, and even careful and experienced climbers are endangered by that kind of exposure. 

  2. You should use appropriate backups because a variety of factors make it likely that a rappeller will lose control of the rappel.  

  3. You should manage the ends of the rope because we often rappel in the dark, when tired, with unfamiliar ropes and in unfamiliar terrain, and since we often rappel rapidly, the ends of the rope can present a unique hazard. 

  4. Avoid Entanglements. Rappelling involves a lot of rope that must be carefully managed and rappel devices that notoriously entrap hair, hoody-strings, straps, and clothing, the last principle asks us to manage the rope and manage ourselves to avoid entanglements.

Security During Setups

There are lots of ways to be secure during setup. Generally, the options fork into two initial categories: technical and non-technical. Non-technical security does not involve anchors or tethers or carabiners. It’s simply staying away from a cliff’s edge or staying seated when setups are awkwardly close to a cliff’s edge.

Technical security uses some sort of tether, sling, PAS, or the climbing rope to connect the climber to an anchor during setup. The context of the rappelling usually inspires a wide range of variations among the tethering methods. 

With their back turned towards a precipitous cliff's edge and their attention focused on setup tasks, these climbers are using technical security (a tether and locking carabiner) to stay secured during setup. 

With their back turned towards a precipitous cliff's edge and their attention focused on setup tasks, these climbers are using technical security (a tether and locking carabiner) to stay secured during setup. 

Notes on appropriate set up:
Be sure that the rope actually passes through the rappel device properly, that a bight includes the carabiner and that the carabiner / extension is properly attached to harness. If pre-rigging – all partners get eyes on each other’s systems.
— Rob Hess, UIAGM/IFMGA. Accidents in North American Mountaineering 2012.

Appropriate Backups

A rappel backup effectively provides a backup for the rappeller’s brake hand. If the rappeller were to release their grip of the brake strand for any reason (losing control, rockfall, medical emergency) the backup would effectively hold the rope instead of the rappeller’s brake hand. There are three common variations: a friction hitch backup, a firefighter’s belay, or the use of an Assisted Braking Device.

Friction Hitch Backup

A Friction Hitch Backup can be quickly paired with any tube style rappel device, but the setup has to be precisely configured. If a backup doesn't work when you need it to, it constitutes little more than wasted time, material, and effort. Common examples include friction hitch backups that are poorly dressed, iced or frozen, or they don’t assert enough friction to grip the brake strands with adequate braking power. Also, if a friction hitch backup is too long, it will push up against a rappel device, pushing the hitch along instead of allowing it to grip the brake strands.  It’s important to get the lengths just right so that the backup engages. On steeper rappels, an inverted rappeller can easily bring the friction hitch into dangerous proximity to the rappel device. 

Precise rigging is vital to an effective rappel backup.  It's not enough to apply a friction hitch; the distances and positions of all the pieces have to be just right.

Precise rigging is vital to an effective rappel backup. It's not enough to apply a friction hitch; the distances and positions of all the pieces have to be just right.

When we don't pay attention to the details, when the rigging is imprecise, our backups are ineffective.  This climber has wasted a lot of time and energy rigging a backup that won't work.

When we don't pay attention to the details, when the rigging is imprecise, our backups are ineffective. This climber has wasted a lot of time and energy rigging a backup that won't work.

Since the rigging of friction hitch backups has to be so precise, many rappellers prefer to extend their rappel devices away from their harnesses. In this configuration, the friction hitch backup can be connected directly to the belay loop. In general, extensions allow for a greater margin of error in the rigging of rappels and their backups, which is advantageous.

a personal tether works also to extend your rappel

An extension built with a double length nylon sling positions a rappel device far enough from a belay loop that almost any friction hitch backup will be effective.

Autoblock friction hitch

An autoblock friction hitch is a great option when tying a rappel backup.  A small loop of 5mm nylon can be quickly deployed for the task.

auto block friction hitch

The auto block is tied by enwrapping the brake strand(s) of the rappel, as many times as the material length allows...

...and the autoblock is completed by rejoining the nylon loop with the locking carabiner.

...and the autoblock is completed by rejoining the nylon loop with the locking carabiner.

There are eternal debates about the type and style of extension used to separate a rappel device from the harness. Suffice it to say, there are many adequate options. As long as the option is adequately strong and secure, without compromising overall efficiency, it's probably a good one. Some of the most common alternatives include a Personal Anchoring System (PAS) or quickdraw with locking carabiners. For multipitch rappelling, an extension that has a modular leg can be used to both extend the rappel and clip into anchors during rappel transitions.

A locker draw extension

A locker draw extension.

A PAS extension

A PAS extension.

An offset extension is great for multistage descents.

An offset extension is great for multistage descents.

Firefighter’s Belay

Firefighter’s Belays are effective backups too, but they have to be executed correctly.  To provide a firefighter’s belay, the belayer should be attentive, with eyes on the rappeller and hands on the brake strand(s) of the rope. If the rappeller were to lose control of the rappel, the attentive belayer would pull down assertively on the brake strand(s) in order to effect enough braking force to halt the rappeller’s descent. Much like a poorly rigged friction hitch backup, a firefighter’s belay that is inattentive, loose, or off the fall line will likely be ineffective.

demonstrating a fireman's belay

When this climber offers a firefighter's belay, she means it.  She's attentive and ready to halt the rappeller at any moment.

When rappellers lose control it happens quickly and unexpectedly, but a quick and firm tug on the brake strands will bring the rappeller to a halt.

When rappellers lose control it happens quickly and unexpectedly, but a quick and firm tug on the brake strands will bring the rappeller to a halt.

Managing The Ends of the Rope

Managing the ends of the climbing rope is often a vital technique to keep rappellers from rapping off the end of the rope. Commonly, the ends of the rope are either conjoined or bulky stopper knots are tied, such that the knot that would ram into a friction hitch or rappel device, reliably arresting the rappel.

when rappelling, stopper knots help manage the rope ends

A pair of bulky stopper knots are among the easiest ways to manage the ends of the rope.

Conjoining the rope ends and carrying them to the ground has the added advantage of managing the ends of the rope while also avoiding tossing ropes down the cliff.

Conjoining the rope ends and carrying them to the ground has the added advantage of managing the ends of the rope while also avoiding tossing ropes down the cliff.

Avoid Entanglements

It’s important to keep anything from getting snagged in a rappel tool, and it’s also important to keep one’s ropes organized and moving fluidly. Entanglements of hair, clothing, or the rope can create serious problems while rappelling, especially in adverse conditions.

Tossing Ropes

It is rarely necessary or expedient to throw ropes down a cliff. Often, the tails of rope can be gently lowered to the ground, or a bight of rope can be lowered and the tails carried to the ground by the rappeller. It’s also likely that tossed ropes will land on other climbers, in places that are difficult to retrieve (trees or cracks), or places that are awkwardly gross (mud, poop, carrion, etc). A rappeller can avoid entanglements by avoiding tossing ropes.

Conclusion

It is a worthwhile thought experiment to imagine how climbers create margins of error, how we use backups, and how/when we selectively (and hopefully carefully) disregard those techniques. Typically, a climber navigating 5th class terrain uses a rope system to mitigate the risk of ground or ledge impact, but sometimes we intentionally neglect to place enough protection to effectuate the rope system we’re tied to. Those are enormously risky behaviors, but we tend to engage in them quite readily when we perceive there to be a low probability of incident, like when the climbing is easy or unremarkable. Similarly, a small portion of climbers free-solo in 5th class terrain, and their calculation is identical: they perceive there to be a low probability of incident, and they therefore eschew a rope system altogether.

The indisputable reality is that good climbers fall off of easy terrain every year.  Experienced rappellers lose control, rap off the ends of rope, or incorrectly rig their rappels. As a species, humans don’t always reconcile their rational/analytical response to risk with their intuitive/emotional response. As a result, best practices like using backups, managing the ropes ends, staying secure during setups, and careful double checks are often characterized as overly conservative, burdensome, and slow. Similarly, eschewing these practices altogether, which is actually tantamount to free-soloing in a demonstrable ways, can be characterized as a matter of preference, style, or status.

Instead, take the time to appreciate that each rappel is merely similar to all previous rappels. In quantifiable ways, every rappel is also dissimilar to all previous rappels.  If that is true, the way we rappel is also merely similar to the way we rappelled on every previous occasion. The solutions we use to descend our next rappel will be unique in appreciable ways. So, the fundamental principles of rappelling can be used as a unique questionnaire for every rappel.  A rappeller should have compelling and accurate responses to each of these questions before rappelling:

Am I secure while I setup the rappel?

Am I using appropriate backups?

Am I managing the ends of the rope?

Am I avoiding entanglements? 

Know the Ropes: How to Rappel  


Climber Communication


In the United States, many incidents and inefficiencies are caused by miscommunication within a climbing team. Often, highly consequential information needs to be relayed between climbers and belayers, and miscommunicating that information has unfortunately resulted in grave consequences. At the American Alpine Club, we have been gathering these unfortunate stories for over a century, and many incidents could have been entirely avoided had the team communicated more clearly. However, any skill that involves the use of language tends to resist standardization; it’s a challenge that has frustrated American climbers in all disciplines.

One of the first climbers to try to address these challenges was Paul Petzoldt. In The Wilderness Handbook he writes, “Unindoctrinated by the standard European techniques and philosophies of [the world war-era], I developed some new skills and ideas. I invented the first voice-signal system (now universally used in America).” American climbers have largely adopted and gravitated to some version of Petzoldt’s verbal commands for the last 100 years, because his assertions are as true today as they ever have been. Petzoldt wrote:

The human voice is difficult to hear and understand on a mountain. The belayer might be out of his companion’s sight, words do not carry well around rock projections, wind and rain sometimes make conversations impossible, even at short distances. Because of such interferences, I have developed voice signals that are brief and intelligible even when faintly heard.

Petzoldt’s innovation was insightful, and it informs the concepts espoused in this article. But, the Petzoldt voice signals that sound so familiar to so many climbers, can easily be obfuscated by a busy crag, dialect or nuances in pronunciation, and by the use of names within the voice signals—names distort the syllabic distinction that Petzoldt originally devised.

Communication, as a concept, has to be grounded in something less complex than language or speech or any group of practices that is so easily undermined by the nuances of dozens of individual cultures. It’s important to remember that communication is not always about language. Climbers who do not have the ability to hear, to speak, or to see have always managed to communicate with others, and those individuals climb in the United States as well. There is a need to address climber communication in a way to focuses on the essential goal climbers are trying to achieve, and language is only one of many ways climbers communicate.

In this article, we will explore why communication is so vital to climbers. We will explore the principles that should govern communication in all contexts, and from those principles we will make recommendations that are mostly likely to work in most contexts.

Why is Communication so vital to climbers?

Communication often results in establishing or relinquishing safety systems, like a belay, and establishing or relinquishing a safety system inappropriately can be dangerous.

AND

Climbing environments make communication difficult. Climbers find themselves in cacophonous surroundings (windy and rainy conditions, busy crags and climbing gyms with lots of competing voices, loud environments like roadsides, roaring rivers and streams, chirping and singing wildlife). Climbers are often out of sight of one another, making traditional nonverbal communication difficult.

climbing commands; multi-pitch climbing communication

Climbing environments often make communication difficult.  The sound of the ocean, in this case, makes it important address the fundamental principles of effective climber communication before the climbing starts.

Fundamental Communication Principles

Fundamentally, all formal climbing communication serves to mitigate the inherent hazards of climbing. Many of the climbing commands typically employed concern management of the rope system, which in turn affects the belay and the security of the person being belayed. The simple command “On belay” may be the best example of a rope system command. An additional set of commands exists to address the hazard of falling objects, “Rope!” and “Rock!” being the most prominent examples.

Effective formal communication in a climbing system relies on commands that follow three foundational principles:

Communication Agreement. Communication between climbers and belayers should be anchored to a script that is agreed upon prior to the need for the communication.

Communication Precision. Communication should strive to minimize the amount of oral traffic needed to relay information between parties.

Communication Action. Communication should imply an impending action, and therefore should unambiguously initiate that action. Communication also may be used to affirm the completion of an action.

Communication Agreement

Climbing commands are only effective if all members of the climbing party agree on what commands will be used and the explicit actions they imply. For example, there are a number of commands associated with eliminating slack from a belay system, including, “Take,” “Tension,” “Up rope,” and “That’s me.” Each of these commands carries a nuanced meaning that must be known by the belayer in advance in order for her to respond appropriately when her climber issues such a command.

agree on your climbing commands from the start

Every climber can appreciate what it's like to call for tension in the rope system.  Paul Petzold originally specified "TENSION" as the preferred voice signal, because it has two syllables, just like all the other commands that involve tightening the belay.  Today, "TAKE" is a common command, but the single syllable can easily be confused with "SLACK," which is the opposite of what this climber wants right now.

Establishing different formal climbing commands prior to every climbing outing with a new partner can inconvenience the climbing experience in little ways, but it's almost always worth the a little inconvenience at the beginning of the day in order to avoid an accident. Once the communication agreement has been established, a climbing team can default to that agreement until the conditions or the context necessitates an adjustment.  

There are common tropes and patterns that speakers of American English will recognize, regardless of region or background. Still, slight variations persist from one group of climbers to the next, and climbers should engrain the ritual of affirming their communication strategy before the climbing outing begins. The most common theme in miscommunication-related incidents involve climbers who neglected to have a vital “agreement” conversation prior to their climb. A simple conversation would have alleviated the confusion.

Communication Precision

Another common theme in miscommunication is over-communication. The climbing team might attempt to rely on informal communication and conversation when precise and unambiguous commands are needed. The communication might be redundant and therefore unnecessary. In both cases, the climbing team fails to appreciate that precision (communicating a precise action, no more and no less) is a fundamental concept.

When conditions are challenging, informal communication should be entirely eliminated to prevent miscommunication of important formal commands. For example, if the leader has climbed around a corner and into the wind, she would be wise to only use formal climbing commands with her partner to prevent being taken off belay prematurely.

Similarly, redundant commands over-communicate and create ambiguity. Some novice lead climbers use the commands “Clipping” and “Clipped” to inform their belayer that they will be clipping the rope into a quickdraw. “Clipping” implies that the leader will need additional slack to clip the carabiner; the formal command “Slack” is already used to alert the belayer to introduce slack into the belay system. “Clipping” is therefore a redundant communication.

“Clipped” suffers from problems with both redundancy and ambiguity; two meanings may be implied. First, the leader may be asking the belayer to remove unnecessary slack from the belay system (in which case a number of commands may do the job). Second, the leader may also be asking the belayer to check the clip: is the leader back-clipped? Z- clipped? Often, this task is impractical or impossible for the belayer to accomplish. Finally, both, “Clipping,” and, “Clipped” are unnecessary assuming the belayer is attentive. No system of communication, even if it is fundamentally thoughtful, can compensate for inadequate belaying.

climbing commands are a critical part of how to belay safely

"CLIPPING" and "CLIPPED" are rarely vital communications if the belayer is attentive.  A climbing team that prioritizes precision will eliminate unnecessary communication in order to minimize ambiguity and miscommunication.

When communication become challenging, eliminating unnecessary command or conversation allows the climbing team to anticipate essential climbing commands based upon their previous communication agreement.

Communication Action

Communication should have a clear and unambiguous relationship with an impending action. For example, “Off belay,” is often used to initiate the deconstruction of a belay system. As any climber can appreciate, the action that corresponds to the communication is often highly consequential, and in many cases an affirmative response to the action helps signify the severity of the action that has occurred. Climbing teams will often use affirmative responses like “Belay off” to signify the completion of an important action. However, any command which does not include or affirm a call to action can easily be interpreted for something it is not intended to be, and such inactive communication should be avoided.

For example, some climbers use the command, “Safe,” or, “In direct,” to imply that they are secured to an anchor in some way. However, these commands are superfluous--there is no action for the partner to take in response to this command, nor is there a corresponding affirmation. Instead, the climber could simply say “Off belay” if intending to secure herself and belay from above as in a multipitch climb. Alternately, the climber could say nothing at all and simply request “Slack,” if cleaning an anchor on a single pitch climb, for example.

Fundamentals of Communication in Practice

The following examples explore the use of fundamental communication principles in real-world scenarios and demonstrate an application of those principles to scenarios that are familiar to many climbers.

Scenario 1: Casual cragging with lots of other parties.

Perhaps the most frequent scenario in modern climbing has the climber and belayer starting together at the base of a pitch. Whether leading or top roping, the commands used are the same. Drawing on the most common climbing commands in the United States, our climber, Maria, queries her belayer: “Jorge, are you on belay?”

As the formal climbing command is a call to action, Jorge physically checks the entire belay system, ensuring his belay device is loaded correctly, the carabiner is locked, his harness is fitted properly, the rope is running properly through an adequate anchor if appropriate, his climber’s harness is fitted properly, and his climber has tied into her harness correctly. When appropriate, Jorge also ensures both he and his climber are wearing helmets. Only after completing all of these checks and confirming them with his partner can Jorge say, “Maria, your belay is on.”

In their communication agreement, Jorge and Maria decided to use each other’s names in their verbal commands. This strategy is particularly important when communicating in a crowded location or noisy environment, such as a climbing gym or a busy sport climbing crag. In the multipitch setting, preceding the command with a name is equally important as it alerts the recipient that a command follows and ensures that adjacent parties do not misinterpret the other party’s communication for their own.

communication tactics change when at a crowded crag

With climbing teams all climbing side by side, the use of names in voice signals is an advisable part of any communication agreement.

Jorge and Maria will use each other’s names to precede all of their verbal commands today, because that is part of their communication agreement, it is a precise way to specify which commands are directed to whom, and the teams needs a way to differentiate between vital commands that initiate action and the informal banter that will surely characterize their time at the crag.

suggested climbing commands for a crowded crag

Scenario 2: Multipitch Climbing

Jorge and Maria are now on a multipitch climb. They begin a pitch sharing a stance at an anchor together, so communication is straightforward prior to the lead. However, once Maria tops out the pitch, there’s a need for terse, precise, and unambiguous action-oriented communication. Belays will be deconstructed and the climbing team will be transitioning from one safety system to the next.

In their communication agreement, Jorge had two main concerns. Jorge wanted to know when exactly to start removing his belay device. He had an experience in the past when he thought the leader said “Off Belay.” On that day, the leader was actually shouting to a rappelling party, “I’m out of the way.” Jorge took the leader off belay prematurely that day, and he never wants to make that mistake again. On a completely separate outing, Jorge was taking his GriGri off the rope when the leader started pulling up the rope. The unexpected tug of the rope yanked Jorge’s GriGri out of his hands and it fell all the way down the cliff. Jorge doesn’t want to deal with either of these miscommunication problems again.

Maria and Jorge agreed that names will be less important today on this isolated climb; no other climbers are around. They’ve also agreed that when the leader shouts “Off Belay,” the belayer will immediately shout “Belay Off.” The leader will have one last chance to object, if Jorge has misheard the verbal command. Jorge agrees to wait a short second before deconstructing the belay.

Also, the leader agrees not to start pulling up rope until she hears the belayer shout “Maria, Up Rope.” It’s important for every climbing team to appreciate that Maria and Jorge could’ve agreed on a completely separate sequence here, and a completely separate set of commands to communicate that sequence. The vital point here is the relationship between prior agreement and precision; Maria and Jorge are being conscientious about both fundamental principles.

When the rope is tensioned against Jorge or his attachment to the anchor, he’ll inform his partner by saying, “That’s me.” This signals to Maria that the tension she feels in the rope is due to Jorge’s weight and not some other potential predicament, such as the rope being wedged in a crack or ensnared around a horn of rock. Maria’s call to action with this command is to put Jorge on belay immediately. “On Belay”

Jorge can now prepare to climb, secure in the knowledge that he is belayed from above. When he is ready to climb, he can inform his belayer with a simple, “Climbing!” A reply of, “Climb on!” will see Jorge to the top of the pitch to rejoin his partner.

Note that in the above exchange, Jorge does not query Maria as to whether he is on belay. There is no need as Maria will put Jorge on belay in response to the command of, “That’s me.” Further, Jorge may not be able to see Maria as she concludes her lead. Consequently, he will likely not know for sure when Maria has established an anchor and is ready to belay. In the best case, voicing, “On belay?!” will not elicit a call to action from Maria other than to say “No, not yet,” unless Jorge happens to pick just the right moment to ask. Asking if he is on belay simply introduces unnecessary, informal communication. In the worst case, shouting, “On belay?!” may be misunderstood as “Off belay!” Maria is likely to find this rather alarming if she has yet to complete her lead.

Scenario 3: Communicating without Commands

It is possible for a climbing party to communicate unambiguously without the use of verbal commands, thereby eliminating the potential for poor verbal communication or miscommunication. Provided the party can agree up on a system in advance, this is readily achieved. Let’s revisit the example in scenario 2 to see this in action.

Maria reaches the top of the pitch and secures herself to the anchor. Because they suspected the possibility of poor communication, Jorge and Maria agreed in advance to use only the necessary formal verbal commands. As Maria is secured to the anchor, she shouts, “Off belay!”

Unfortunately, Jorge is unable to hear this command. However, he knows that there are only two reasons that he might need to feed rope to the leader. Either Maria is still leading, or she has arrived at the belay stance and is pulling up excess rope. Since Jorge is unsure which is the case, he simply continues belaying until he reaches his end of the rope. As he did not hear Maria issue the “off belay” command, he has no reason to affirm this command. Instead, he skips this and simply proceeds to the next command, “Maria, that’s me!” He then removes his belay device from the rope.

Maria has pulled the rope until it is tensioned and thinks she hears Jorge shout a command to her, but she’s not positive. Regardless, her next step is clear: put Jorge on belay. She does so promptly and shouts, “On Belay!”

Meanwhile, down below, Jorge is diligently waiting to climb. Prior to starting the climb, Maria and Jorge agreed to a 30- second waiting period. After shouting, “Maria, that’s me!” Jorge waits 30 seconds and then removes himself from the anchor to begin climbing. He does this knowing that Maria will promptly put him on belay after the rope is tensioned, a task that should take no more than 30 seconds. Jorge and Maria could have agreed to any amount of time they felt appropriate; again the prior agreement is the important thing.

After the agreed upon amount of time, Jorge bellows, “Climbing!” and makes a couple moves. He has one last chance to make sure that he is on some form of belay. He’s making sure the rope is travelling up, in the characteristic progression of a belay cycle. In this sequence, Jorge and Maria have accepted that it might also be possible that Maria is not actually belaying. It is possible that she is still leading, and the team is now accidentally simul-climbing. Even though it’s scary and hopefully avoidable, Jorge and Maria appreciate that Jorge will have to climb in that scenario, even if he’s not on belay. What choice does he have?

Meanwhile, back at the top of the pitch, Maria cannot hear Jorge, but she can feel the slack in the rope he generates by climbing. She pulls the rope through the belay system and after a few feet of movement is sure Jorge must be climbing. As a confirmation, she yells, “Climb on!”

Troubleshooting Communication Challenges

Select belay stances and pitch lengths that enable communication, when feasible.

Occasionally, verbal communication is challenging or impossible. This happens most often on multipitch routes and can result from many factors, including a pitch that traverses around a corner or crosses a ridgeline, high winds, or stretching or linking pitches. The best strategy for these situations is simply prevention. Whenever possible, select stances that enable good verbal communication, or even visual communication if possible. Research the route thoroughly to know when your partner might be out of touch. Consider belaying at an appropriate stance even if the guidebook does not indicate the stance as a typical belay point.

nonverbal climbing communication is often necessary for multi-pitch transitions

This climbing team could have chosen to belay an any number of places.  The huge river gorge, the imposing rough, and the presence of other climbing parties nearby compelled the party to shorten the pitch-length and optimize communication.

The conventional wisdom is that stretching the rope and linking pitches results in a faster ascent as there are fewer belay transitions to be made. However, 15 minutes wasted shouting to a partner 200 or more feet distant certainly bears a greater time cost than two or even three efficient belay transitions.

Visual communication is helpful when verbal commands are inaudible.

Unfortunately, sometimes poor verbal communication simply cannot be prevented. This leaves a few options for alternative communication systems. A visual command system is one such solution. Such a system needs to be established in advance, but can be effective provided that appropriate belay stances are selected. Most often, a negative and affirmative command are all that is needed. For example, when the leader reaches the top of the pitch, she secures herself, then leans out to look down at her belayer and makes a slashing motion across her throat, indicating, “Off belay.” When the belayer has removed the belay device from the rope, he returns the signal. When the leader has put the follower on belay, she leans out and gives a thumbs-up signal straight overhead, indicating, “On belay.”

Beware of Rope Tugs.

A more common approach is a system of rope tugs used by the leader to communicate with the follower when she is off belay. Unfortunately, any system relying on rope tugs introduces significant ambiguity and the potential for miscommunication. For example, the climbing party may agree that three rope tugs from the leader means, “Off belay.” However, the leader might also issue three similar feeling rope tugs as a result of a potentially stuck rope or simple rope drag. If the belayer interprets this as a call to action, though, the leader may find herself unintentionally off belay for the remainder of the pitch.

Many climbing parties enjoy success with the rope tug technique, and their success usually hinges on a smoothly executed rope line, and a discipline avoidance of any rope movement that could be interrupted as a tug.

A second rope can be a communication tool too.

When climbing with two ropes, whether half ropes, a lead line and tag line, or as a party of three, the leader can unambiguously communicate the “off belay” command. Upon securing herself to the anchor, the leader’s next step is to pull up the ropes. By pulling up the trailing line first (or only one of the half ropes), the leader can clearly indicate that she is stopped at the belay stance as the lead rope is not moving.  

Just like the rope tugs, there can be opportunities for ambiguity here.  It helps for the climbing teams to consciously avoid these signals.  If the isolated movement of one of two ropes is agreed to be an "Off Belay" signal, a leader should not move that rope independently unless she is off belay.

Radios, Cell Phones, and Technology

FRS radios are another option and can ease communication considerably over long distances or in poor conditions. However, radios have a number of drawbacks, including weight and costs. Further, radio communication quality varies, both in transmission clarity and range. Additionally, radios rely on battery power, yielding an additional battery to manage. Should batteries die, over- reliance on radios may also leave a party ill-prepared to use an alternative form of communication. Despite these costs, radios can be effective and beneficial in appropriate contexts, such as multi-party climbing, expeditionary climbing, and complex ski descents. Similarly cell phones and text messages have a comparable potential and drawbacks. These technologies all present the same conclusion to a climbing team: do not rely too heavily on technology. Climbers have been communicating quite effectively without these technologies, and those traditional communications skills have value. 

Pre-Climb Communication

Special Thanks to Contributors

Derek Debruin is from Weber State University in Ogden Utah.  Derek is an AMGA certified Rock Guide and owner of Bear House Mountain Guiding.  Derek wrote much of the content of this article.

Also, members of the AAC Education Task Force were enormously helpful with feedback and commentary on this article.  Special thanks to Mark Vermeal, Jon Tierney, Dale Remsberg, Dougald MacDonald, Aram Attarian.  AAC Staff were also a great help.  Thanks Phil and Whitney in particular.

Belaying

The following article is reproduced from the 2016 edition of Accidents in North American Climbing. Author: Ron Funderburke.

Climbers have been belaying for as long as they’ve been using ropes. We use some type of belay in almost every roped climbing context—it is the essential skill that unites all disciplines. It’s interesting, therefore, to see how little agreement there is about the “best” belay techniques, how distracting our assertions about belaying tend to be, and how rigidly dogmatic we can be about a task that many understand so imperfectly.

This dogmatic approach persists even though using a rope to belay something valuable—whether a load of cargo on a ship or a climber on a cliff—has always been organized by three fundamental principles:

  • There should be a brake hand on the rope at all times.

  • Any time the brake hand slides along the rope, the rope should be in the brake position.

  • The hands and limbs should be positioned according to their natural strength.

These are the principles that we should use to evaluate belaying, yet our discussion of “good” or “bad” belaying often revolves around a specific biomechanical sequence. It’s time to abandon this way of talking and thinking about belaying. It’s misleading, reductive, and provokes more arguments that it solves.

Meanwhile, a cursory perusal of any edition of Accidents reveals there are severe consequences for imprecise understanding of belaying. In recent years, 5 to 10 percent of all incidents reported have involved inadequate belays.

This edition of Know the Ropes will equip readers with language and principles that unify all belay contexts. Additionally, for those who are new to belaying, those who want to learn to belay in different contexts, or those who aren’t sure about their current technique, this article will provide some suggestions for how to do so in a fundamentally sound way.

THE ORIGINS OF BELAYING PRINCIPLES

The earliest belayers used the most primitive technique: The belayer held the rope tightly and did not let go under any circumstance. Belayers had to be very strong, and the rope had to be kept very tight. And the brake hand had to be on the rope at all times. Even the strongest belayers and the lightest climbers wouldn’t stand a chance without this fundamental principle. 

The addition of friction to the belay system allowed smaller belayers to secure bigger climbers. Wrapping the rope around features in mountain terrain or the belayer’s body provided enough friction to hold larger loads. 

Friction also introduced two new realities to belaying. First, friction could be increased and decreased, creating a “belay cycle.” Increased friction is valuable when holding a load; decreased friction is valuable when trying to move rope through the system.

The second new reality was that friction allowed the belayer to relax a little. In the more primitive form of belaying, without friction, the belayer’s hand-over-hand technique maintained a constant grip on the rope. By contrast, a belay system with friction allows the belayer to relax [their] grip at some points in the cycle, which, naturally, deprioritizes vigilance.

These changes led to the second fundamental principle of belaying: Since every belay cycle has a point of high friction, it makes sense to spend as much time in that position as possible. Therefore, whenever the brake hand slides along the rope, the rope should be in the brake position. If a climber falls while the brake hand is sliding on the rope, it obviously will be easier and quicker to arrest the fall if the rope is already in the brake position.

Since the addition of friction to the system, every major evolution in belaying has involved some sort of technology. First came the carabiner, which not only allowed belayers to augment their friction belays but also invited the use of hitches, tied to carabiners, as belay tools. The most effective of these was the Munter hitch. 

belaying on a Munter hitch; traditional belaying

The Munter hitch offered a braking position that was the same as the pulling position, so the belay cycle was easy to teach and learn. It soon became the predominant belay technique in all disciplines. (Before the advent of reliable protection, dynamic belays, and nylon ropes, belaying was primarily the duty of the leader. A second might belay the leader, but the leader was not expected to fall, nor was it widely expected that a leader fall could be caught.) The Munter hitch, belaying a second from above, conforms naturally to the third fundamental principle of belaying: It positions the hands, limbs, and body according to their natural strength. It keeps the belay comfortable and strong throughout the belay cycle, and while taking rope in, catching falls, holding weight, and lowering.

THE MODERN ERA

An era ago, these fundamental principles were not really in dispute. They applied to body belays (hip belays, butt belays, shoulder belays, boot-axe belays, etc.), terrain belays (belays over horns, boulders, and ridgelines), and belays on carabiners (Munter hitch). However, by the Second World War, climbers began to use nylon ropes and other equipment that could handle the forces of leader falls. Moreover, climbing clubs, schools, and enthusiasts began to experiment with redirecting the climbing rope through a top anchor, so that belaying on the ground, for both the leader and follower, became much more common. Pushing the limits of difficulty also became more common— leading to more falling.

Belayers around the world also began to experiment with new belay tools that redirected the braking position 180 degrees—the most common early example was the Sticht plate, but the same principle applies to today’s tube-style devices. Instead of the brake strand of rope running in the same direction as the loaded strand (the climber’s strand), the belayer had to hold the brake strand in the opposite direction.

For many years, instructors and textbooks explained how to use these new manual belay devices (MBDs) by defaulting to the hand and body positions that had become entrenched from the use of the Munter hitch and the hip belay. The most common of these was the hand-up (supinated) brake-hand position on the rope. 

The stronger, more comfortable technique with MBDs is a hand-down (pronated) position with the brake hand, and newer texts and instructors often adopted this technique, in order to connect the new technology with the fundamental principles of belay. But the resulting cacophony—with belay instruction varying wildly—gave students and climbers the impression that belaying did not have any governing principles. 

We climbers have our sectarian instincts, and climbers today are as likely to argue the relative merits of various belay techniques as they are to argue about the merits of sport climbing and trad climbing, alpine style and expedition style. The goal of this article is to redirect all belayers’ attention to two indisputable truths: 

  • Belaying happens in many, many different contexts. 

  • Belaying in every context is most effective when it is based on the three fundamental principles, which long preceded any arguments we are currently having. 

THE CONTEXTS OF BELAYING

Even though we generally learn to belay in a fairly simple context (top-roping), belaying is much more diverse than what happens in an Intro to Climbing class. The most appropriate belay techniques can vary widely depending on the setting (gym, multi-pitch crag, alpine climb, etc.) and whether the climber is leading or following. Most generally, belaying happens in three different ways, using different techniques and tools for each: friction belays, counterweight belays, and direct belays. 

FRICTION BELAYS

In a friction belay, the rope runs directly between the belayer and climber, and there might not be any anchor. The potential holding power of the belay is relative to the amount of friction one can generate, the strength of the belayer’s grip, and the resilience of the object providing friction. 

Friction belays are most common in mountaineering (though there are other contexts where they provide efficient and prudent options). In the mountains, there usually are long stretches of terrain where a full anchor is not necessary and building and deconstructing anchors might dangerously delay the climbers. 

Most commonly, the belayer will select a feature of the terrain to belay or use [their] body to create friction. The belay stance must replace the security that an anchor might have provided, whether by bracing one’s feet, belaying over the top of a ridgeline, or another method. Any terrain features used to provide friction or a stance must be carefully inspected to ensure they are solid and won’t create a rockfall hazard. 

COUNTERWEIGHT BELAYS

Whether climbing single-pitch routes or belaying the leader on a multi-pitch climb, these are the most commonly used belay techniques. The climbing rope is redirected through a top anchor or a leader’s top piece of protection, and the belayer provides a counterweight, coupled with effective belay technique and tools, to hold or lower the climber or catch a fall. 

Even though there are plenty of exceptions, the vast majority of American climbing happens in a single-pitch setting, on a climb that is less than 30 meters tall. The belayers and climbers generally are comparably sized, and the belayer is comfortably situated on the ground. Belaying this way provides a more social atmosphere, allowing for banter, camaraderie, and coaching. That’s why climbing gyms, climbing programs, and most casual outings gravitate toward this belay context. 

However, the ease and comfort of single-pitch counterweight belays do not liberate the belayer from serious responsibilities. Thankfully, there are several different biomechanical sequences for belaying a top-rope that fall under the halo of the three fundamental principles. Each of the three techniques outlined below comes with a set of pros and cons that makes it the preferred methods of certain groups of climbers, instructors, and programs. 

PBUS

The top-roping belay technique commonly known as PBUS resonates with climbing instructors and mentors because it emphasizes the fundamental principles so distinctly. The hand transition is securely in the braking position, and it’s hard to imagine the belayer losing control if the climber were to fall while the hand was sliding. Plus, the ergonomics of the technique keep the wrist and grip pronated.

PBUS is most effective when a top-roper is moving slowly and hanging frequently. When the climber moves quickly and proficiently, a strict adherence to this technique often causes the belay setup to collapse, which could allow the belay carabiner to cross-load. It’s also harder to move slack quickly enough to keep up with a proficient climber. 

belaying; PBUS method of belaying

HAND OVER HAND

If the belayer alternates brake hands, [they are] able to move slack through the belay cycle more quickly than with PBUS. As long as the brake hands are alternating in the braking position, this technique abides by the fundamental principles of belay, and it is a preferred technique for experienced belayers and for top-ropers who move quickly. 

Many instructors and mentors dislike this technique because it allows the belayer to keep “a” brake hand on at all times, instead of keeping “the” brake hand on at all times. As a result, this technique is usually relegated to more experienced teams.

belayer; Hand over hand belaying

SHUFFLE

The shuffle technique is most applicable when using an assisted-braking device (ABD) to belay, but it can be used with manual devices by a very experienced belayer (read more about assisted-braking devices). It requires the belayer to have a refined sense of how to grip the rope with varying degrees of intensity, all without relinquishing the readiness to brake. A loosely gripped brake hand can shuffle along the brake strand, up or down, without letting go. A tightly gripped brake hand can be used to catch falls.

Many belayers find this technique unsettling because they are attached to the idea that a relentlessly strong grip on the brake strand is symbolic of the belayer’s commitment. With a proficient belayer, however, the shuffle technique is not only fundamentally sound, it also can be a smooth and reliable way to belay, especially with an ABD. 

anam-13201214178-1495804271.jpg

TOP-ROPE BELAYING IN ACTION

BELAYING A LEADER

Lead belaying involves the same fundamental counterweight arrangements as top-rope belays, but the dynamics involved in a lead fall greatly augment the forces a belayer must contend with. The loads can be severe and startling. Moreover, there is much more to effective lead belaying than simply paying out slack and catching occasional falls. The interplay of slack and tension requires quick and seamless adaptation, practiced and undistracted fine motor skills, and a situational awareness that is hard to achieve if one has never done any leading oneself. Lead belayers must master the following skills:

  • Setup and preparation

  • Correct use of the chosen belay device

  • Compensating for unnecessary slack

  • Catching falls

Unfortunately, lead belayers may only learn a portion of these skills before they are asked to perform all of them on a belay. It’s easy to imagine how a rudimentary skill set can result in frustration, accidents, or even fatalities. 

SETUP AND PREPARATION

A lead belayer needs to determine the likely fall line for a climber who has clipped the first piece of protection. Standing directly beneath the first piece and then taking one step out of the fall line (roughly 10 degrees) will usually keep a falling leader from landing directly on the belayer’s head, while still keeping the belayer in position to give an effective belay. 

Once the lead belayer decides where [they want] to stand, the rope should be stacked neatly on the brake-hand side, right next to the belayer’s stance. A knot in the belayer’s end of the rope (or tying in) closes the system. 

USING THE BELAY DEVICE

Lead belayers will have to learn some fine motor skills to offer an effective lead belay, especially with an ABD. It takes practice. 

Most of the time, the leader keeps [their] brake hand wrapped entirely around the rope, as with any other belay. The lead belayer pays out arm lengths of slack as the leader moves, and then slides the brake hand down the rope with the rope in the brake position. The mechanics are mostly identical, whether the belayer is using an MBD (such as an ATC or other tube-style device) or an ABD. 

But when the leader moves quickly or pulls a lot of slack to clip protection, the belayer will have to feed slack fast, without releasing the brake hand. This is easily learned with an MBD, using a form of the shuffle technique. But with ABD devices such as the Grigri, a specific technique for each device must be learned and practiced. Follow the manufacturer’s instructions and warnings. (Most have produced instructional online videos explaining the appropriate technique.) No matter which device you use, keep the fundamental principles of belaying in mind. Most importantly, your brake hand must stay on the rope as you feed slack. 

COMPENSATING

Lead belaying also involves a subtle exchange of giving and taking rope called compensating. When a leader makes a long clip, there is a moment where the rope is actually clipped above the leader’s head, and [they are] effectively on a short top-rope. As a result the belayer needs to make a seamless transition between giving slack, taking in slack, and giving slack again. The most extreme version of compensating happens when the leader downclimbs from a clip to a rest and then reascends to the high point.

CATCHING FALLS

The most important part of catching a fall is stopping a leader from hitting the ground or a ledge—or abruptly slamming into the wall. On overhanging climbs, a leader is less likely to impact objects, so longer falls are acceptable. But on vertical or low-angled climbs, the same length of fall could easily cause the leader to impact features along the fall line. 

The lead belayer must be constantly prepared to mitigate the fall consequence as much as [they] can, and a key part of this is maintaining the appropriate amount of slack and movement in the system. While belaying a leader on an overhang, the belayer might feel free to let the momentum of the counterweight lift [them] off the ground. This is the coveted “soft catch” that so many leaders seem to think is essential. 

But when a fall is more consequential—when it might result in ledge impact or a ground fall—an astute belayer may “fight” the fall, sometimes even taking in slack and bracing to increase the counterweight effect. 

It takes time and effort to learn this distinction, because every climb is a little different. One of the most important ways to learn lead belaying is to lead climb. An experienced leader will better understand the issues facing other lead climbers and will know what it feels like to have a belayer do [their] job perfectly.

LEAD BELAYING IN ACTION

DIRECT BELAYS

Direct belays connect the belay system directly to an anchor. As a result, the anchor must be fundamentally sound. That is to say, it has redundant construction, distributes loads intelligently to all the components, limits potential shock-loading if a single component were to fail, and is adequately strong. The anchor must easily sustain all the potential loads applied to it, plus a healthy margin of error. Its integrity should not be in question. Read more about anchors here or here.

Direct belays are the most prudent way to belay a second from the top of a rock or ice pitch where falls are likely and consequential. (That would include all fifth-class rock terrain and almost every ice climb at any grade.) They do not trap the belayer in a counterweight arrangement, allowing the belayer to manage the rope and multi-task. Because the belayer is attached to the anchor separately, the belayer can affect assistance techniques to help a climber move up if needed. Direct belays also put less force on an anchor than counterweight belays do (which shouldn’t matter, really, because the anchor should be bombproof). Lastly, they are particularly advantageous when belaying more than one person simultaneously. 

Whether the belayer is using a Munter hitch, an MBD, or an ABD in a direct belay, the fundamentals apply: The brake hand is always on the rope, hand transitions occur in the braking position, and the limbs are positioned in ways that are comfortable and sustainable. Direct belays should confer all of the climber’s weight to the anchor, so it is easy to imagine a few different hand positions that take advantage of the belayer’s natural strength.Lowering is a completely different story with direct belays. As articles in Accidents will attest, lowering will usually require the belayer to disable or reduce a device’s autoblocking or braking function. As a result, the belayer should redirect the rope through the anchor and use a friction hitch or backup belay whenever [they are] lowering from a direct belay. 

COMMON MISTAKES

FINAL THOUGHTS

As we can see, there are so many variables to belaying that it can be counterproductive to say there is only one “right” technique. The appropriate belay method for each pitch depends on the terrain, the style and difficulty of climbing, the relative experience and weight of the climber and belayer, and the tools available. The “right” technique is the one that’s appropriate for each context, as long as it adheres to the fundamental principles of keeping your brake hand on the rope, sliding your hand only when the rope is in the braking position, and positioning your hands and body according to their natural strength.

Keep exploring belaying by watching our Know the Ropes videos here or checking out this slideshow. If you teach belaying or just want to take a deep dive, see the AAC’s own Gold Standard curriculum.

Find more information on a variety of topics, including “Climber Communication,” by checking out our complete Know the Ropes collection.

Cleaning an Anchor in Single Pitch Climbing

Accident data in the United States clearly indicates that the routine task of anchor cleaning is clearly too routine for some of us, and not routine enough for others. The inescapable reality is that experienced and and inexperienced climbers, alike, are susceptible to mishap during this seemingly mundane process.

Every accident on record has a slew of contributing factors, to be sure, and it would be impossible to create best practices that could account for all possible contingencies. However, one common thread indicated by accident reporting and a review of instructional literature is that anchor-cleaning sequences, up to this point, have not necessarily been dictated by any unifying principles or concepts.

This article will attempt to reset the bar on that deficit, and align the reader with a set of value-based decision making tools that inform our recommendations for a generalizable best practice.  This article will start with the following assumption: the climbing team consists of a lead climber that has been lowered to the ground, through a redirected top-anchor, the anchor material needs to be retrieved, and the climbing team is operating in a single pitch context with a permanent fixed anchor. 

This context is common on any single pitch outing. The climber is toproping, when she arrives at the top of the pitch she will retrieve the anchoring tools.  

Often, the climber/cleaner also removes equipment from the climb, equipment that the initial leader left behind.

Certain values should govern the cleaning procedure every time it occurs, and each of these values can be used to analyze the effectiveness of any cleaning sequence.

Those values are as follows:

  • Changing safety systems, like going on and off belay or switching from being belayed to rappelling, opens up opportunities for error. It also takes time, requires communication and double checks. It is inherently more efficient and safer to use one safety system at all times.

  • It is valuable for the cleaner to be connected to the climbing rope, in some way, at all times. That way the rope cannot be dropped.

  • It is valuable to minimize the amount of equipment needed to clean an anchor. If minimal equipment is needed, equipment cannot be forgotten.

Most Generalizable Cleaning Sequence: Lowering off the Rings

The cleaning sequence that best applies the values listed above requires the cleaner to lower off an anchor's rappel rings or quick-links.  There are a few reasons this sequence is not more widely adopted.  First, the lowering sequence is misapplied and/or misunderstood.  Second, there is misplaced sense of stewardship that seeks to preserve anchor hardware. 

Many climbers erroneously believe that changing safety systems in unavoidable because they do not necessarily understand that a bight of rope can be pushed through rappel rings.  They might also misunderstand the different ways climbers can connect to an anchor.  Some connections between a climber and an anchor are critical, and they require strength and security.  Like a PAS, a personal tether, or anchoring with the climbing rope and a clove hitch.  These kinds of connections are both strong and secure. Combined with a locking carabiner, they are capable of holding over ten times the climbers body weight in some cases.

Second, many climbers misunderstand the actual impacts lowering off the rings make on communal fixed hardware. Lowering off rings, undoubtedly, wears rings out faster than rappelling.  But, it is important to remember that the rings are engineered for the purpose of lowering. They are designed to sustain the wear and tear of lowering, and then be replaced. Even if lowering resulted in drastic ring erosion, it is worth considering how a more efficient and safer lowering sequence may be worth it.  As accident data surrounding rappelling accumulates, it is worth considering that our friends and family members are more valuable than stainless steel rings, and the only real cost of keeping them safer is replacing rings more frequently.

Having asserted those two common misunderstandings, let’s look at a cleaning sequence that maintains one unremitting safety system (the belay), requires minimal equipment, and never detaches the climbing rope from the cleaner.

Step One: Fifi. Upon arriving at the anchor, the leader can Fifi in to any point in the anchor, but the master point is usually well positioned for this task. A Fifi is a common tool among aid climbers and the concept can be valuable in a cleaning sequence. The idea is to continue to rely on the belay for ultimate security.  Why relinquish it? But, the cleaner will want to connect to the anchor somehow so that the cleaning sequence can proceed more efficiently. So, taking a single quickdraw, any of the quickdraws cleaned off the climb for example, and connecting the belay loop to the master point, will allow the cleaner to work without maintaining a stance or a grip on the rock.  

cleaning a single pitch sport anchor

Any quickdraw cleaned off the pitch can serve as a "Fifi".

Connecting to the masterpoint with a "fifi" is not anchoring. It's just a place to sit for a minute. No need to say anything to suggest that the belayer should not continue to keep the climber safe.

Connecting to the masterpoint with a "fifi" is not anchoring. It's just a place to sit for a minute. No need to say anything to suggest that the belayer should not continue to keep the climber safe.

Step Two: Thread a Bight through the rap ring(s). The cleaner will then call for slack, enough slack to run a bight of rope through the rap ring(s).  Once the bight has been passed through the ring, a Figure 8 on a Bight should be tied.  

Most rap rings and quicklinks are big enough to pass a bight of rope through. The bight only needs to be big enough to tie a Figure-8-On-A-Bight. Note the hangers are thick rounded steel typically found at belay stations; do not pass rope through th…

Most rap rings and quicklinks are big enough to pass a bight of rope through. The bight only needs to be big enough to tie a Figure-8-On-A-Bight. Note the hangers are thick rounded steel typically found at belay stations; do not pass rope through the thinner, sharper edged hangers used on route.

Try to imagine the precision in this moment. The bight is now blocked against the rings. If anything were to go wrong, the climber is secured in a way, by that blocked knot. The belayer did not hear anything confusing or distracting like “Off Belay” or “In Direct” or any other command that could suggest that relinquishing the belay is the next step.

Step Three: Clip the Figure on a Bight to the belay loop with a locking carabiner or two non-locking carabiners (opposite and opposed). Once that bight knot is connected to the climber’s belay loop, the climber may call to the belayer for tension, or take. The belay will do so, and the climber’s body weight will now be counterweighted through the rings by the belayer.

cleaning a sport anchor; bight on a locker

In this moment, the climber is connected to the original tie-in, the bight-knot and locking carabiner, and the fifi. It's a good time to double check the system.

Try to imagine the precision of this moment. Even if the belayer somehow misunderstood his/her role in the cleaning sequence, the call to take gives the climber a chance to double check the entire system before initiating any other critical steps. The climber is essentially anchored at this point by the knot block, the bight clipped to the belay loop, and the original tie-in, which still has not been touched.

Step Four: Untie the original tie-in, clean the anchor, and lower. After double checking all the critical links in the system (the belayer, the bight knot, the locking carabiners, and the rope running through the rap rings) the climber can untie his/her original figure 8 follow through. That long tail can be pulled through the rings and allowed to dangle harmlessly behind the cleaner. The anchoring tools can all be removed from the bolts and stowed. The climber can announce that he/she is ready to lower, and allow the belayer to lower to the ground.

lowering from rap rings is safer than rappelling

When lowering, the tail from the original tie-in will dangle behind the bight knot.

The cleaner never relinquished the belay.  The cleaner was never untied from the rope, and therefore did not create an opportunity to drop it.  The cleaner only communicated three unambiguous commands to the belayer: “Slack,” “Take, ” and “Ready to Lower.” The cleaner did not need PAS or daisy chain or ATC or friction hitch or a half dozen carabiners to complete this sequence.  

Most anchor cleaning should happen in this way; it is the generalizable case.

Know the Ropes: Cleaning an Anchor


The Prescription — June 2023

This report will soon be published in ANAC, 2023. It is a dramatic story of a climber who narrowly avoided death. It is also a cautionary tale of a hazard that can strike even well-seasoned experts.

Rappel Anchor Failure

Wind River Range, Cirque of the Towers, Wolf's Head

The Cirque of the Towers is a popular alpine rock destination. It is home to two of the hallowed Fifty Classic Climbs of North America. One of those routes climbs the big rock tower on the right—Pingora. The other, the East Ridge of Wolfs Head, climbs the sunlit ridge of the formation to the left. 

Photo by Kylir Horton—Wikimedia Commons

On July 6, 2022, Alex Satonik (35) and Peter Haley (29) climbed the classic East Ridge of Wolf's Head (10 pitches, 5.6). The climb was uneventful. Satonik wrote to the ANAC that, “We arrived at the summit around 11 a.m. We had a brief rest and then started the standard descent route.

“The first two rappels were easy to find, and the cordage looked good on both. After some scrambling across the west face we found the next two sets of rappel anchors, again deeming the cordage to be in reasonable condition. After more sideways scrambling we arrived at the fifth rappel. I inspected the visible sections of the cordage on the anchor, two lengths of 5mm to 6mm cordalette. I yanked hard on the anchor. The cord held the pull and handled well. It did not show indications of severe sun damage. However, it was wedged into a crack and I could not see the back side of the material.

“I threaded the rope. After checking my ATC, I loaded the rope and sat back. Almost immediately, I was accelerating downward at 9.8m/s. Roughly halfway down, my feet impacted a small ledge, causing me to somersault. I landed on a ledge at the bottom of the rappel, mostly on my back and left side. I had fallen about 50 feet. 

“I immediately knew I was badly injured. I heard my partner calling out. I had an older Personal Locator Beacon (PLB) that didn't have two-way communication capability. My partner activated the beacon. He also called 911 via normal cell phone. SAR responded that their helicopter was already out on a rescue, but would refuel and be at our location in an hour. During the wait, I untangled myself from the rope and did a self-assessment. I had broken both legs, with an open fracture on the right. I had some painful spots on my back, and my right arm was weak. I had also broken my helmet into three pieces and had multiple facial lacerations.

“I did my best to communicate my injuries to my partner, who relayed them to the 911 dispatcher. Roughly an hour after calling in, we heard the helicopter. They located us quickly and landed down by a lake to rig a longline for a pick off. At this time a second party showed up at the failed rap station, where my partner was. The helicopter came and a rescuer dropped onto my ledge. The rescuer attempted to splint my legs with some foam supports and got a three-point seat harness under me. We clipped into the long line, and the helicopter lifted us off the mountain.  

“It was a short flight down to the flat landing area near the lake where the SAR team transferred me into a soft litter and loaded me in the back of the helicopter. Five minutes later, I was at the Pinedale clinic. A day and a half later I woke up in a hospital in Idaho Falls. All told, I had broken my tibia and fibula in both legs, my right arm, right thumb, two vertebrae, the orbital bone over my left eye, and the bridge of my nose. I ended up staying in the hospital just short of a month. The doctors were confident that I would be able to walk on my own by winter, although my ankle strength and mobility will be permanently affected.”

ANALYSIS

Satonik suffered simple bad luck when the rappel anchor failed. There are many rappel stations scattered in various locations on the Wolf’s Head descent. These and other soft rappel stations in the high country suffer from UV degradation and in this case, abrasion and cutting due to the expansion and contraction of anchor blocks. Climber Thomas Gilmore used the same descent two months later. He wrote ANAC, “The team that had the anchor failure, may or may not have been on the ‘standard’ anchor. But, as you can see from the image below, one of the ‘standard’ anchors, the regular stations are garbage too.” 

These old slings comprise either the third or fourth rappel anchor on Wolf’s Head. In a “pinch point,” anchor such as this (similar to Satonik’s failed anchor), the area of contact between large rocks provides security for a thread or sling. Over time, these anchors can become hazardous. Gilmore wrote ANAC, 'This was taken after that accident. Unfortunately, I forgot to grab a picture of the anchor that blew. The rappel route really needs some love.’"

Photo by Thomas Gilmore.

Satonik wrote the ANAC that, “I remember there were double aluminum rings on two pieces of 5mm or 6mm cord, one green and one orange. My suspicion is that on the backside of the block, the cord must have been damaged, likely from being run over an edge. But since the loop was wedged firmly into a crack, I couldn't slide it around to investigate the hidden material. But it is also on me that I choose to use that anchor as is. Based on the damage to my helmet and other facial trauma, I would have died had the helmet not been on my head.”

*Editor’s Note: It is prudent to bring and use extra cordelette to back up anchors. Bring a knife to cut and clean old weathered webbing. In 2022, there were three reported rappel accidents caused by aging slings/cords, causing three deaths. Satonik was fortunate to avoid being the fourth fatality. He wrote to ANAC that, “While falling, I definitely bounced off at least two ledges. That took out some of the kinetic energy out of the impact, compared to 50 feet of uninterrupted acceleration.”

In the image above and in Satonik’s description, aluminum rappel rings are seen or mentioned. These rings vary in manufacture and can range from very strong (25 Kn) to very weak (1.5 Kn). Beware rappel rings with visible wear, especially in the old rolled variety. These are recognized by a seam, running along the entire circumference of the ring. Best practice is to use a locking carabiner or a quicklink in place of the ring. At the minimum, back up the ring with a carabiner clipped through all the available slings. Please do not pilfer fixed carabiners. (Source: Alex Satonik.)


Join the Club—United We Climb.

Get Accidents Sent to You Annually

Partner-level members receive the Accidents in North American Climbing book every year. Detailing the most noteworthy climbing and skiing accidents each year, climbers, rangers, rescue professionals, and editors analyze what went wrong, so you can learn from others’ mistakes.

Rescue & Medical Expense Coverage

Climbing can be a risky pursuit, but one worth the price of admission. Partner-level members receive $7,500 in rescue services and $5,000 in emergency medical expense coverage. Looking for deeper coverage? Sign up for the Leader level and receive $300k in rescue services.


Shop the ANAC Collection


Sign Up for AAC Emails

10th Mountain Division to Memorialize AAC Member John McCown II

John McCown rappelling for a August 1942 photo shoot for Life Magazine. This image appeared in the Nov. 9, 1942 issue. Photos courtesy Private Collection of McCown Family.

On June 21st, 2023, the history of the US Army’s 10th Mountain Division and the legacy of the American Alpine Club will collide when the Division renames its Light Fighter School in honor of AAC member First Lieutenant John Andrew McCown II. 

The memorialization will recognize McCown’s service to his country in WWII. Not only did McCown instruct 10th Mountain Division troops in mountaineering and climbing tactics. He played a pivotal role in the unit’s signature action: a nighttime assault of Italy’s Riva Ridge that helped break Hitler’s Gothic Line and end the war in Europe.  

In honor of his impact, the 10th Mountain Division’s Light Fighter School will now be known as the 1LT John Andrew McCown II Light Fighter School building. 

***

Climber, former American Alpine Journal editor, and Alpinist co-founder Christian Beckwith was writing a history of Teton mountaineering when he discovered that Teton climbers of the 1930s played an integral role in the development of the 10th Mountain Division. As he continued his research in the AAC Library and Denver Public Library archives, he found that the unit known widely as “America’s ski troops” owe much of their inception and development to American climbers in general and the AAC in particular.

As he dug deeper, Beckwith discovered an incontrovertible link between the modern era of recreation in America—particularly the modern era of climbing—and the skills, equipment, and tactics that some of the best and the brightest mountaineers brought to the 10th Mountain Division. He also uncovered a deep connection between the AAC and the 10th Mountain Division—especially how the AAC helped develop the gear, tactics, and clothing the 10th Mountain Division would use in action—and that, as Army surplus after the war, would help fuel the birth of the outdoor recreation industry.

John Andrew McCown II in the Tetons in 1939. Photos courtesy Private Collection of McCown Family.

Recently, Beckwith began a book and podcast called Ninety-Pound Rucksack that tells the true story of John McCown, the 10th Mountain Division and the dawn of outdoor recreation in America, all from the perspective of climbers. He also began serving as an advisor to the current 10th Mountain Division, helping them reconnect with their historic mission. 

Following a keynote presentation on the Division’s base in February, he proposed recognizing the service of John McCown with a memorialization. Next month, the 10th Mountain Division will proceed by renaming its Light Fighter School in McCown’s honor.

At the same time, the Division will recognize Beckwith’s contributions by inducting him into its Mountain Warrior Legends Hall of Fame.

Below, you can read a bit about McCown’s story and the impact he had on the 10th’s actions in Italy. 

***

Christian Beckwith summarizes McCown’s story as follows:

“A Wharton School graduate who dropped out of the University of Virginia School of Law after Pearl Harbor to enlist in the Division, McCown’s mountaineering skills, devilish sense of humor and contempt for Army red tape endeared him to officers and soldiers alike as he rose through the ranks. At both Camp Hale and as lead instructor at West Virginia’s Seneca Assault Climbing School, he trained thousands of soldiers in the dark art of alpine warfare—skills he put to use in breaking the Gothic Line, a series of German-held ridges and summits in Italy’s Apennine Mountains.

John Andrew McCown II, in the Tetons in 1939. Photos courtesy Private Collection of McCown Family.

Key to doing so was Riva Ridge, an escarpment so precipitous the Germans barely defended it—they considered it impossible for a company of soldiers to climb. They hadn’t bargained for the profanity-laced tenacity of the bow-legged McCown, who reconnoitered the hardest route to its summit, then led his C Company up the route under cover of darkness in the dead of winter to take the ridge without a casualty. It was a magnificent action, one that marked the beginning of the end of Germany’s occupation of Italy—but McCown never got to enjoy the victory. He was riddled by machine gun fire while foiling a counter attack the next day.

“It is a profound honor to illuminate McCown’s sacrifice and service,” says Beckwith, “and to contribute, in however small a way, to the country he died to defend.”

McCown’s obituary in the 1946 AAJ highlights the climbing background  that contributed to the 10th Mountain Division success:

“John McCown was elected to the American Alpine Club in 1940, on the basis of four seasons of climbing, much of it in the Teton area, including four ascents of Grand Teton by various routes. In 1941 he visited the Coast Range of B. C., back-packing through the Homathko Valley to Scimitar Glacier. Had he emerged from the war, his qualities of leadership would undoubtedly have secured him a notable position in expeditionary mountaineering.”

***

McCown is the central protagonist of “Ninety-Pound Rucksack.” Dive into all the details of the 10th Mountain Division—and their untold climbing history—with Beckwith’s podcast.


Looking for a brief overview of the historic connection between the 10th Mountain Division and climbing? Check out this interview with Christian Beckwith on the AAC Podcast!


We would like to extend a special thank you to Christian Beckwith and the AAC Library for their extensive research and resources that led to this historic memorialization.

Know the Ropes: Safer 4th Class

Know the Ropes: Safer 4th Class

Each year we see many accidents that very likely could have been prevented or mitigated by the use of a rope in easy terrain, including unroped falls on technical alpine ridges (often caused by loose rock), approach and de- scent accidents due to rockfall or small slips, and scrambling accidents in terrain deemed “too easy for a rope.” This article seeks to make climbers aware of alternatives to soloing (scrambling) that use the equipment they’re likely carrying anyway and incur little or no time cost.

The Prescription — April 2023

This month we have an unusual rappel accident. While this story has a happy ending, we cannot be absolutely certain of the accident’s cause. However, one theory seems to check all the boxes. For more details, read on.

Rappel Failure | Rope Became Unclipped from Anchor

Utah, Provo, Rock Canyon

The Kitchen in Rock Canyon with rappel/belay anchor circled in red. This was where the accident happened last September. Photo by John Ross.

On September 3, 2022, Kyra Harames (female, 24) was climbing with a group of friends at The Kitchen in Rock Canyon. After setting up a top-rope, she fell to the ground while rappelling from the two-bolt anchor.

Harames reported to ANAC, “I remember everything leading up to my actual fall, and the rest of the details my friends filled in. At about 8 a.m., I successfully led Panic City (5.11a). After I set up that route with a top-rope, a couple of my friends started climbing it. I then hiked to the top to set up another route called Left Corner (5.9). I clipped in my daisy chain as a safety with a locking carabiner. I set up the top-rope using two wiregate quickdraws on the same bolt. I put both strands of rope through my belay device to rappel and used a locking carabiner. I checked the rappel and put my weight on the belay device/rope before taking off my safety. Everything seemed good, so I proceeded to rappel. The last thing I remember is lowering myself a couple of feet, and that is when I fell.

“The rope came out of the quickdraws, and I fell about 35 feet. My friends said when I hit the ground, they could hear the air leave my lungs. I briefly landed on my feet at an angle, and then landed on my back. One of my friends called 911. Shortly after that, I lost consciousness. A nearby climber came over and couldn't find a pulse. My close friend Alivia did CPR and less than a minute later, I regained consciousness. The ambulance came really quick. A friend ran down to make sure the gate was open for the ambulance and it was able to drive up all the way to me.

“I have a very vague memory of being in the ambulance. I didn't know what had happened, but I had a dream that I was climbing. My first solid post-fall memory was when I woke up in the trauma room. I had no idea what had happened. The nurses filled me in. I got stitches in my foot and elbow, as well as staples in my head. I had a compression fracture on my T11 [vertebra], a mild concussion, bruised ribs, and a fractured talus bone in my ankle. I stayed for a day and a half for monitoring and pain control. The reason I went into cardiac arrest after my fall is believed to be caused by a phenomenon called commotio cordis. This is when an impact to the chest occurs during a short vulnerable window in the cardiac electrical cycle. 

“A week later, I received surgery to repair my talus and they put two screws in my ankle. I took a leave of absence from medical school to recover from my concussion and other injuries. 

“Currently, I have made a full recovery physically and mentally. I have caught up on medical school and have started to climb again. So far, I have only top-roped in indoor gyms, but hope to go back to climbing outside. I am thankful for my friends and family for helping me through my recovery and everything I learned from my experience. It truly was a miracle.” 

ANALYSIS

Two strands of rope were running through Harames’ belay device, which was attached to her harness with a locking carabiner. The entire rope was on the ground after the fall occurred. The quickdraws were still attached to the anchor. 

Harames writes, “Looking back on it, my friends and I have tried to figure out why the rope came out of the quickdraws. It is possible that they were facing the same way, which may have contributed to the rope unclipping itself as I rappelled. I believe this could've been prevented using locking carabiners.” 

In principle, Harames did the right thing by using two draws at a bolt belay. However, she made a fundamental error in using only one of the available bolts. Sport belay stations almost always have a minimum of two bolts. Always incorporate both in any anchor system.

Why did Harames not do so? One clue might lie in the positioning of the belay bolts and the style of hanger used. The bolts here are on either side of a small arete, positioned in such a way as to allow top-roping on both Left Corner and Mark’s Corner (5.7) to the right. Harames later wrote, “I don't remember why I clipped the rope to only one bolt, I might not have seen the other bolt around the corner a little bit.” 

The waist level belay bolts for Left Corner and Mark’s Corner have horizontal hangers with welded steel rings. Photo by John Ross.

Setting up a top-rope with the rope through at least one locking carabiner is always a good idea. (Many climbers always carry an “anchor draw” constructed with locking carabiners for exactly this purpose.) If you don’t have a locker, it’s important to oppose the gates on the carabiners through which the rope is running. 

It is extremely unlikely that simply leaning back on two anchor quickdraws would cause them to come unclipped. If this were so, any link in the belay chain using a rope clipped to a carabiner—a quickdraw on a run-out sport route for instance—would be suspect. Nonetheless, the best practice is to oppose the carabiners, because there are scenarios where for the rope could unclip—see the photos for an example.

Another factor that comes into play is the height of the anchor. When one stands atop Left Corner, the anchor bolts are at waist level. This height might have contributed to this very unlikely accident. As one pulls up the slack on an ATC-style rappel device, it is possible that the tightening loop of rope can wrap around the carabiner gates—see the video. This is made more possible if the quickdraws lie parallel to the rock surface and incorporate both stiff sling material and pronounced bent gates on the lower, rope-bearing carabiner (typical in most modern high-performance draws).

Patrick Begley wrote on mountainproject.com that if two draws on bolted anchors were oriented in parallel rather than gates opposite, “complete detachment of the rope is certainly possible, especially if the climber was firmly gripping the draws in preparation to weight the rappel.” Begley is an aerospace engineer, an AMGA Single Pitch Instructor, and Apprentice Rock Guide. Photo by Patrick Begley.

While unlikely, this scenario is possible when stiff, captive lower carabiner quickdraws are both clipped to a single point. Begley wrote, “It was quite difficult to replicate.” Photo by Patrick Begley.

Video Analysis

If a picture is worth 1,000 words, then a video is worth 10,000. Here, Begley demonstrates this unusual scenario. Video by Patrick Begley.

TAKEAWAYS

  1. Always incorporate two or more bolts into any anchor system.

  2. Weight test the rappel anchor. Put your weight on the belay/rappel device and rope before you unclip your PAS or other backup. Though Harames did this, it’s possible she did it while holding the draws in the manner depicted in Begley’s photos.

  3. Consider using locking carabiners and a cordelette or long sling. AlpineSavvy climbing guide John Godino’s website has some good resources on cordelettes and clipping the horizontal-style ring hanger as found on Left Corner.

  4. Oppose the carabiners, especially if you’re not using lockers.

(Sources: Kyra Harames, John Ross, Patrick Begley.)


Join the Club—United We Climb.

Get Accidents Sent to You Annually

Partner-level members receive the Accidents in North American Climbing book every year. Detailing the most noteworthy climbing and skiing accidents each year, climbers, rangers, rescue professionals, and editors analyze what went wrong, so you can learn from others’ mistakes.

Rescue & Medical Expense Coverage

Climbing can be a risky pursuit, but one worth the price of admission. Partner-level members receive $7,500 in rescue services and $5,000 in emergency medical expense coverage. Looking for deeper coverage? Sign up for Leader-level and receive $300k in rescue services.


Shop the ANAC Collection


Sign Up for AAC Emails


The Prescription — March 2023

This month we have a dramatic story that speaks to the strengths of our outdoor community. When Will Toor, the executive director of the Colorado Energy Office, and his wife, Mariella Colvin, a philosophy teacher at the University of Colorado, took a tumble, fellow climbers and hikers came to their aid.

We also cover a remarkable free solo incident below.

Fall on Snow | Climbing Unroped

Colorado, Rocky Mountain National Park, Flattop Mountain

A National Guard helicopter swoops in to evacuate Will Toor. He recalled, “It was raining and windy. This was super-skilled flying, and the helicopter took some real risks to save me.” Photo by Markian Feduschak.

On July 10, 2022, Will Toor (60) and his wife, Mariella Colvin (59), fell down the East Couloir (II, AI2 or 65°snow) on the north face of Flattop Mountain. At the top, a cornice collapsed, causing Toor to fall. The dislodged debris struck Colvin and they both tumbled 900 feet. Colvin left her immobilized husband to try to get help, bushwhacking nearly two miles despite having suffered broken ribs, a broken sternum, a broken wrist, and three fractured vertebrae. While she was gone, two climbers on an adjacent peak came over to assist Toor and summoned a National Park Service rescue. Toor was helicoptered out with a broken femur. Colvin was evacuated the next day.

Toor recalls: “Mariella and I arrived at the couloirs around 11:30 a.m. and spent some time examining conditions. We planned to climb the 1,200-foot-long East Couloir. The cornices at the top had not fully melted out, but there was a portion in the middle with a reasonable looking exit—maybe 80 feet of very steep snow, before turning almost vertical for ten feet. 

Mariella Colvin climbing in couloir prior to the accident. Photo by Will Toor.

“It was a warm day, and because of the timed entry permit, we did not get an early start. But the couloir had been in shade down low, and the snow was good for kicking steps. I was maybe ten feet ahead of Mariella most of the time. We wore helmets and crampons. We had packs with some warm clothing. We did not bring a rope or pickets (to keep our packs lighter). We did not have satellite devices, only cellphones.

“We traversed the lower sections of the couloir but largely went straight up as it steepened. Just below the top, we stopped on a ledge and got out our second tools. We talked about traversing left to a lower-angle exit, but I felt more comfortable facing straight in, with a tool in each hand (for three points of contact), versus traversing. We started up again, and I was still able to kick very secure steps and get secure axe placements. Right around 1:30 p.m. I made the final move to the flat snow on top.”

At this point, the snow collapsed. Toor’s memory of the moment is hazy: “I remember starting to fall and being totally confused how it was happening. I was done with the climb! Our theory is, the old cornice fracture line, a few feet back from the edge, collapsed.”

Colvin recalls, “I was knocked over backwards. I lost both ice axes. I slid until I found myself rolling, which eventually turned into somersaulting, sliding, and tumbling. I was aware enough to see some rocks in the snow as I hit the lower-angled section and did my best to miss them. I dragged my crampons to come to a stop near the bottom and amazingly didn’t break my ankles.”

Meanwhile, Toor recalls “hearing Mariella scream and trying to self-arrest. I remember tumbling out of control and having a fleeting sense that this was the end. Mariella also remembers feeling we were probably going to die.”

 “I was aware of Will sliding behind me,” Colvin recounts. “When we finally stopped, I could skootch sideways to him. Will thought his femur was broken. I knew my upper body had significant trauma, but my legs were fine. Will kept asking, ‘Where are we, what happened?,’ which made me worry about a concussion. I tested my mental state by asking myself easy arithmetic questions and did okay. I yelled for help but got no response. I realized I would have to get help, so I gave Will my warm clothes and food and set off with nothing but a windbreaker.”

Markian Feduschak, right, and Riley Gaines. Both work at the Walking Mountains Science Center in Colorado, as president and community science and hiking coordinator, respectively. Photo by Riley Gaines.

Toor recounts, “At 3:30 p.m., two climbers (Markian Feduschak and Riley Gaines) arrived. They had been climbing on Notchtop and had heard our calls. Seeing them walk toward me was one of the best sights of my life. They immediately took off their own puffies and put them on me. They were able to text with the Park Service on a Garmin InReach. They were calm and competent.

“Unfortunately, I was still cold because I was lying on the snow. Then, another party of three climbers appeared. They used my crampons to dig a trench, then lined it with packs, and dragged me into a sitting position. We got contact back from the Park Service confirming Mariella was with folks tending to her, which helped me relax. At that point, I hadn’t realized that she had serious injuries beyond a broken wrist.”

Colvin, unaware that aid had arrived for Toor, had “headed straight down over snow and rock slabs, avoiding cliffs and talus fields. I did stumble across one of the most beautiful places I’ve ever seen—with a waterfall, green meadow, wildflowers, and butterflies. I debated lying down to nap right there, but knew I had to keep going. I found that focusing on identifying wildflowers kept my mind in the here and now.

Colvin and Toor in the hospital. Toor says, “The whole experience really makes me see the good in people.” Photo by Will Toor.

“Finally, I reached Odessa Lake. This was a good place to yell for help, as my voice would carry across the water. I heard helicopters circling, and I felt sure they were going to Will and was really relieved. That gave me permission to lie down and rest, but within a few minutes I saw a man and his son. He sent his son in search of help and helped me on the rough trail around the lake to a campsite.

“A couple camping there had two tents. She set me up in a sleeping bag and air mattress. Someone else had a Garmin device and contacted the Park Service.”  

Meanwhile, still at the bottom of the East Couloir, Toor, Feduschak, and Gaines awaited more help. Toor recounts, “Around 6:30 p.m. we saw three yellow raincoats—the Park Service hasty team. They had warm blankets and painkillers. The adrenaline was wearing off, and the pain was setting in, so this was very welcome. Eventually, a big National Guard helicopter appeared. Just before 8 p.m. they dropped a litter and an attendant.”

Meanwhile, because of bad weather and impending darkness, Colvin had to stay at the hikers’ campsite overnight. “Two medics hiked in and spent the night with me, monitoring vital signs and administering painkillers,” she said. “They initially thought I would be able to walk out, but it became clear I would need an evacuation. So, the next morning two teams of rescuers transported me to a clearing to be picked up by a helicopter.”

Analysis

Toor and Colvin are very experienced, having climbed since the 1980s in the Tetons, Colorado, and the Canadian Rockies. One can argue in favor of the use of ropes and intermediate protection on snow climbs, but given the pair’s competence, such precaution might have only slowed them down, exposing them to even softer snow conditions.

The team’s late start due to the national park’s timed entry played an important role. Toor wrote that as they started up the couloir, “We were a bit concerned about the temperature.” While RMNP’s timed-entry system can be a challenge, it also reinforces best practices by encouraging an early arrival at the trailhead. A 5 a.m. start might well have prevented this accident.

Alpine climbing is full of unforeseen hazards. In line with Toor and Colvin’s cornice fracture theory, Park officials also suspect the cornice hadn’t melted out completely, contributing to its collapse.

Toor says, “SO MANY people put themselves out to save us, in little ways and in big ways, with skill, enormous effort, discomfort (the climbers with me had to jog to stay warm because I had their warm clothes, and that couple gave up their tent and sleeping bag for Mariella), and real risk (the helicopter team). I just can’t thank everyone enough. I am buying a Garmin InReach for us and one for my son Nicky.

(Sources: Will Toor, Mariella Colvin, Rocky Mountain National Park.)


Free Solo Rescue on El Cajon Mountain

Is this picture familiar? El Cajon Mountain, the site of a December free solo accident, was the location of a February rescue of a free soloist. Both incidents took place on Leonids (3 pitches, 5.9). The route is to the left of the prominent black roof and dihedral. Photo by Michael Sandler.

In December, we reported a tragic free solo accident in Southern California. It was the third free solo accident in Souther California during 2022.

Last month, a rescue of a stranded free soloist took place on the same crag. Incredibly, the latest incident, involving yet another unroped climber, unfolded on the exact same route!

Climbers, being passionate and opinionated, thrive on conjecture, estimations, and in some cases—judgment. Here, at Accidents in North American Climbing, we avoid emotional opinions. We report events and provide analysis of the facts. Our job is to educate by describing accidents and asking what went wrong. Because of that, we seldom do in-depth reporting of free solo accidents, as that style is a personal choice and there is usually scant helpful analysis to be made after the fact.

So, read on and make your own assessment here on the Mountain Project forum.


Join the Club—United We Climb.

Get Accidents Sent to You Annually

Partner-level members receive the Accidents in North American Climbing book every year. Detailing the most noteworthy climbing and skiing accidents each year, climbers, rangers, rescue professionals, and editors analyze what went wrong, so you can learn from others’ mistakes.

Rescue & Medical Expense Coverage

Climbing can be a risky pursuit, but one worth the price of admission. Partner-level members receive $7,500 in rescue services and $5,000 in emergency medical expense coverage. Looking for deeper coverage? Sign up for Leader-level and receive $300k in rescue services.


Shop the ANAC Collection


Sign Up for AAC Emails

The Prescription — February 2023

The following story describes a top-rope solo accident from 2021. The report arrived too late to include in the 2022 Accidents book. Unfortunately, this type of mishap has become more common as many choose the efficiency of partner-free ascent for much of their outdoor climbing.

Device Disengaged from Rope

Snowshed Wall, Donner Summit, California

Snowshed Wall. A rappelling climber is visible near the same place that Dozier fell. PC: Ryan Dozier

On June 7, 2021, Ryan Dozier (37) was top-rope soloing at Snowshed Wall at Donner Summit, near Lake Tahoe. Near the top, he fell, plummeting 50 feet before his system caught his fall. Ryan picks up the story from here.

On that day, “I completed four different climbs using a rig that I have frequently used over the past 10 years. I usually fix two strands of a dynamic rope at the anchor. I attach a Petzl Micro Traxion to one strand and weight it at the bottom. I use a Trango Cinch assisted-braking device on the other, unweighted strand. I attach both devices to my harness belay loop via locking carabiners. 

Dozier’s ropes on Crack Of The Eighties. He top-roped the route with one hang a year after his accident. PC: Ryan Dozier

“By early afternoon, most people had left the crag due to the breezy conditions. I moved my ropes to the anchor of Crack of the Eighties (5.13a) and weighted one line at the bottom with a rope bag stuffed with the remainder of the strand. This was a difficult route I had climbed many times over the years. I decided to modify my soloing setup by only using the one strand of rope and the Micro Traxion. I decided to do this because it was windy and I was worried my unweighted rappel strand would get blown around the corner. I also did not want to pull slack through the Cinch. This was also my last climb, and I wanted to get it done and head home. This was the first time I have ever soloed with just one device. 

“I fell three times on the first three quarters of the route, and the device engaged each time. Several feet below the anchor, I was in a difficult layback with high feet and I remember looking down at the Micro Traxion and thinking something seemed off. The device and carabiner were a little twisted, and I took one hand off the rock to straighten it out. 

Dozier being treated in the same ER where he formerly worked. PC: Ryan Dozier

“Before I could touch [the device], a foot popped and I began a 50-foot free fall, acutely aware that the cam was not biting the rope. In an attempt to slow myself down, I grabbed the rope with both hands and sustained deep rope burns to eight fingers and both palms. This action probably kept me upright. While the route is vertical to slightly overhanging and mostly devoid of features, my left foot impacted a protrusion just before I hit the ground. This impact caused my torso to crunch, and when this happened, the Micro Traxion miraculously engaged on the rope and arrested my fall. My feet were three feet above the ground. I was not wearing a helmet.

“Two friends happened to be nearby and witnessed the fall. I’m an ER trauma nurse and former EMT. This background was invaluable in rapidly assessing injury and determining the safest plan of action. I immediately put my leather belay gloves on my damaged hands so that I could use them. I checked my head, neck, chest, and other extremities for pain. Finding none, I knew my main injury was my left ankle dislocation. I had no feeling in the foot and knew that I couldn’t waste time. I used a prusik to unweight the Micro Traxion, lowered to the ground on a Grigri, and immediately retrieved painkillers from my first-aid kit. Calling 911 was discussed and we decided to self-rescue rather than wait for EMS. My fixed line helped me lower down the short but steep approach trail, and my two friends helped me hop across the creek and reach the road. They drove me to the ER, where my leg was realigned. I underwent surgery about a week later. My left foot had sustained a sub-talar dislocation and fractures to four different bones. I have since returned to rock climbing at nearly the level I had been, thanks to a copious amount of physical and mental therapy.”

ANALYSIS

“I can’t find any recorded accounts of this type of accident, but I have heard that it has happened before. It is common at climbing areas around the world to use a single Micro Traxion for toprope soloing.* This is an ‘off-label’ use of the device. There are no documented reports of its failure to engage during dynamic loading, although I have heard some campfire talk about it happening. I believe that while climbing, the device was squeezed in my lap in just the right way to lock the device open. It then re-engaged when my foot slammed into the cliff.

“The Micro Traxion had no visible damage. The rope had no apparent damage. I’ve had many conversations with friends in rope access and SAR. The best we can figure is that, besides causing my torso to crunch and re-engage the Micro Traxion, the impact of my foot caused me to slow down enough to minimize the impact on the rope. A more dynamic load onto a toothed cam would likely have core shot, if not severed, the line. 

“I made choices that day to modify my time-tested solo rig for many reasons—the Micro Traxion had never failed to engage in the past, it was windy, I was anxious to go home, and I didn’t want to have to pull slack through the backup device. None of those were good reasons, but at the time I convinced myself they were. If I had not remained upright, I would have certainly sustained a head injury. There is no good reason not to wear a helmet. If my foot had not hit the rare protrusion on this section of the cliff, I would have had a ground fall and been gravely injured or killed. In a redundant rigging system, this accident would likely not have happened.” (Source: Ryan Dozier.)

*Editor’s Note: Most climbers (the ANAC editor included) use a variety of top-rope solo systems that incorporate elastic cord, surgical tubing, or even a headlamp strap to keep the primary device upright and taut. This maintains the device’s orientation in some configurations, and keeps it separated from a backup device.


Join the Club—United We Climb.

Get Accidents Sent to You Annually

Partner-level members receive the Accidents in North American Climbing book every year. Detailing the most noteworthy climbing and skiing accidents each year, climbers, rangers, rescue professionals, and editors analyze what went wrong, so you can learn from others’ mistakes.

Rescue & Medical Expense Coverage

Climbing can be a risky pursuit, but one worth the price of admission. Partner-level members receive $7,500 in rescue services and $5,000 in emergency medical expense coverage. Looking for deeper coverage? Sign up for the Leader level and receive $300k in rescue services.


More Analysis Of Top-Rope Device Malfunction

Big-wall climber and climbing instructor Yann Camus’ rope grab video provides some in-depth analysis of top-rope solo devices. The bottom line: Use a backup!

In another video, Camus examines more devices used by top-rope soloists. Along the way, he debunks some myths.

Different Devices, Similar Outcomes

Top-rope solo mishaps seem to be on the rise. From 2019 through 2021, four accidents involving other “off label” uses of devices on single ropes were reported in Accidents in North American Climbing. Two are below. 

Montezuma, Colorado

On the morning of September 19, 2021, Craig Faulhaber (41) fell to the ground while top-rope soloing Burning Down the Haus (5.13d). Faulhaber, a climber with 12 years of experience, set up his system using a single strand of 9.5mm dynamic rope. He fixed the rope and descended using a Petzl Grigri. For a self-belay, he switched to a Petzl Shunt attached to his harness’ belay loop with a locking, anti-cross-loading carabiner…

Vedauwoo, Wyoming

On August 20, 2019, a 26-year-old male drove to Vedauwoo, Wyoming for some after-work top-rope soloing. He set up a fixed line on To the Moon (5.10b/V0), a 35-foot crack with a bolted anchor. He used a Kong Duck mini-ascender with a paracord sling around his neck to keep the device high, prevent it from weighting the rope dynamically, and to keep it separate from a backup Petzl Micro Traxion…


ANAC Translations

As we announced last month, the 2022 Accidents in North American Climbing has been translated into Chinese. Earlier, a crew of volunteers translated the 2020 Accidents in North American Climbing into Spanish. Click the links below for more information and download the PDFs.


Shop the ANAC Collection


Sign up for AAC emails


The Prescription — Auto Belay Accident—January 2023

The following report will appear in the 2023 edition of Accidents in North American Climbing. You can purchase the 2022 book and many previous editions through the AAC Store.

*A previous version of this Prescription used a photo from the Spot Gyms, however, the accident DID NOT occur at any of the Spot gyms, it occurred in a gym in NC. There has never been an accident of this kind at the Spot gyms.*

Failure To Clip Into Auto Belay

Asheville, North Carolina

This month we have an indoor gym accident of a type that sadly occurs with some frequency. This accident has a happy ending and a powerful lesson.

On December 14, 2022, Adam Herzog (43) miraculously survived a fall in which he suffered severe injuries after failing to clip into an auto belay in a climbing gym. Upon finishing the climb, he simply let go, and fell 45 feet to the ground. “I feel very lucky to be alive and not paralyzed,” said Herzog.

In Herzog’s own words:

“The fall resulted in a skull fracture, bilateral pulmonary contusions, three spinal fractures, right proximal radius fracture, left distal radius fracture, right pilon fracture (ankle shattered), left fibula fracture and a severe concussion.” His recovery is ongoing, “I was in the ICU on a ventilator for two days, and in the hospital for 15 days. I am expected to make a pretty full recovery. The pilon fracture may have some long-term effects and I lost some extension in the right arm.”

His post-accident recollections:  

“I awoke in a fog of drugs. A tube was jammed down my throat. A ventilator forced air into my chest unnaturally with positive pressure. The next day I woke up extubated. My wife was there as always, helping me through another crash. But this one felt bigger than the others.  

Adam rappelling before his accident. PC: Zach Frayser

“The next fifteen days I lay on the slick mattress of a hospital bed, intermittently conscious, asleep, exhausted, confused, and occasionally keenly aware that I had a long recovery ahead. I spent the next several weeks mulling over the events of December 14th. ‘How could I be so stupid?’ I wondered again and again. I beat myself up, apologized to my friends, family, and the staff at the climbing gym. I could not believe I would climb to the top of a route without clipping in. It seemed impossible.

“My friends reassured me. ‘It was an accident, man. It happens.’ A surprising number of people had similar stories of friends who took big falls on auto belays. I googled it and found a number of gym related accident reports.”

Analysis

Herzog writes, “I’ve been a paramedic for 22 years and a nurse for 14. In the medical field we refer to the ‘Swiss Cheese Model’ of medical errors. All the holes line up and boom, somebody dies. My accident was a perfect storm of mistakes that coincided with catastrophic results. They are listed here in the interest of preventing other climbers from falling into the same trap:

1. Hubris: I am not an expert climber. But I am an elite whitewater kayaker. I have been padding for over thirty years. The morning of my fall I paddled the Green River at high water. Once off the Green, I thought my risk exposure was over for the day. I didn’t treat the gym with the same respect I brought to the river. I should have.

2. Heuristics: Heuristics are mental shortcuts. They help us navigate our daily lives and can be useful or harmful. In my mind, “outside = dangerous, inside = safe.” When I climbed outdoors, I neurotically practiced setting up belays, cleaning routes, and rappelling before heading out. But I saw the gym as contrived, manufactured, and fake. A fifty-foot wall is a fifty-foot wall. It doesn’t matter if there are four walls and a ceiling around it. 

3. Inattention: I don’t bring my phone to the climbing wall so that I am not distracted. But the day I fell, I was preparing for a paramedic recertification exam. I studied a book between routes. I wonder if that distraction contributed to my fall.

4. Deviation: I have a system I usually stick to religiously. I climb a route, unclip, walk away, and take 5-10 minutes to rest before I approach the wall again. Before I fell, I climbed halfway up a route and dropped back down to the ground. I unclipped but instead of walking away, I immediately got back on the wall. The small deviation from my normal routine removed the visual cues that usually lead to me clipping into my harness. I am 6’4” so when standing right next to the wall, my line of sight is well above the gate.

5. Redundancy: I was climbing alone so there was no one to double check my system. In top rope and lead belay we constantly check each other’s knots. But on the auto belay it’s up to the climber to double check his or her system. In my haste I neglected to check anything.

6. Focus: The route I was on was a white (marked) 5.10. That grade is the upper limit of what I climb. Because I was at the edge of my ability, I was ultra-focused on the route and holds. That is why I didn’t notice the rope was not retracting as I climbed. Had I been on an easier route I suspect I would have been more attentive.

Let’s wish Adam Herzog a swift recovery. PC: John Parmenter

“These six factors led to my fall. I sit in a wheelchair typing this up, grateful I will only have to live in it for a couple of months. I hope that by writing this, I may prevent future incidents.

“Auto belay devices almost never fail. But people do. As long as humans are involved, mistakes happen. Are there steps gyms could take to prevent other terrible falls? Maybe, but ultimately it is the climber’s responsibility to climb safely. The gym can provide measures to mitigate risk, but we must engage those measures, and know that if we work around them, there is nothing between us and the gym floor.”


Join the Club—United We Climb.

Get Accidents Sent to You Annually

Partner-level members receive the Accidents in North American Climbing book every year. Detailing the most noteworthy climbing and skiing accidents each year. Climbers, rangers, rescue professionals, and editors analyze what went wrong, so you can learn from others’ mistakes.

Rescue & Medical Expense Coverage

Climbing can be a risky pursuit, but one worth the price of admission. Partner-level members receive $7,500 in rescue services and $5,000 in emergency medical expense and coverage. Looking for deeper coverage? Sign up for Leader-level and receive $300k in rescue services.


From The Editor

Happy New Year! I’m still in Spain, clipping bolts and enjoying the good things that this country has to offer. Chulilla attracts climbers of all levels to its world-class limestone walls and is especially busy during the Christmas and New Year holiday season.

This crag dates back to the 1990s, and as such, should be reasonably clear of loose rock. However, a few days ago, a climber dislodged a baseball-sized stone while we were at the crag. It landed amid a cluster of belayers and onlookers. No one was struck, but the next day, one of my partners took the warning to heart and showed up wearing a helmet for belaying. Last night, a different partner was stuck by a small rock, apparently dislodged by a flock of birds perched on a ledge. An informal count at the crag revealed that about fifty percent of climbers were wearing a helmet.

To wear a helmet is a personal choice. When I started climbing, virtually no one owned, much less wore, a climbing helmet. Helmet wearing was considered by many as unnecessary. These days, I wear helmets while adventure climbing and now bring them to the sport crag. It’s a hard-earned lesson, as over the decades, I’ve had several head-related climbing accidents—one in which I was struck on my helmet-less head by falling ice, two in which I fell and my helmet probably saved my life, and one in which I was struck by falling rock that narrowly missed my head. These accidents took place on ice, alpine, or big wall climbs. — Pete Takeda

For an in-depth and humorous take on helmet technology from our friends @HardIsEasy, see below.

Accidents in North American Climbing to be Translated to Chinese

The cover 2022 Accidents in North American Climbing.

Several leading Chinese climbers from Beijing Xiangpan Outdoor Sports, are planning to translate the 2022 Accidents in North American Climbing. According to Chinese climber Zhou Peng, “All our work is done out of passion and voluntariness, without remuneration, and free of charge for climbers.”

About ANAC

This educational book has been published annually by the American Alpine Club for 75 years. The mission has always been the same: publish stories and analysis of climbing accidents so that other climbers can learn about the causes of accidents and avoid similar problems in the future. All of the stories and photos in the publication are donated by climbers, rescuers, and park rangers who share the same goals.

This publication documents accidents in the United States, Canada, and Mexico, and some of the problems described here are unique to those locations. However, in the large majority of cases, these lessons will be useful to rock climbers and mountaineers in China or anywhere else in the world. With this in mind, we are very happy to see this translation of the 2022 edition of the Accidents in North American Climbing book, and we hope that Chinese students and climbers will learn a lot from these stories.

Dougald MacDonald, Executive Editor, American Alpine Club 


Shop the ANAC Collection


The Prescription—Free Solo Fall— December 2022

The following report will appear in the 2023 edition of Accidents in North American Climbing. You can purchase the 2022 book and many previous editions through the AAC Store.

Free Solo Fall

Southern California, El Cajon Mountain, The Wedge

El Cajon Mountain, seen here, was scene of a recent free solo fatality. The route in question is Leonids, which climbs the face to the left of the angling dihedral and the sun-shade line. Photo: Michael Sandler

On December 4, Nathaniel Masahi Takatsuno (22) fell to his death while free soloing Leonids, a three-pitch 5.9 on The Wedge at El Cajon Mountain an hour east of San Diego.

Climber Michael Sandler witnessed the accident. In his report to Accidents, he wrote:

“As we were waiting (at the base), a single man walked by. I asked what his name was and we made some small talk. His name was Nate (Takatsuno), and he was a lab tech at University of California San Diego. He was alone but had a rope, so I asked him what route he was planning to do. He told me he wanted to solo Meteor—I asked if he was going to rope solo. He said no but was planning to carry up the rope in a pack and use it to rappel. I asked if he just didn't have any friends who wanted to climb, and he said that he did, but that he liked soloing. We observed that he was not planning to wear a helmet.

“At this point he started up the crag. He seemed gripped on even the third bolt—he was on the nearby Leonids (5.9) and not his intended route, Meteor (5.8). However, he made it up past the tricky start and kept heading up. As he did so, he would occasionally grab bolts; he had a small amount of gear with him to assist in this. He passed by another party that was already rappelling down the formation. They exchanged some words and asked if he was doing well. They reported that he was continuing to occasionally grab bolts.

“I was leading the first pitch of our route, when I felt a soft thud and gust of wind. I looked around and saw him fall to the ground.”

Sandler also said, “He (Takatsuno) was on the second pitch of either Meteor or Leonids, not sure. The two routes are very close together. He hit the trail and then continued down the steep hillside. Another party had just finished rappelling to the ground. I asked my partner Andrew to tie me off and I went direct into the closest bolt. A member of the other party said he was a Wilderness First Responder, so he went down the hillside to help. We immediately called 911 and were on the phone with the operator for the next 40 minutes.”

Helicopter from the San Diego County Sheriff’s Department lowering a paramedic to the accident scene. Photo: Michael Sandler

Sandler continued, “Helicopters arrived in approximately 45 minutes and dropped a paramedic. He took our info, looked at Nate, and then was picked up by the helicopter. We called the sheriff's office to figure out what they wanted us to do. They made it sound like it was alright for us to go, but we felt that they would be unable to find the body without very clear markers. We used climbing tape to mark the location.”

According to Climbing.com, Takatsuno’s body could not be recovered until the following day due to the late time of the accident.

Analysis

While we cannot ascertain what caused the fall, the route was in the sun, which may have been a factor. Sandler wrote, “It's south-facing and pretty inland, so it gets pretty hot (and it was definitely pretty warm that day). The easier climbing is usually techy face climbing, it never quite feels 'comfortable.’”

Rock quality may have played a factor. The Wedge was described in a 2010 Mountain Project post as having “plenty of ready-to-snap micro flakes and a few larger hollow bits.” ANAC Southern California reporter Christy Rosa, who has climbed Leonids, says, “The route he was on is 350 to 400 feet long, mostly solid granite, but a bit crumbly and flakey at a few points.” She adds, “It is one of the best routes in San Diego, so it's well traveled.”

Climbers on Meteor, the route to the right of Leonids. It is clear how close the falling free soloist was to Sandler. Photo: Josh Bedard

While there’s not much educational nor technical analysis to be made in free solo accidents, Rosa notes that this incident was the third free solo death in Southern California this year. As an ER doctor, her assessment is suitably objective, “The increased number of free solo accidents is simple math: More people are free soloing. This is likely a combination of seeing others successfully do it, and perhaps an increase in risk tolerance, as the pandemic has changed most of us.”

Sandler had several things to say. He pointed out that, “If, for whatever reason, you must free solo, do so on climbs well below your ability, ideally ones you have done before. From our discussion with Nate and his apparent discomfort on the climb, this was not an appropriate climb to be ropeless on.” Perhaps Sandler’s most important observation was to encourage soloists to think of others. “As a free soloist, you put the lives of those below you at risk. He flew by less than five feet from me; a collision could have led to serious trauma for myself.” Witnessing trauma can itself be traumatic. Sandler adds, “Thankfully, I'm doing okay. I had regular flashbacks for probably a week or so afterward, but those have thankfully become less frequent.”


Join the Club—United We Climb.

Get Accidents Sent to You Annually

Partner-level members receive the Accidents in North American Climbing book every year. Detailing the most noteworthy climbing and skiing accidents each year, climbers, rangers, rescue professionals, and editors analyze what went wrong, so you can learn from others’ mistakes.

Rescue & Medical Expense Coverage

Climbing can be a risky pursuit, but one worth the price of admission. Partner-level members receive $7,500 in rescue services and $5,000 in emergency medical expense coverage. Looking for deeper coverage? Sign up for the Leader level and receive $300k in rescue services.


Happy Warnings from the Editor

It’s the holiday season at Chulilla in eastern Spain. It’s my first time in this world-class area, and I’m fortunate to be clipping bolts on warm Spanish limestone. It’s a reminder that, while favoring athleticism over risk, sport climbing arguably holds perils for a greater number of climbers than other discipline, due to the sheer volume of participants and the repetition of critical tasks. The latter includes lowering, untying, retying, taking, and catching leader falls. Beginners and experts alike can benefit from remembering good belay practice, and even then, accidents can occur when unusual factors come into play.

A few days ago, I was belaying a partner on a difficult 40-meter pitch. He was using a brand new 8.9mm rope in order to write an online gear review. Though there were plenty of falls and takes, one hazard we avoided was unintentional slippage from a skinny and very slick rope. This can be an issue even when the belayer does (almost) everything right.

So, as I wish you safe and happy holidays, I’ll leave you with a short video that addresses this potential hazard. The video, which focuses on the Petzl Grigri but applies in similar ways to any assisted-braking belay device, is from a YouTube channel called Hard Is Easy. @HardIsEasy takes an analytic and often entertaining approach to gear, training, and technique. — Pete Takeda


DMM Swivel Devices Recalled

Recently, DMM was made aware of a near-miss incident involving the failure of a DMM Director connector. These and similar devices are frequently used by rescuers and some possibly by big-wall climbers. Though the user was unhurt, DMM has issued a recall for nine items in their product line.


Shop the ANAC Collection


 The Prescription newsletter is published monthly by the American Alpine Club.


Sign up for AAC emails


EDUCATE: The Art of Shralpinism, with Jeremy Jones

Legendary backcountry snowboarder Jeremy Jones describes being in the mountains as “The idiot’s guide to the present moment.” This wisdom and so much more shines through in this interview with Jeremy about his new book, The Art of Shralpinsm: Lessons from the Mountains. Shralpinism, or the art of shredding and alpinism combined, is, according to Jeremy, a mix of the wisdom of reading avalanche danger, the science of changing conditions due to climate change, the art of evaluating risk and pushing past fear, and so much more. Jeremy shares stories from his many years of snowboarding in Alaska and other big mountain ranges, his tips on training, why he fell in love with going up as well as flowing down mountains, why most climbers should learn a little something about snow, and how to wrestle with the hard lessons the mountains teach you about danger, risk, and confidence. Listen in to this episode to get stoked and learn from the legendary big mountain shredder, originator of Jones Snowboards and Protect Our Winters, and devoted practitioner of the Church of the Seven-day Recreationalists.

You can get a copy of “The Art of Shralpinism: Lessons from the Mountains” here: www.mountaineers.org/books/books/th…-the-mountains


Get Covered for All Your Backcountry Adventure with the AAC Rescue Benefit and Medical Expense Coverage


Episode Resources:

Buy the Book The Art of Shralpinism: Lessons from the Mountains

Learn more about Jeremy Jones

Learn more about Protect Our Winters

Learn more about Jones Snowboards

CLIMB: The 10th Mountain Division and the Evolution of Climbing after WWII

You’ve probably heard of the 10th Mountain Division, but did you know that climbing is just as or MORE important than skiing in shaping this division of expert mountaineering troops? In this episode, we sat down with Christian Beckwith, the creator of the 90 Pound Rucksack Podcast, and writer of a book by the same name, to talk about how climbers influenced the creation of the 10th Mountain Division, how climbing itself was critical to a battle in Italy that helped facilitate the end of the WWII, and the many gear developments that evolved from the 10th Mountain Division that shaped the climbing and mountaineering boom after the war. If you’re a history buff, you are going to especially love this episode. But even as someone who doesn’t have a particular connection to history, or especially military history, you can’t deny that tracing the impact of climbing on a world scale hits the spot for anyone who loves this sport.


Listen to more history of the 10th Mountain Division and their impact on climbing history on The Ninety Pound Rucksack podcast.


Resources


The Prescription—November 2022

The Ice Climbing Atlas Project

Avalanche Observations from Popular Ice Climbs in the Canadian Rockies

Our friends in the Canadian Rockies take avalanches seriously. The terrain is big, cold, and snowy. The Rockies are also a popular ice climbing venue that holds a vast trove of some of the best ice in the world. However, those who want to climb cascades, gullies, smears, and drips in this region must pay heed to the perils of avalanches. Fortunately, Avalanche Canada, a not-for-profit organization dedicated to public avalanche safety that issues daily avalanche forecasts throughout the winter and provides avalanche awareness and education programs, recently started the Ice Climbing Atlas Project.

Rogan’s Gully has a roadside location and moderate climbing, making it a popular outing. As shown, though, once in the gully it’s near impossible to get out of harm’s way should something come down. Photo: Avalanche Canada/Grant Statham

The Ice Climbing Atlas Project started through an ongoing collaboration between Avalanche Canada, their ambassador Sarah Hueniken, and Grant Statham, a visitor safety specialist for Banff National Park. Hueniken and Statham are among the most experienced ice climbers in the range and are also certified guides. The atlas is intended to provide an overview of historical avalanche observations from popular ice climbs in the Rockies. According to the website, this work in progress will be regularly updated as information on climbs gets collected.

The Ice Climbing Atlas Project provides an Avalanche Terrain Exposure Scale (ATES) rating for eight very popular ice climbs. According to Parks Canada, the ATES categorizes avalanche terrain based on unchanging characteristics. By using the ATES, climbers will get a sense of the type of avalanche terrain threatening their proposed route and its approach.

The Ice Climbing Atlas merges graphics with actual route photos to illustrate avalanche hazards. Photo: Avalanche Canada/Grant Statham

Cascade Waterfall is close to the road, moderate in grade, and sits in the sun. It has also seen many unfortunate avalanches originating from terrain above it. Photo: Avalanche Canada/Grant Statham

Cascade Waterfall avalanche accidents from the ANAC archive: Report 1; Report 2

The atlas also provides other crucial information for each climbing route. This includes data on how often these routes get climbed; information on the frequency of avalanches; analyses regarding the time of year and frequency of climbing; presence of avalanche debris; graphical representation of the avalanche start zones and run-outs; and reports of actual avalanches/accidents.

As noted on the site: Avalanche observations are collected through surveys of local climbers conducted by Sarah Hueniken. Our hope is that by sharing historical data, climbers can better understand the avalanche hazard that exists on these popular climbs. We strongly encourage all ice climbers to always carry avalanche safety gear—transceiver, probe, and shovel.

The Ice Climbing Atlas Project points the way to the future. Hopefully, an organization in the United States will eventually create something along these same lines.


Join the Club—United We Climb.

Get Accidents Sent to You Annually

Partner-level members receive the Accidents in North American Climbing book every year. Detailing the most noteworthy climbing and skiing accidents each year, climbers, rangers, rescue professionals, and editors analyze what went wrong, so you can learn from others’ mistakes.

Rescue & Medical Expense Coverage

Climbing can be a risky pursuit, but one worth the price of admission. Partner-level members receive $7,500 in rescue services and $5,000 in emergency medical expense coverage. Looking for deeper coverage? Sign up for Leader-level and receive $300k in rescue services.


FALL AND SPRING AVALANCHES IN THE CANADIAN ROCKIES: THE EDITOR’S STORY

In the Rockies, winter is not the only season in which avalanches pose a climbing hazard. It can snow during any month of the year, so fall, spring, and even summer can be hazardous for climbers.

Avalanches in the Rockies can be huge and often follow the climber’s line of ascent. Photo: Wikimedia Commons/David Wilson

In September 1997, my climbing partner and I drove up to Canada with an eye on alpine routes. Conditions were typically mercurial—one day an alpine rock route would be dry, and the next morning it would be covered with verglas. On another day, a different route would be filled with blue ice, and on the next it would be flushed by an avalanche every 15 minutes, spawned on the slopes far above the climbing route. We always erred on the side of safety, waiting for days on end after storms before venturing onto a climb. Even approaches could be perilous.

The next spring we drove up and met the one and only Jeff Lowe, intent on doing a new route above the Icefields Parkway. Sure enough some storms rolled through, costing us several days. Lowe was on a tight schedule and departed while the remaining two of us decided to scope out a route on a big mountain that was fairly close to the road.

To get a better view, we pulled off the highway and skied across a lake and into the forest on the far side. There, below an open slope—read: avalanche path—we pulled out the binoculars to scope out the climb. The route we had in mind followed a large gully that cut across the face before joining a couloir leading to the crux rock band below the summit. The sky was clear blue, the temperatures were cold, and the air still. After ten minutes of observation, we turned our backs to ski down in search of a different perspective.

Rockies ice climbing is world class but comes with a host of big-mountain hazards. Photo: Wikimedia Commons/Dwayne Reilander

Above we heard a faint crack and turned to watch as a puff of powder snow in the upper couloir wafted down. It grew larger and larger. It was a beautiful sight as the cloud billowed and slowly descended the gully. After a few moments we could hear a dull roar growing louder and louder. We turned to each other and wordlessly asked, “How big is this?” The cloud grew bigger and bigger and closer and closer. We began skiing faster and faster away from the face. I looked over my shoulder and saw to my horror that as the cloud struck the lower slopes it neither slowed nor dissipated.

At this point we were skiing as fast as we could. Behind us, we could sense the pressure change as the avalanche pushed the air in its path. I glanced over my shoulder again. The cloud engulfed us and we crouched in a dark, seething mass of crystals that pelted us with little bullets of ice. After several long moments the roaring subsided and light penetrated the darkness. We shook the snow off our jackets and stood laughing with relief at what had been a very close call.

The Rockies holds a vast range of elevations, exposure, rock quality, and climbing styles each with its own set of complexities. I have climbed in the Canadian Rockies on over a dozen occasions and I still feel like I have so much to learn. For a reasonably simple explanation of the Rockies climbing seasons with general seasonal avalanche information, see Will Gadd’s webpage on Rockies climbing seasons.


Shop the ANAC Collection


The Sharp End: Impaled on Mt. Rainer

Mountaineering holds a host of hazards besides avalanches. Freezing cold, high winds, and falling rocks can plague any ascent, but what happens when a climber falls and gets skewered by his own ice axe? A climber named Aavron was on Mt. Rainier when he fell, pulling his climbing partner down a slippery slope with him. During the fall, he was impaled by his ice axe. Listen to this episode of the Sharp End Podcast to hear what happened and what Aavron learned from his accident.


The Prescription Newsletter is published monthly by the American Alpine Club.


Sign Up for AAC Emails

The Prescription — October 2022

The following report will appear in the upcoming edition of Accidents in North American Climbing. The 2022 books are being prepared for shipment and will start going into the mail next week.

Stranded | Exposure and Weather

Yosemite National Park, Half Dome

Nick and Kate being hoisted to the summit of Half Dome after the storm in mid-October of 2021. Big Sandy and Thank God ledges are clearly outlined below by the plastering of fresh snow. Photo: Jack Cramer

In the evening of October 17, two climbers, Kate (28) and Nick (26), started up the Regular Northwest Face of Half Dome (23 pitches, 5.9 C2) after completing The Nose on El Capitan (31 pitches, 5.9 C2) earlier in the same day. Nick and Kate were both experienced climbers attempting a sub-24-hour link-up of the two walls. They failed to summit Half Dome when they were caught in a winter storm, five pitches from the top. 

After finishing The Nose, Kate and Nick ate lunch and started up the approach to Half Dome. The weather forecasted a 90 percent chance of precipitation around 1:30 a.m. Despite that, neither talked about rescheduling.

Kate and Nick started climbing the Northwest Face around 6 p.m. They made good progress, but around midnight they were engulfed in a winter-like storm. At this point, Nick and Kate were simul-climbing through 5.9 and 5.10 terrain, with snow and ice accumulating on ledges and in cracks. Around 12:30 a.m., they arrived at Big Sandy Ledge, atop pitch 18.

Nick and Kate are visible on a snow-covered Big Sandy Ledge in lower right. The icy Zig-Zag pitches are directly above this ledge. Photo: Jack Cramer

Nick began leading the first pitch of the “Zig-Zags” (pitch 19) with increasing difficulty. He was scraping ice out of the cracks and, at one point, slipped off a large foot ledge and fell back onto his daisy chain. Their gear was freezing solid, and Kate’s hands were losing their ability to function.  

Nick still wanted to try and summit, but Kate did not think safely continuing was possible. At this point, they had not sustained any injuries, but the pitches ahead included Thank God Ledge and multiple slab pitches, none of which is inconsequential, especially if covered with ice and snow. They called 911 at 1:50 a.m. and were told to call back at 6 a.m. In a few hours the snow stopped falling, the wind died down, and the temperature dropped. At first light, the conditions on the route were even icier. At 6 a.m., they called search and rescue back and confirmed they needed assistance.

Shortly afterward, Yosemite Search and Rescue (YOSAR) gathered for a technical rescue on Half Dome. The plan was to fly rescuers, ropes, and all necessary equipment to the summit with a helicopter and lower one member of YOSAR to Nick and Kate and then haul them up to the summit. Due to the cold conditions, the helicopter got delayed because the rotors needed to de-ice.

Nick and Kate huddling for warmth on snow-covered Big Sandy Ledge. Photo: Jack Cramer

Later that morning, conditions allowed the helicopter to fly. A rescuer was lowered to Nick and Kate, carrying jackets and warm beverages. Once the rescuer attached to Kate and Nick, two teams on top raised the climbers to the summit. Miraculously, neither Kate nor Nick sustained any cold-related injuries.

ANALYSIS

Heed the forecast. Severe storms can roll through Yosemite any month of the year, but early spring and late fall often catch climbers unaware. In this case, the team saw a forecast for the Valley floor (4,000 feet elevation) with precipitation starting at 1:30 a.m., and they were surprised when the storm started two hours earlier. The conditions on Half Dome (8,846 feet) were unsurprisingly much more intense and severe. 

Nick and Kate on the summit of Half Dome. Photographer Jack Cramer reported that the pair recovered and successfully completed The Nose/Half Dome link-up in spring 2022. Photo: Jack Cramer

Don’t allow the goal to blind your judgment. The link-up of Half Dome and El Capitan in under 24 hours is an admirable goal for any Valley climber. After a season of training and a plan set in motion, it can be tough to decide to bail, especially given that the climbers had completed El Capitan and were “on track” for a sub-24-hour time. They ignored a known weather risk to complete their goal. 

Communicate openly with your partner. Many accidents and rescues can be avoided with better communication. Any reservations or concerns should be immediately communicated. Especially with disappointment on the line, it can be challenging to start the conversation. Partners, particularly new partners, should regularly check in and practice their communication like other climbing skills. Sure, one partner might be disappointed at first, but if it means not having to spend the night in a winter storm or worse, it might be worth it.

Although they discussed the weather, there was no conversation about a worst-case scenario. The climbers didn’t discuss the possibility of not making it to the top nor what the upper pitches would be like in a storm. The final pitch of the Regular Northwest Face is slab climbing with limited opportunities to aid. There should always be a conversation about how to retreat if there is no real possibility of going up.

Pack the proper layers. If you know there is a chance of precipitation, you should pack suitable layers. Kate and Nick both had warm gloves (Kate was not initially wearing them), base layers, and hardshell jackets. However, neither had hardshell pants, and they felt like that was a major mistake. Both Kate and Nick have experience with ice/mixed climbing in winter conditions and thought they could have possibly self-rescued the following morning with the appropriate layers.

A National Park Service rescue helicopter departs the sunny Valley floor on the way to the snowy and frozen summit of Half Dome. Photo: Jack Cramer

Know when to call for a rescue (and have the ability to communicate). It’s tough to know when the right time is. Ultimately, Kate decided they should call for help when she felt like she could not safely use her hands. The need for a rescue became more apparent when they were rappelling back down to Big Sandy after attempting the Zig-Zags. The ropes were extremely icy, making the rappel dangerous. They rappelled with Grigris and used slings as “third-hand” backup prusiks, and did not feel it was safe to try and retreat further. There were legitimate concerns that if they attempted to continue upward, Kate and/or Nick could have gotten injured; this would have made the situation much worse and the rescue more complex.

They only carried one cell phone with them, and fortunately they were able to make a phone call to 911. To communicate with YOSAR, they kept the phone off when not in use and kept the phone next to their bodies to keep it warm and preserve the battery. (Source: Yosemite National Park Climbing Rangers.)

This report is adapted from a story at Yosemite Climbing Information, published by Yosemite rangers. 


SEASONAL HAZARDS: THE EDITOR’S STORY

The shoulder-season months of March/April and October/November can be perilous in Yosemite. After a long winter spent indoors, clear and sunny weather in early spring can lure climbers onto the walls. In fall, peak fitness honed over summer, combined with seemingly endless weeks of perfect weather, can tempt climbers to squeeze in one last end-of-the-season send.  

As the old saying goes, “Good judgment comes from bad experience.” Take it from Pete Takeda, editor of ANAC:

“I spent seven years living in Yosemite. Over that period, I climbed many big walls and suffered more than a few bad-weather epics. One instance stands out. 

“I was coming off a long winter and was itching to get on a wall. So in early April, my partner and I launched up an El Cap route called Lost World, foolishly ignoring a storm forecast. There was no internet back then, but the San Francisco Chronicle, delivered to the Valley on a daily basis, had a generally solid forecast printed in plain black and white on the front page. After two days of climbing, a storm clobbered us above the point of no return, and we spent the next three days soaked to the bone. My shelter was a thin sleeping bag and a leaky bivy sack. On day one of the storm, we foolishly declined an NPS rescue.

On day two I became concerned about hypothermia and asked my partner, ‘Are we going to make it?’ He was a veteran survivor of epics on walls and big mountains. His reply was frightening. ‘How the f*** should I know?’ 

“Day three dawned with sleet, but by noon the sun had peeked out. We jumped into action, climbing for our lives, and barely summited during a few hours of good weather. I’d lost ten pounds and acquired a case of trench foot. Had we had another day of bad weather I might not be sharing this tale.”


FROM THE ACCIDENTS VAULT: HALF DOME STORIES

These three rescues involved legendary climbers caught in storms on Half Dome:

In 1968, Warren Harding and Galen Rowell got caught in a storm on a new route.

On 27 October Warren Harding (44) and Galen Rowell (28) began an ascent on the unclimbed South Face of Half Dome. It was late in the year, but the weather looked good for the future and they both had equipment in the experimental stages, namely a single suspension bivouac hammock and shelter which would feasibly protect them from the weather in case a storm did break….

In 1986, Steve Bosque, Mike Corbett, and John Middendorf were trapped by an epic storm on the South Face.

(The trio) had been climbing the South Face route on Half Dome since March 4… McDevitt (a Search and Rescue team member) reported by radio that he had attempted to contact the climbers with a loudspeaker and that they had yelled that they needed to be rescued… McDevitt reported blizzard conditions in Little Yosemite Valley with heavy snowfall and strong winds…. 

Scenes from the 1986 South Face epic. Photos: John Middendorf Collection. Read Middendorf’s harrowing personal account here.

In 1975, budding young Stonemasters Dave Diegelman and Bill Price were rescued from the Regular North Face.

Dave Diegelman (17) and Bill Brice (17) had been climbing for the full day of August 19, 1975, on Half Dome’s Regular North (sic) Face, VI 5.8, A3. It started to rain moderately hard at 3 p.m. The climbers continued on for one more hour to reach the bivouac ledge (13th pitch). The rain continued all night and was accompanied by freezing temperatures…. 


EDUCATE: Trends in Climbing Accidents, with Pete Takeda

In this episode, we sat down with Pete to talk about the process of selecting the stories and analysis for the "Accidents" publication each year, trends in climbing accidents that Pete has noticed through his work—including many that the climbing world has been ignoring for far too long—and the bravery of submitting a report in a world that loves to critique.


EDUCATE: Inside the Life of Search and Rescue Teams

In this episode of the podcast, we talk to Grant Kleeves, a volunteer with Ouray Mountain Rescue, one of the winning SAR teams for last year’s Rocky Talkie SAR Award. We talk to Grant about some of the operational and logistical challenges that SAR teams face, and he walks us through the decision making process for a particular rescue Ouray Mountain Rescue did in 2021. You might note that we don’t describe what caused the accident, or analyze the accident either. And this is on purpose. Most of the time, SAR teams get a call for services without much context, and they must make decisions based on what they know. The story that Grant shares with us reflects that tricky reality.


The Prescription Newsletter is published monthly by the American Alpine Club.