The Prescription—August 2023

We are about to enter the prime big-wall season for Yosemite Valley, so this month we’re featuring a big-wall mishap. Last year, a solo aid climber suffered a serious leader fall on a classic Yosemite wall. He used a bit of know-how and perseverance to help effect his own rescue. This report will appear in the upcoming 2023 edition of Accidents in North American Climbing.

Fall on Rock

Yosemite National Park, Washington Column

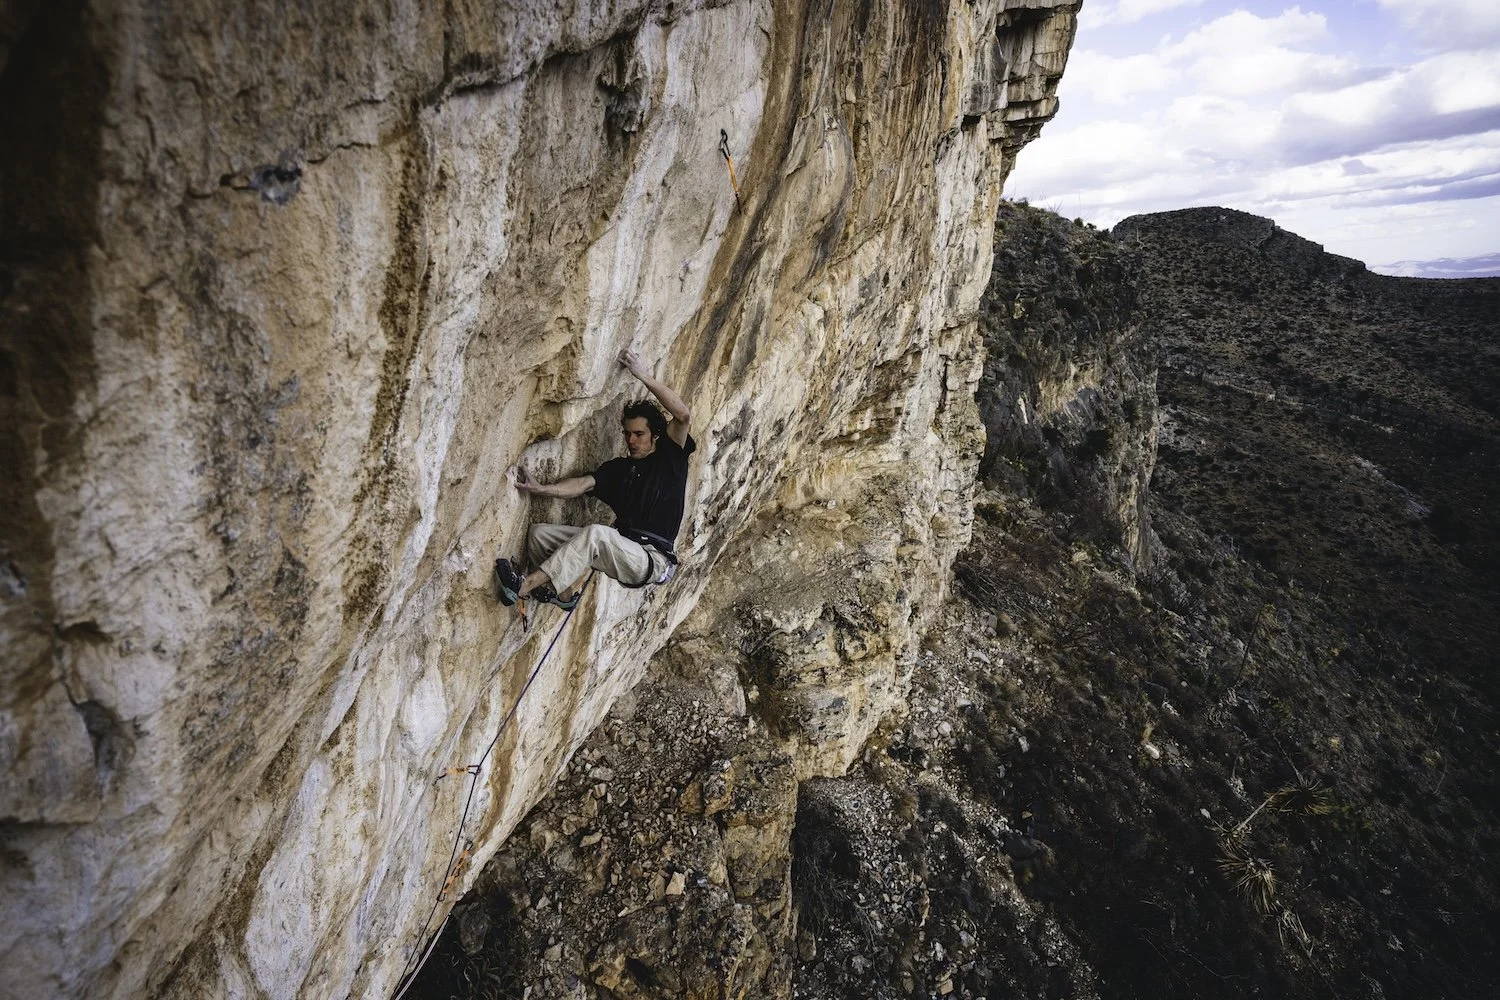
On June 28, at 10:59 a.m., Yosemite Dispatch received a report of a 42-year-old male who had taken an approximately 50-foot fall on The Prow (V 5.8 C2) on Washington Column. The climber’s plan had been a multi-day, aid-solo ascent. On the second pitch, the climber fell, ripped rock protection, and struck a ledge. He recalled, “I felt the sensation of falling—it was so sudden and so fast. Then I remember hitting a ledge hard, bouncing, sliding. I remember hitting two more small ledges on the way down.”
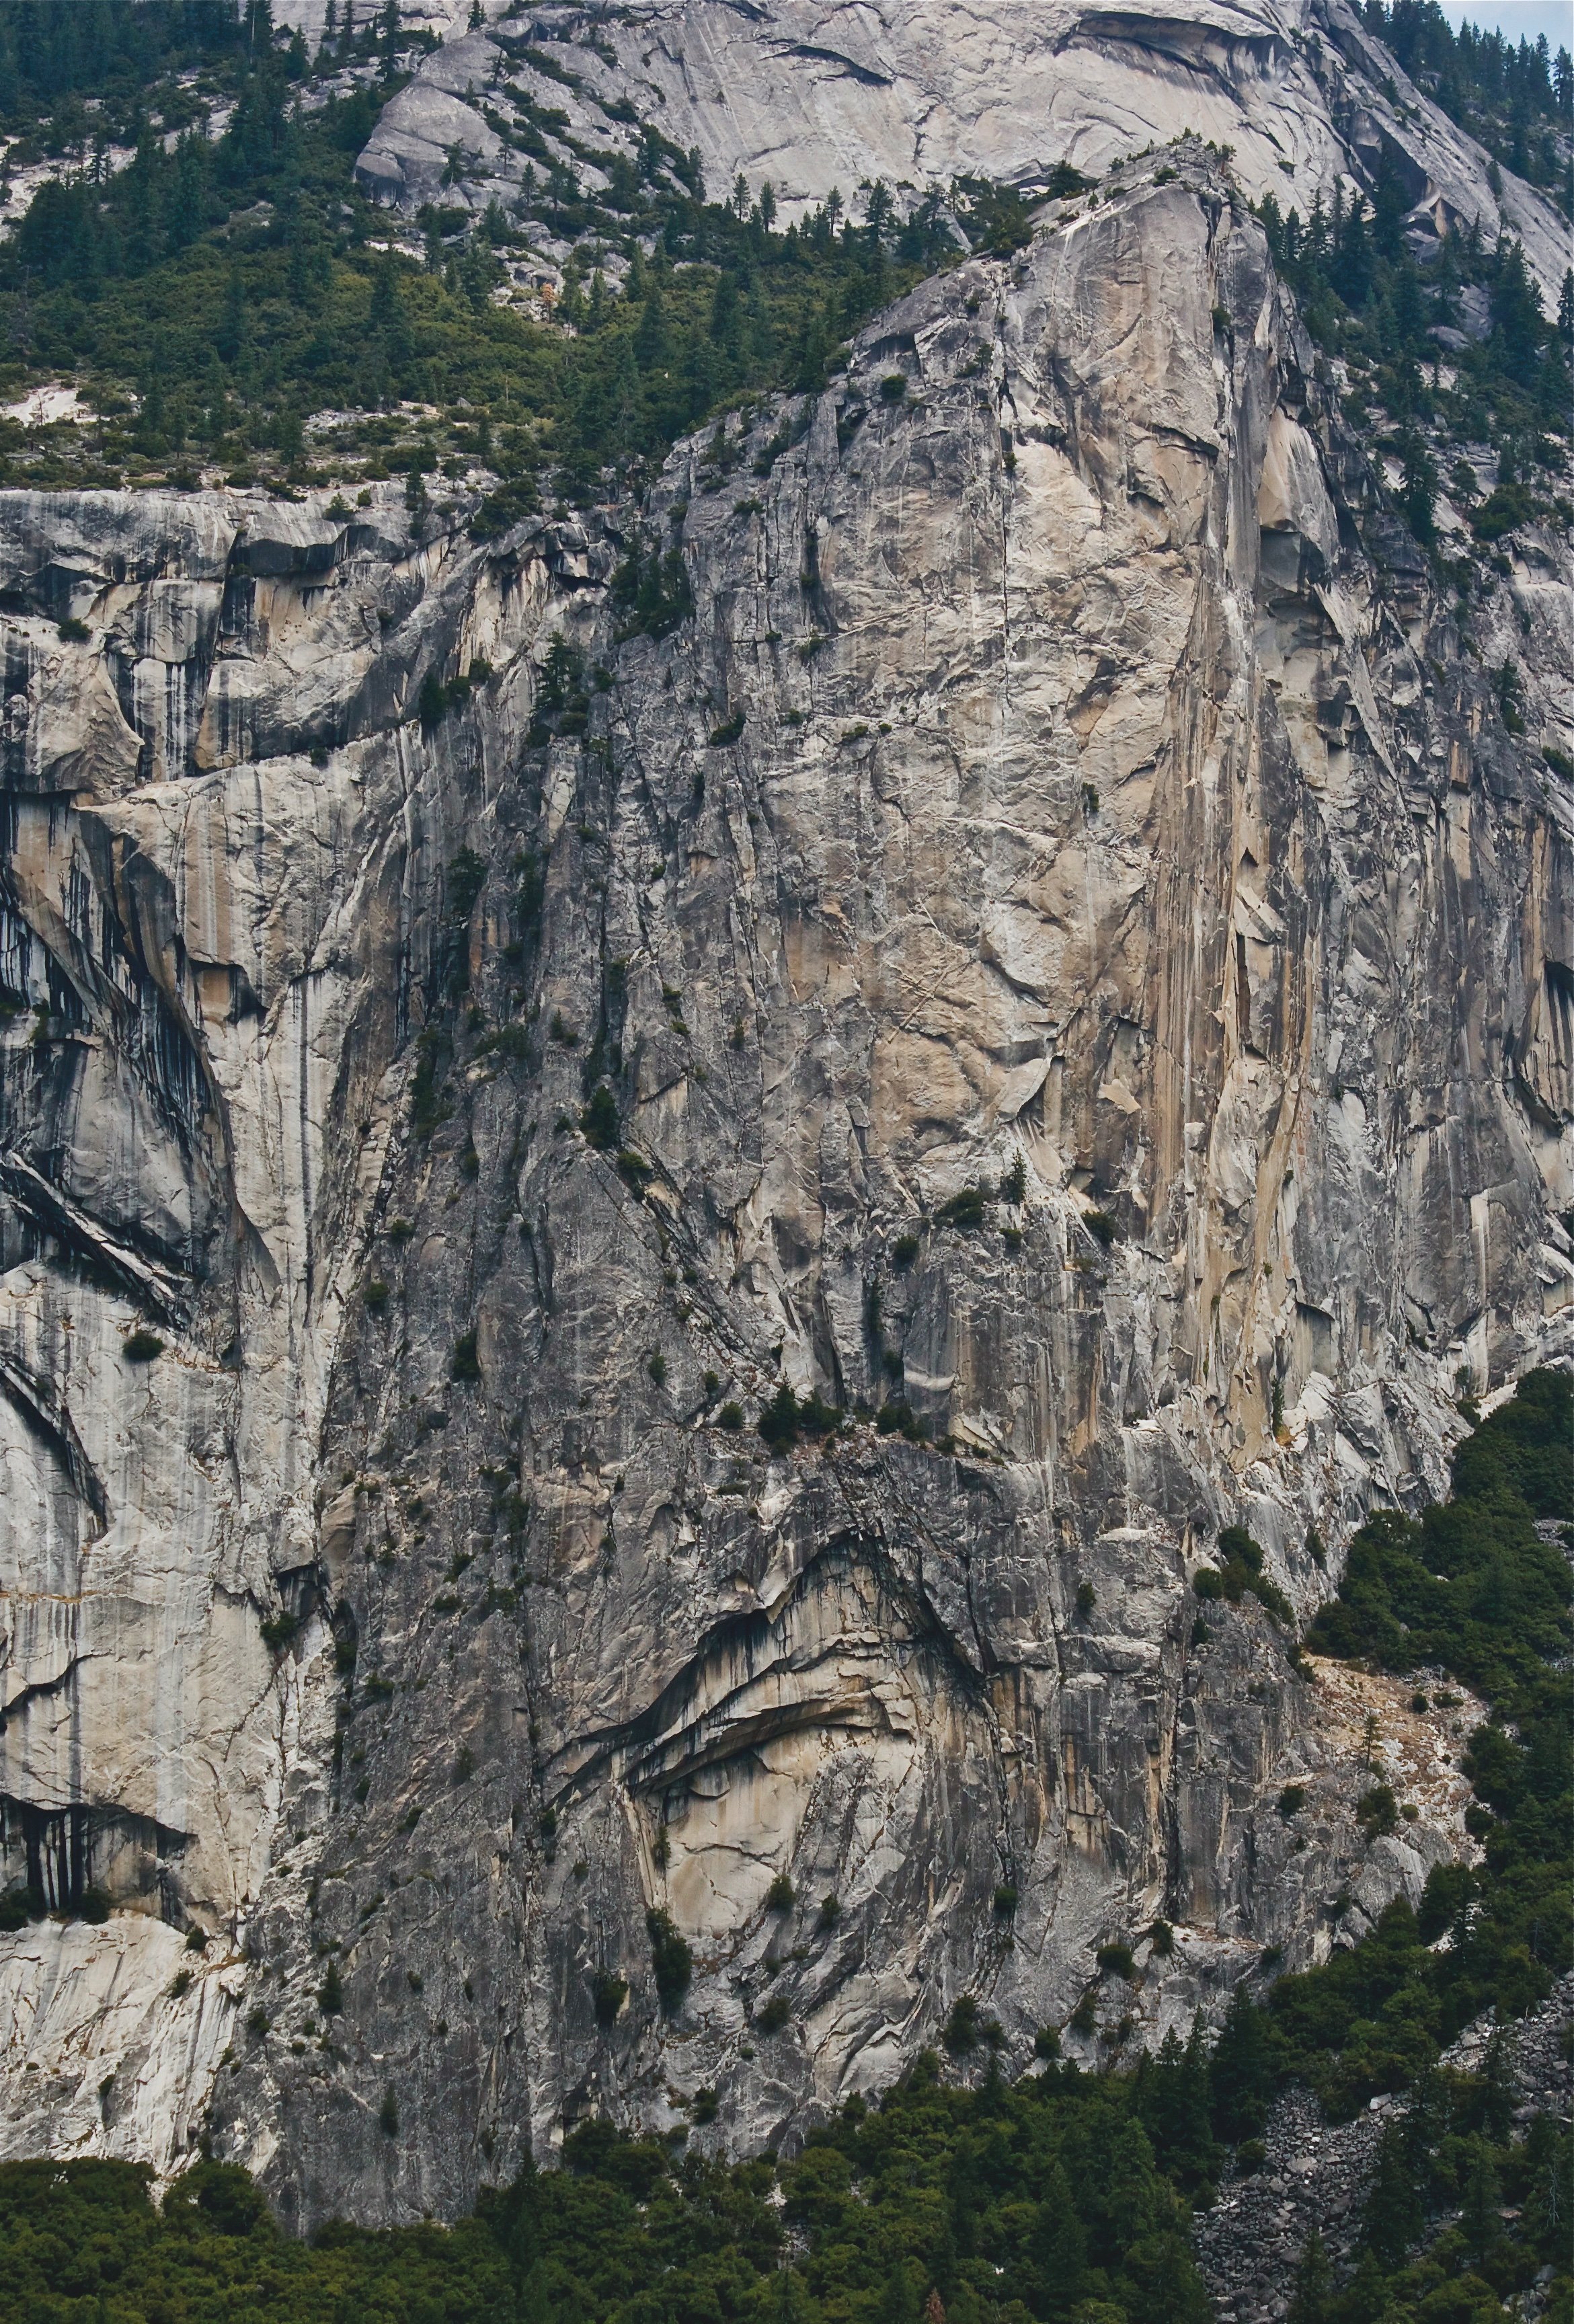
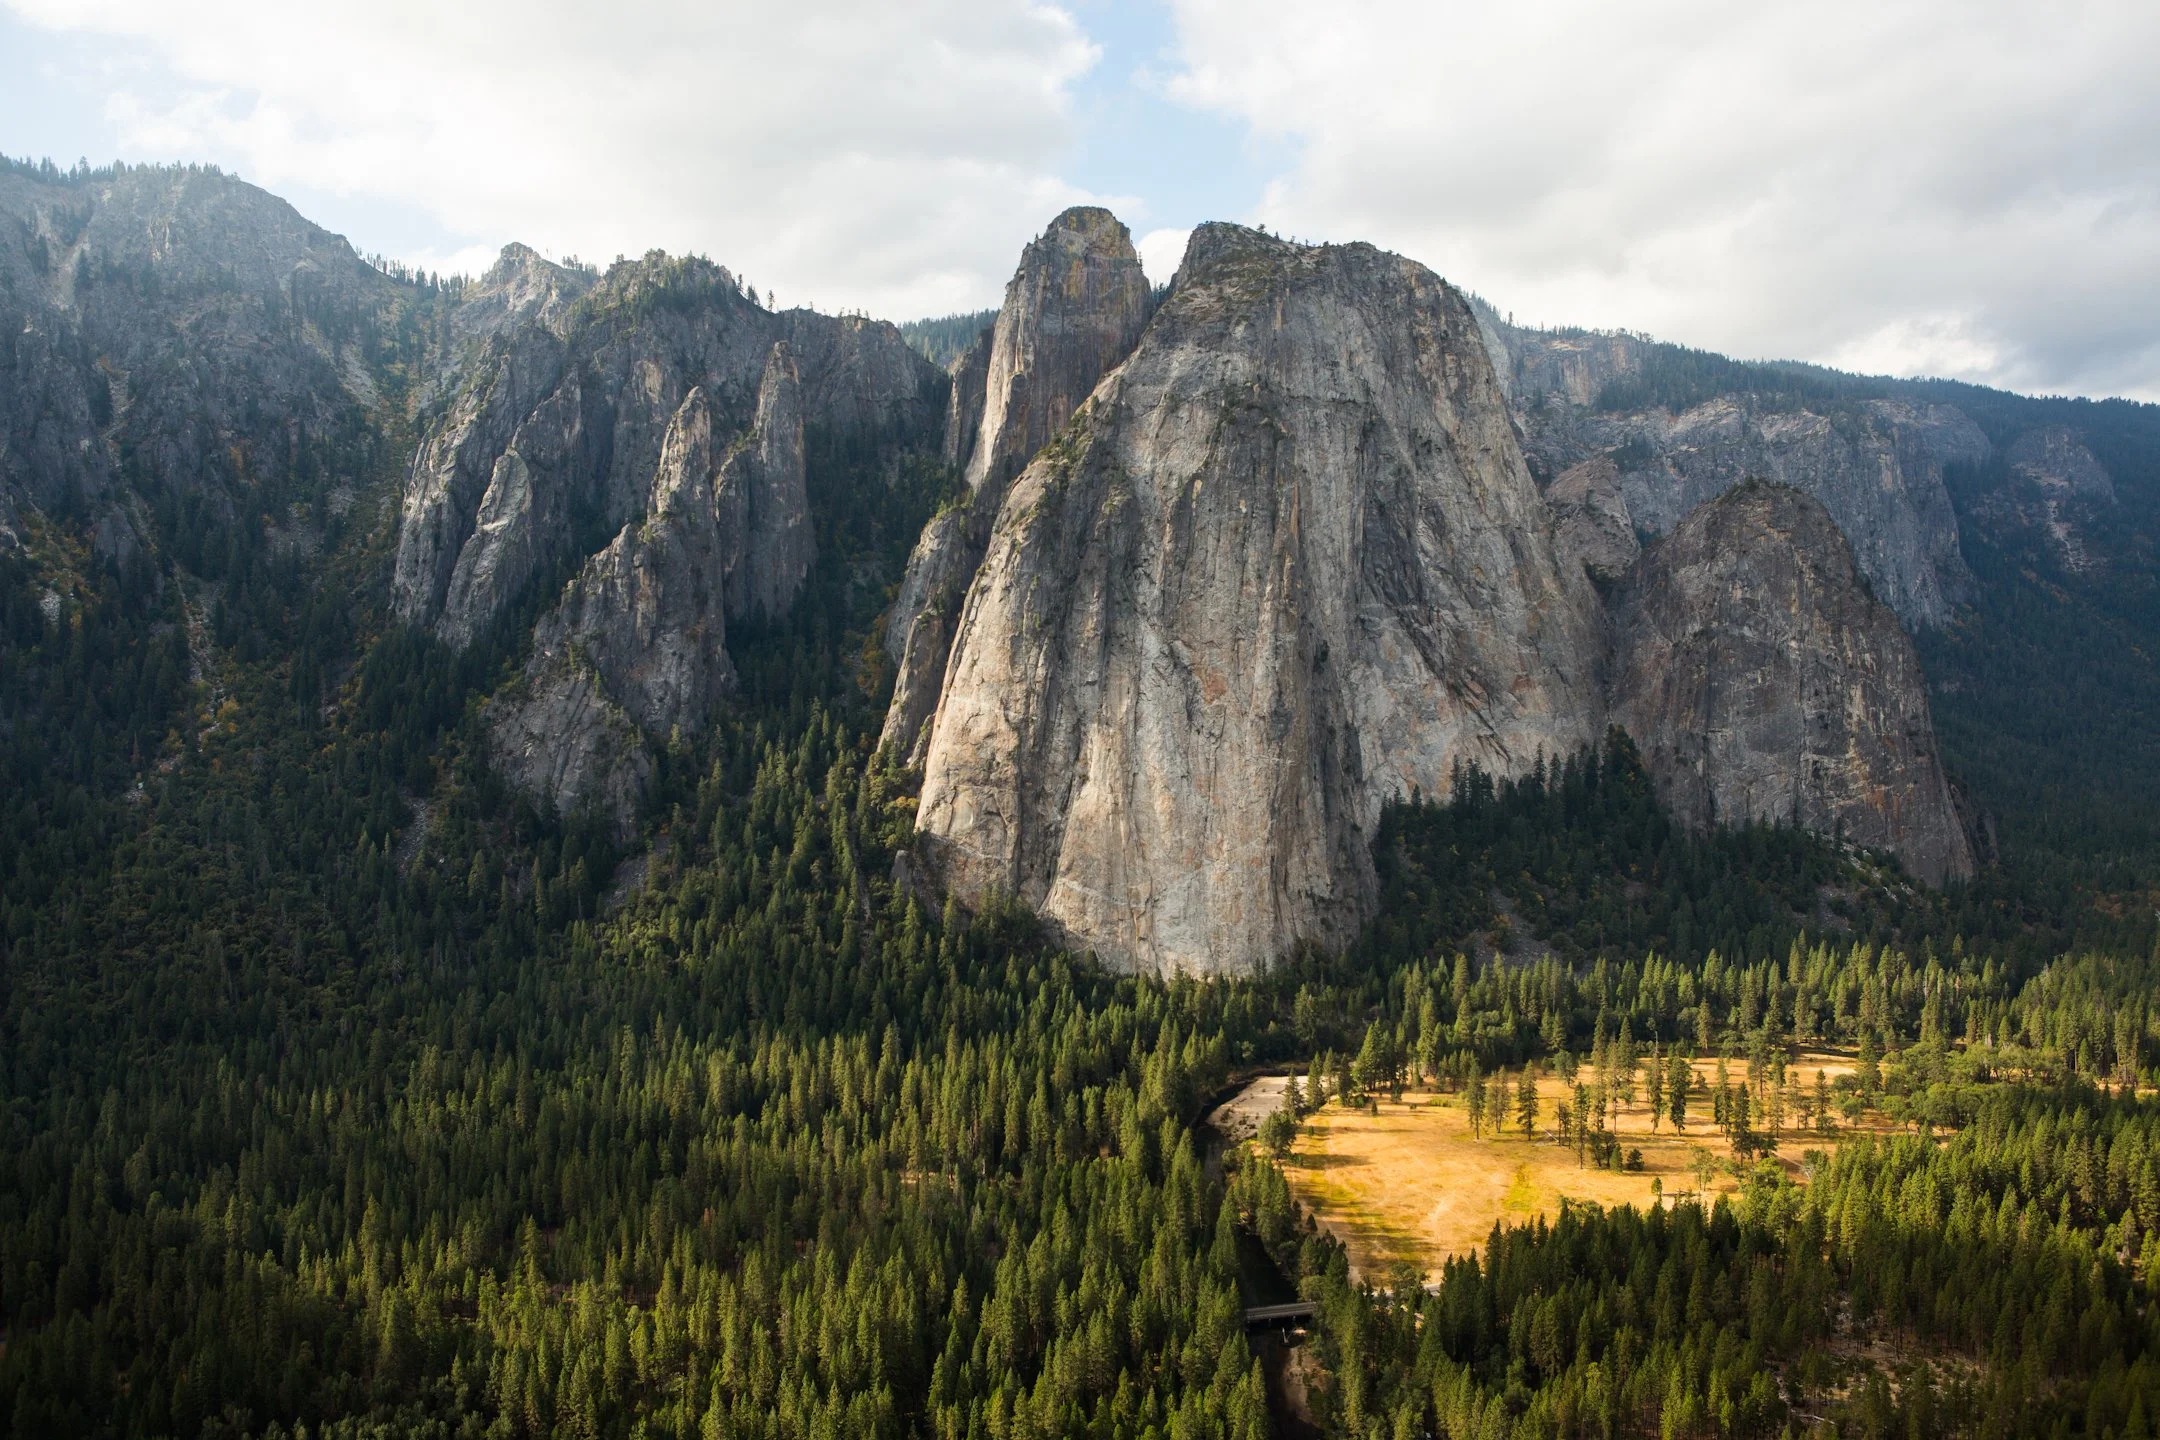
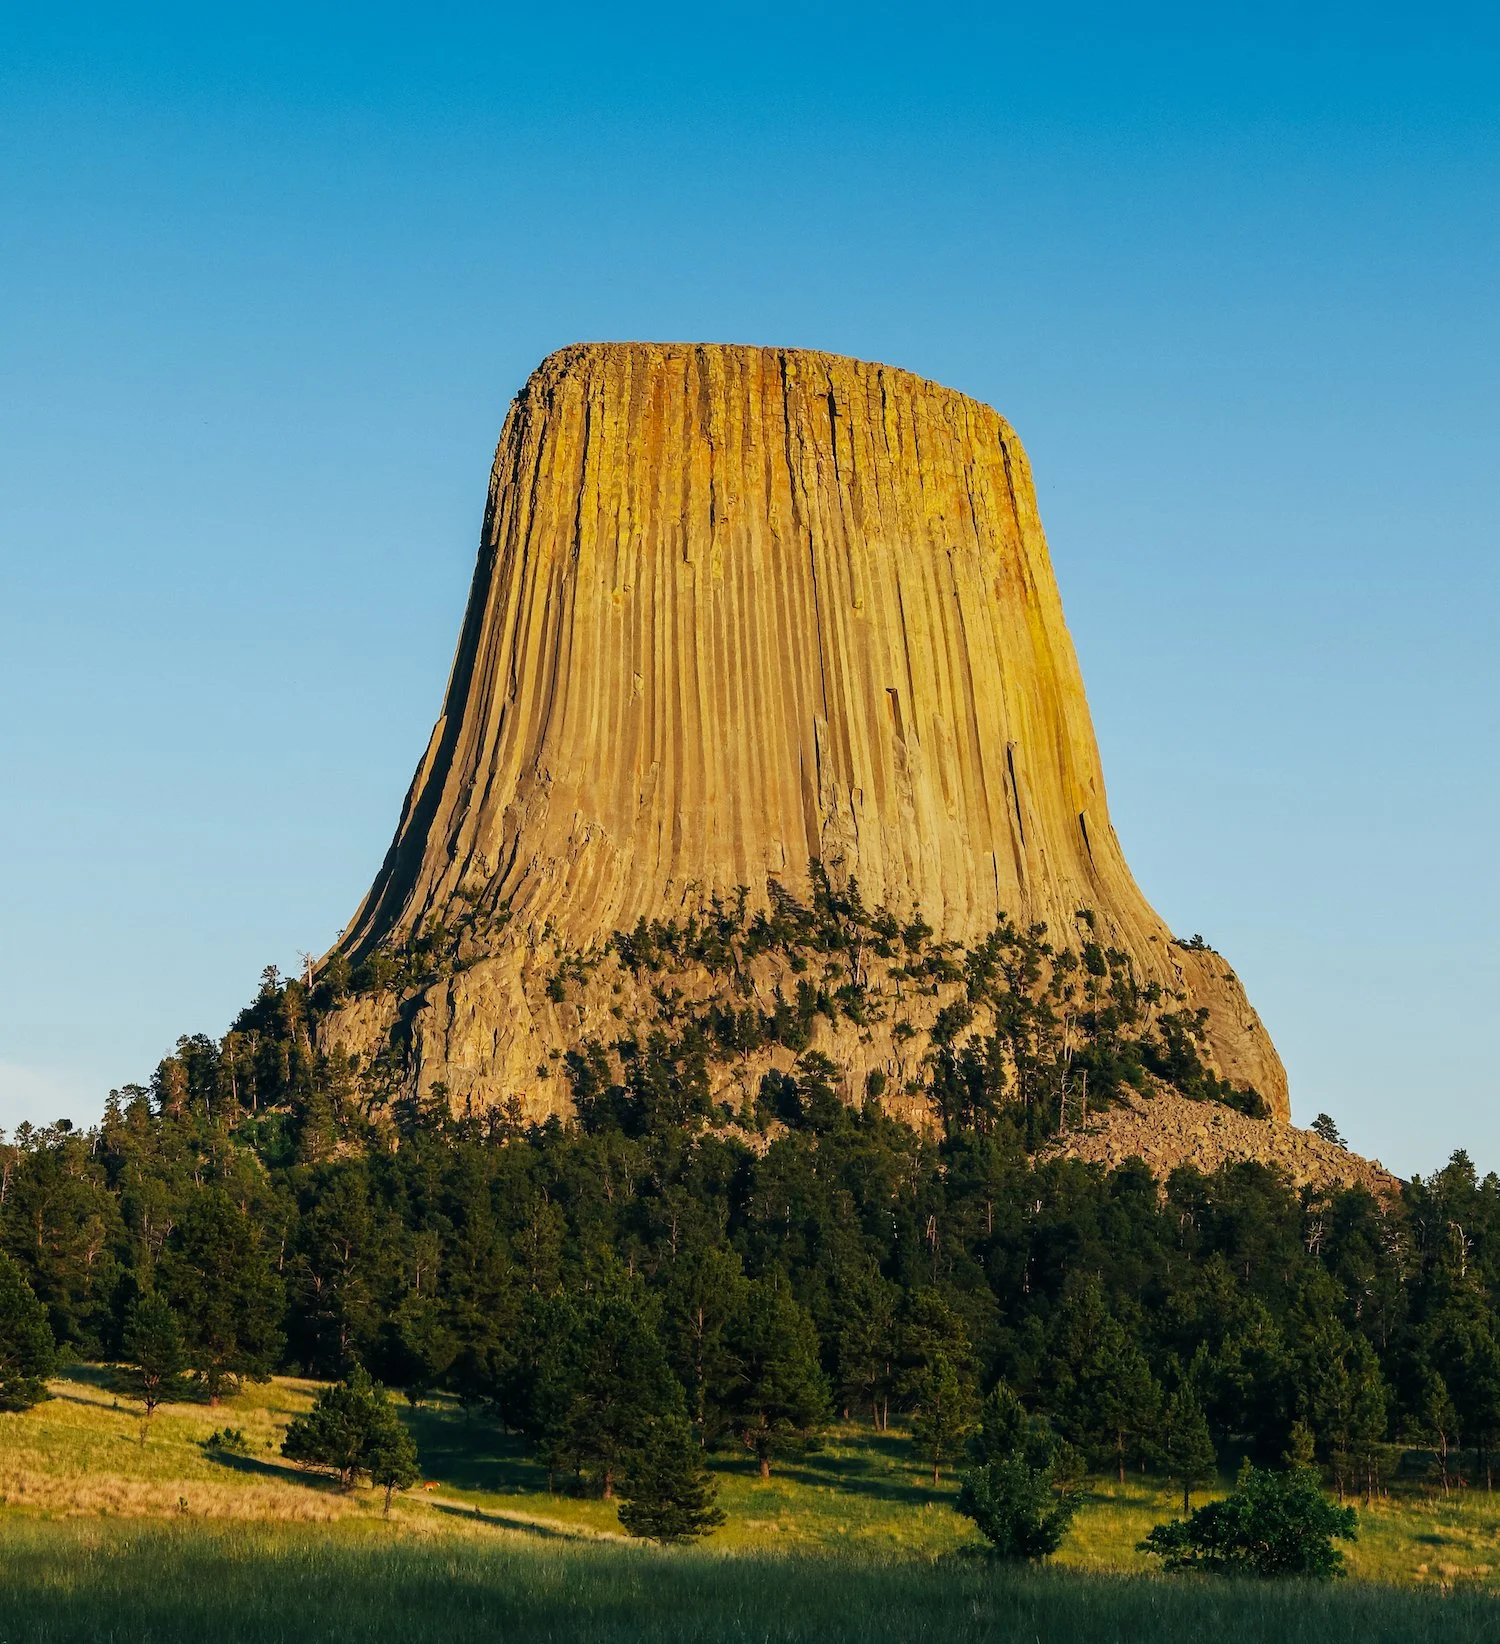
Washington Column. The Prow is a classic aid route and excellent primer for El Cap. It climbs the smooth, golden plaque of rock on the right side of the formation. Photo: xRez Studio

The climber was finally caught by his rope. He had sustained closed injuries to his head, knee, and ankle. He also had one open injury to his thigh that he tied off with an improvised tourniquet. He wrote, “I could not breathe in all the way. Possible lung injury—it felt like fractured ribs. Can’t do anything about that, other than controlled breathing. Next, I looked around and saw the deep laceration on my inner left thigh. This one I was worried about! I had flesh hanging out that I put back in, and I stopped the bleeding with my bandana. Then I checked my limbs. The hands, feet, neck, and back seemed okay.”

He began to ascend his rope in order to reach his cell phone to call for help. He recalled, “I had to get my phone from my haulbag, which was above me about 50 feet. I thought, if I were to get rescued it would be easier for YOSAR to get me from the ground and not on the side of the wall. I did not have my jumars with me because I was leading. So, I used two prusiks, one that I had and the second one that doubled as my belt for my chalk bag. I untangled myself from the ropes, backed myself up with a Grigri, and began the painful journey up to my phone. I finally arrived at the belay station [and the phone], quickly set up for a rappel, fixed both the lead and haul line, and got down to the beginning of the climbing, which starts at the top of a 4th-class section.”  

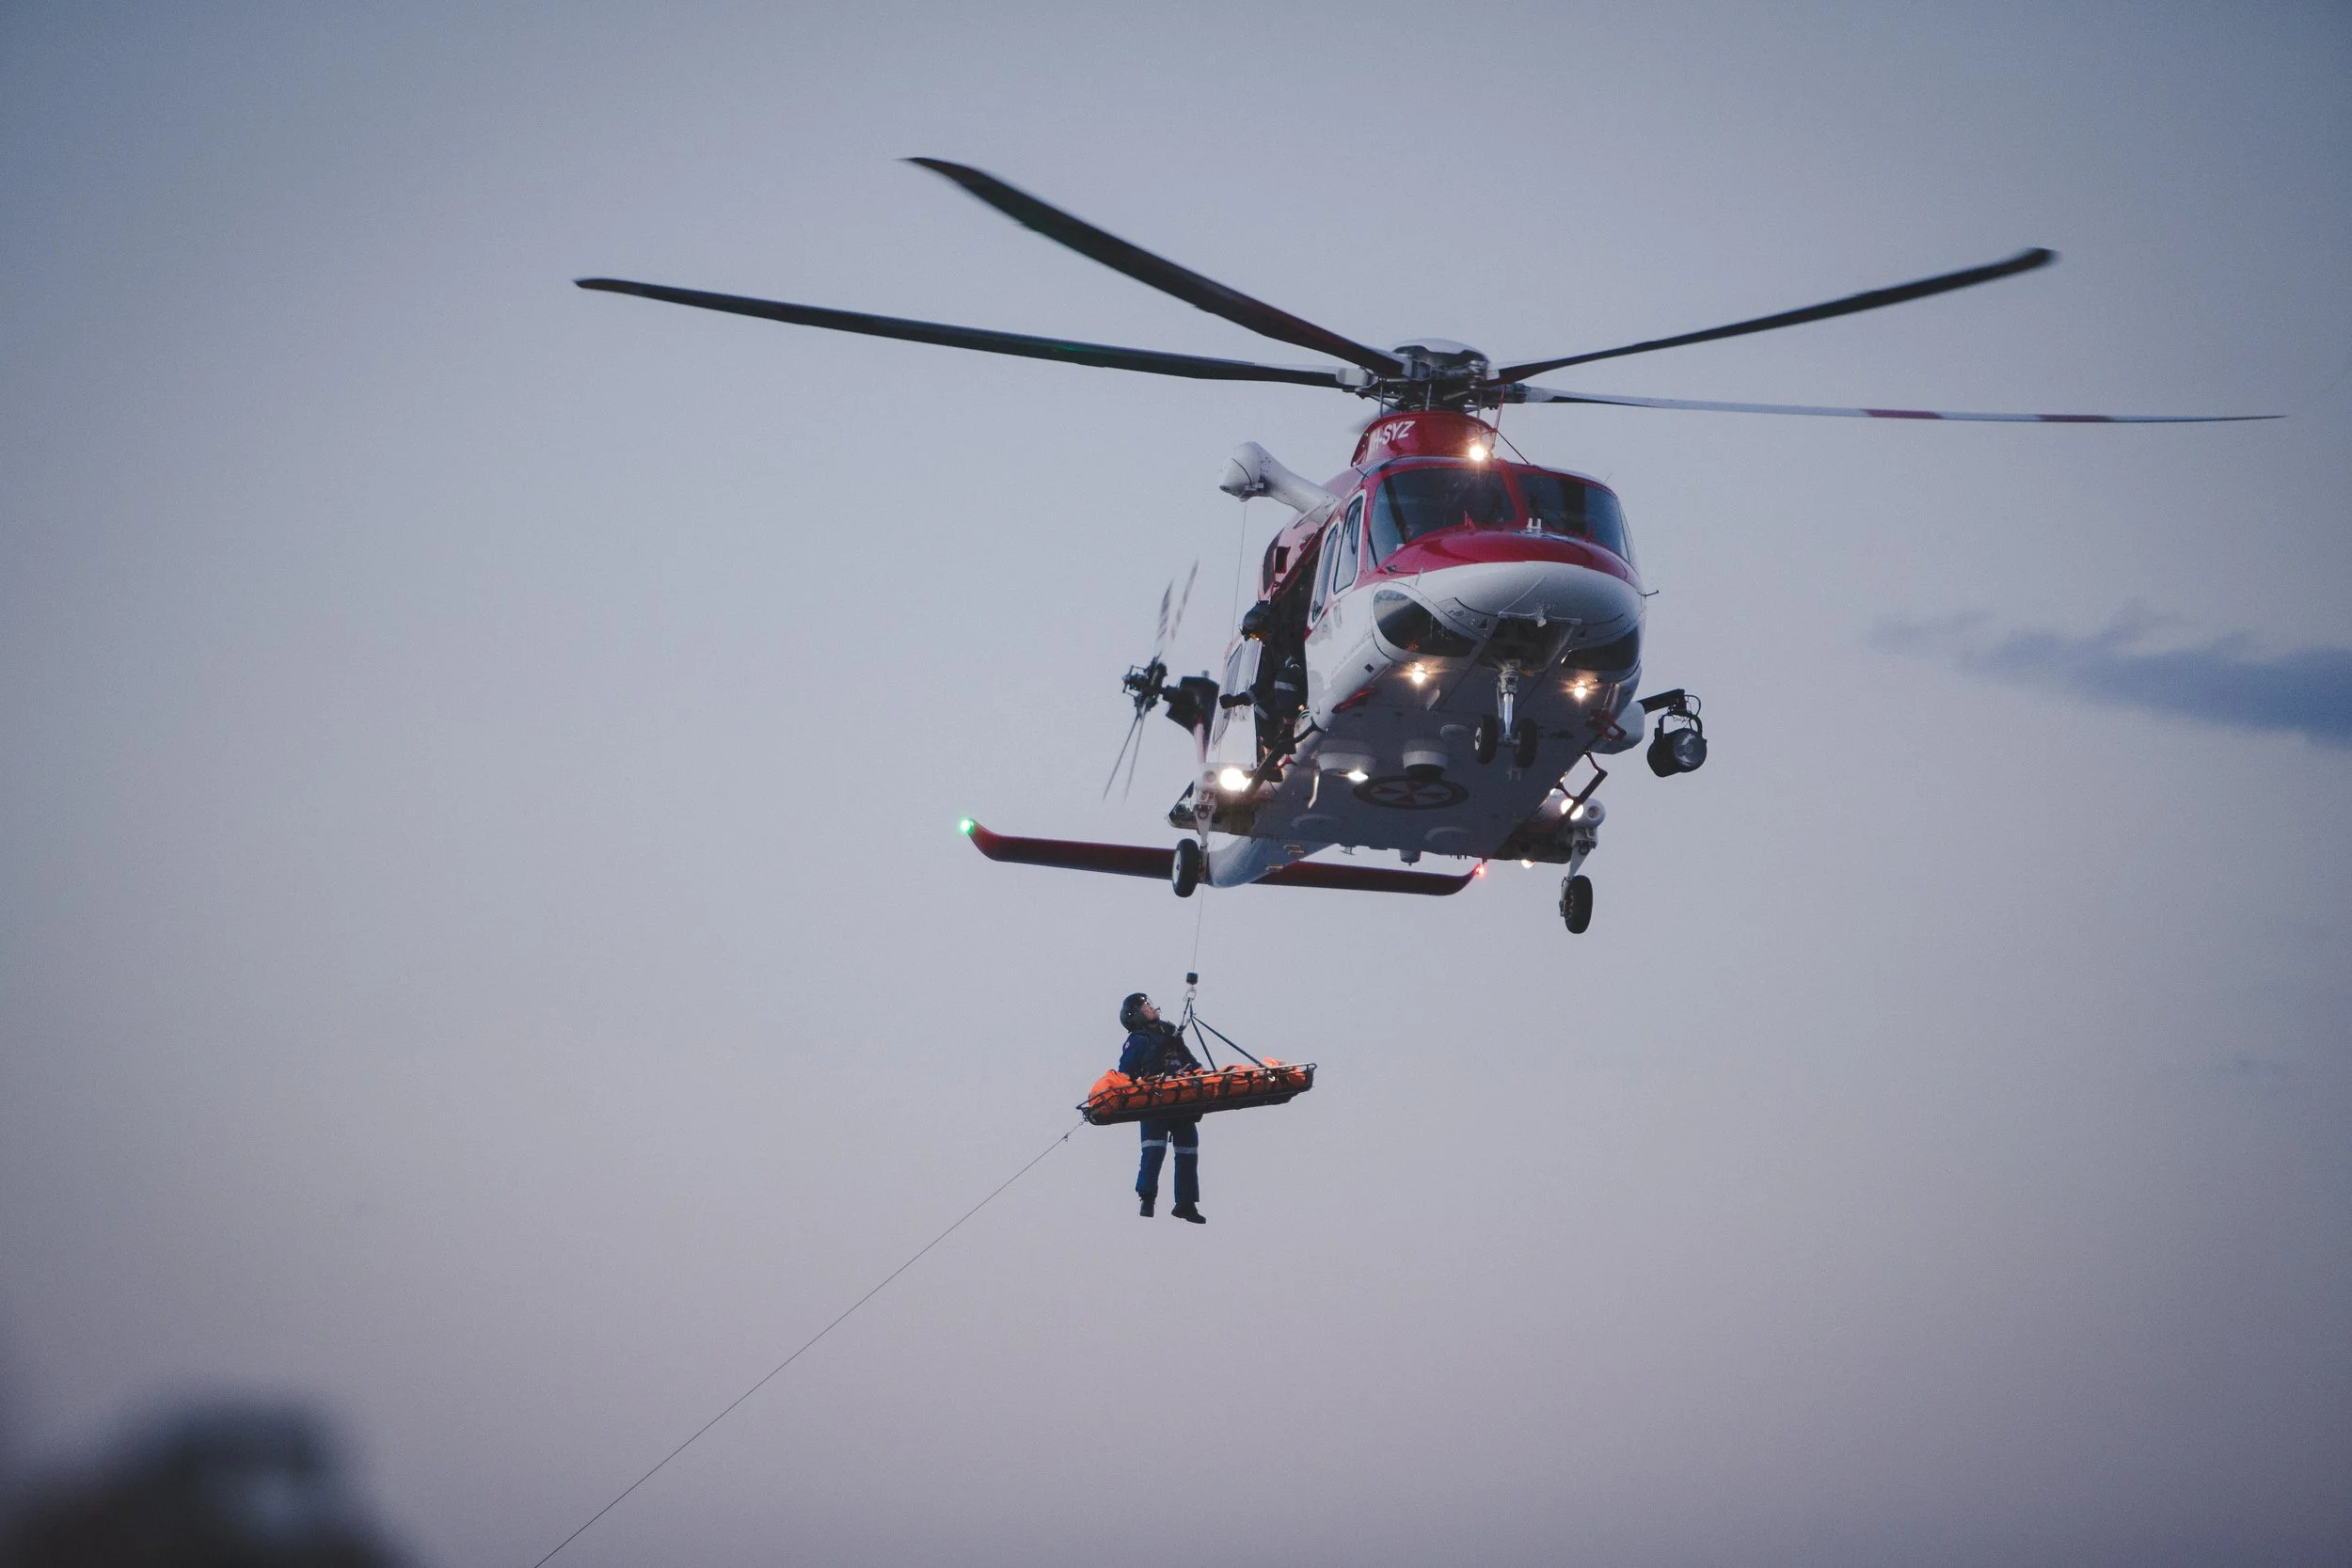
The YOSAR hasty team located him at the top of the 4th class and provided necessary care. Soon a technical rescue team of four arrived and rigged to lower the injured climber down to the bottom of the cliff. From an open, grassy area between the South Face and Astroman routes, the climber was short-hauled by helicopter and transferred to a hospital.

Editor’s Note: In 2016, another climber fell from a similar section of aid on the nearby South Face route, when a cam pulled from a flared piton scar. That climber also ripped several pieces before coming to a stop. Take extra care placing cams in pin scars. Offset nuts, offset cams, and Totem cams often have superior holding power in these flared/grooved placements. Read the 2016 report.

The first few pitches of The Prow follow classic yet tricky piton-scarred cracks and corners. Extra care must be taken when placing gear in such flared placements. Photo by Ryan Meyers.

Analysis

“A piece for you and a piece for Mom,” as they say. Climbing above ledges is a heads-up moment—the threat of falling and getting traumatically injured is very real. As climbers, what can we do to make climbing above ledges safer? Backing up pieces is one option. Also, be aware of how much slack is in your system.

Other takeaways:

Bring a medical kit. A light medical kit while climbing could be a life saver. Ideally, it is never used, but it’s always wise to be prepared for an accident. A little tape, some pain meds, and gauze go a long way.

Practice and be familiar with self-rescue techniques. During this rescue, the injured climber did an excellent job of helping himself. Even after sustaining several injures, he was able to improvise gear, ascend his line, and rappel down the cliff. His self-rescue skills made the whole operation much faster and more efficient. Study self-rescue skills and practice with friends, or consider taking a self-rescue course.

Climb with a partner. While some enjoy the extra challenge of climbing alone, there’s no denying that aid soloing introduces more risk and complexity to a climb. Consider climbing with a partner for a safer climb, or at least acknowledge the added risk of climbing alone. Is it worth it?

The climber offered some final thanks and advice for others: “I cannot thank YOSAR, all the medical professionals, and all my friends and family who helped me and are helping through this event. I feel that even though being super prepared is a must, life just happens! I encourage all climbers to learn basic self-rescue skills.”

(Source: Yosemite National Park Climbing Rangers.)


Shop the ANAC Collection


With three spotters and five crash pads, Emily Diamond can safely launch into the crux of Heartbreak Hotel (V2). Photo by Pete Takeda.

From the Editor: On the Small(er) Rocks

I’m a week into a bouldering trip to Squamish. It’s peak season in terms of number of climbers, but it’s a little early for good conditions, that brief period in which cool temperatures converge with low humidity.

Bouldering is my first love. As a teenager, I started climbing in an abandoned quarry. Over the years I would learn that the spirit of climbing is in its movement and all I would need learn of any style of ascent could be traced back to those boulders. We wore painter’s pants and carbon rubber (non-sticky) high-tops called EB’s—pretty much the only performance rock shoe of the time. This was in the pre-pad days and spotting was unheard of. While bouldering, I managed to suffer my first serious accident—fracturing my leg at the age of 16.

Today, while topping out a classic highball, I have a half-dozen pads below, along with a handful of attentive spotters. That said, I am reminded that climbing on the small(er) stones, though generally regarded as safe, arguably holds a higher injury potential than any other facet of climbing. My reasoning is:

1. Move for move, bouldering is the most difficult game in climbing.

2. Bouldering is quite popular and exposes the largest number of climbers to the largest number of falls.

3. Every bouldering fall is a ground fall. 

4. Crowds can create a false sense of security.

5. The uninhibited and maximal physical effort demanded by bouldering can draw attention from critical peripheral matters, like pad placement, spotting, and falling.

Boulderers hit the ground more than in any other genre. While these accidents do not incur fatalities (at least that I am aware of), nor prompt spectacular rescues, they do have a huge impact on our community.

I encourage anyone experiencing or witnessing a bouldering accident to report them here.

While we annually publish a few bouldering accidents—the vast majority of them result in lower-leg and/or wrist/arm injuries, and the vast majority self-rescue—obtaining data is important. It is prudent to reinforce best practices. Read more on bouldering safely here.


Sign Up for AAC Emails

Legacy Series: The Uriostes, the Origins of Red Rock's Classics

Jorge Urioste was a priest from Chile. Joanne had strong-headed ideals, and was determined to be independent—pitting herself against death-defying situations through climbing in order to prove it. They were climbing together constantly, and then one thing led to another, and they were kissing in a bivy cave in the Gunks. Their marriage and lifelong commitment to climbing would produce some of the most notable multi-pitch classics of Red Rock, including Epinephrine, Prince of Darkness, and Levitation 29, among many others. They broke a lot of climbing's rules at the time—including bolting, but also publishing a guidebook on the "sandstone junk" that others perceived Red Rock climbing to be. This is their story, a long overdue tribute to their legacy in climbing.


Legacy Series: Jack Tackle, First Ascents in the Alaska Range

Jack Tackle was a van dweller before he became a climber, but on that first day, he was hooked. He loved the anarchy of the small fringe activity that was climbing, and he would go on to channel that anarchy into proud first ascents, including FA's on Waddington as well as throughout the Alaska Range. Dive into this film to hear Tackle's reflections on his mountain life, his first ascents, and what motivated him to keep pushing his technical edge.


CLIMB: The Training Episode, with Tom Randall

On this episode of the podcast, we sat down with the infamous Tom Randall of Wide Boyz fame. Tom reflected on some of the most transformative moments in his climbing career, debunked some of the myths of climbing training, and got us hyped on the AAC’s new partnership and discount with Lattice Training. Whether it's how to train as a trad climber, or the difference that trainers see between UK athletes and US athletes, we covered a broad range of topics. If you’re curious whether you should start training for climbing, even if your goals in climbing have nothing to do with pushing grades, then dive in!


Summary Block
This block has no content yet. Items you add to the page connected to this block will display here.

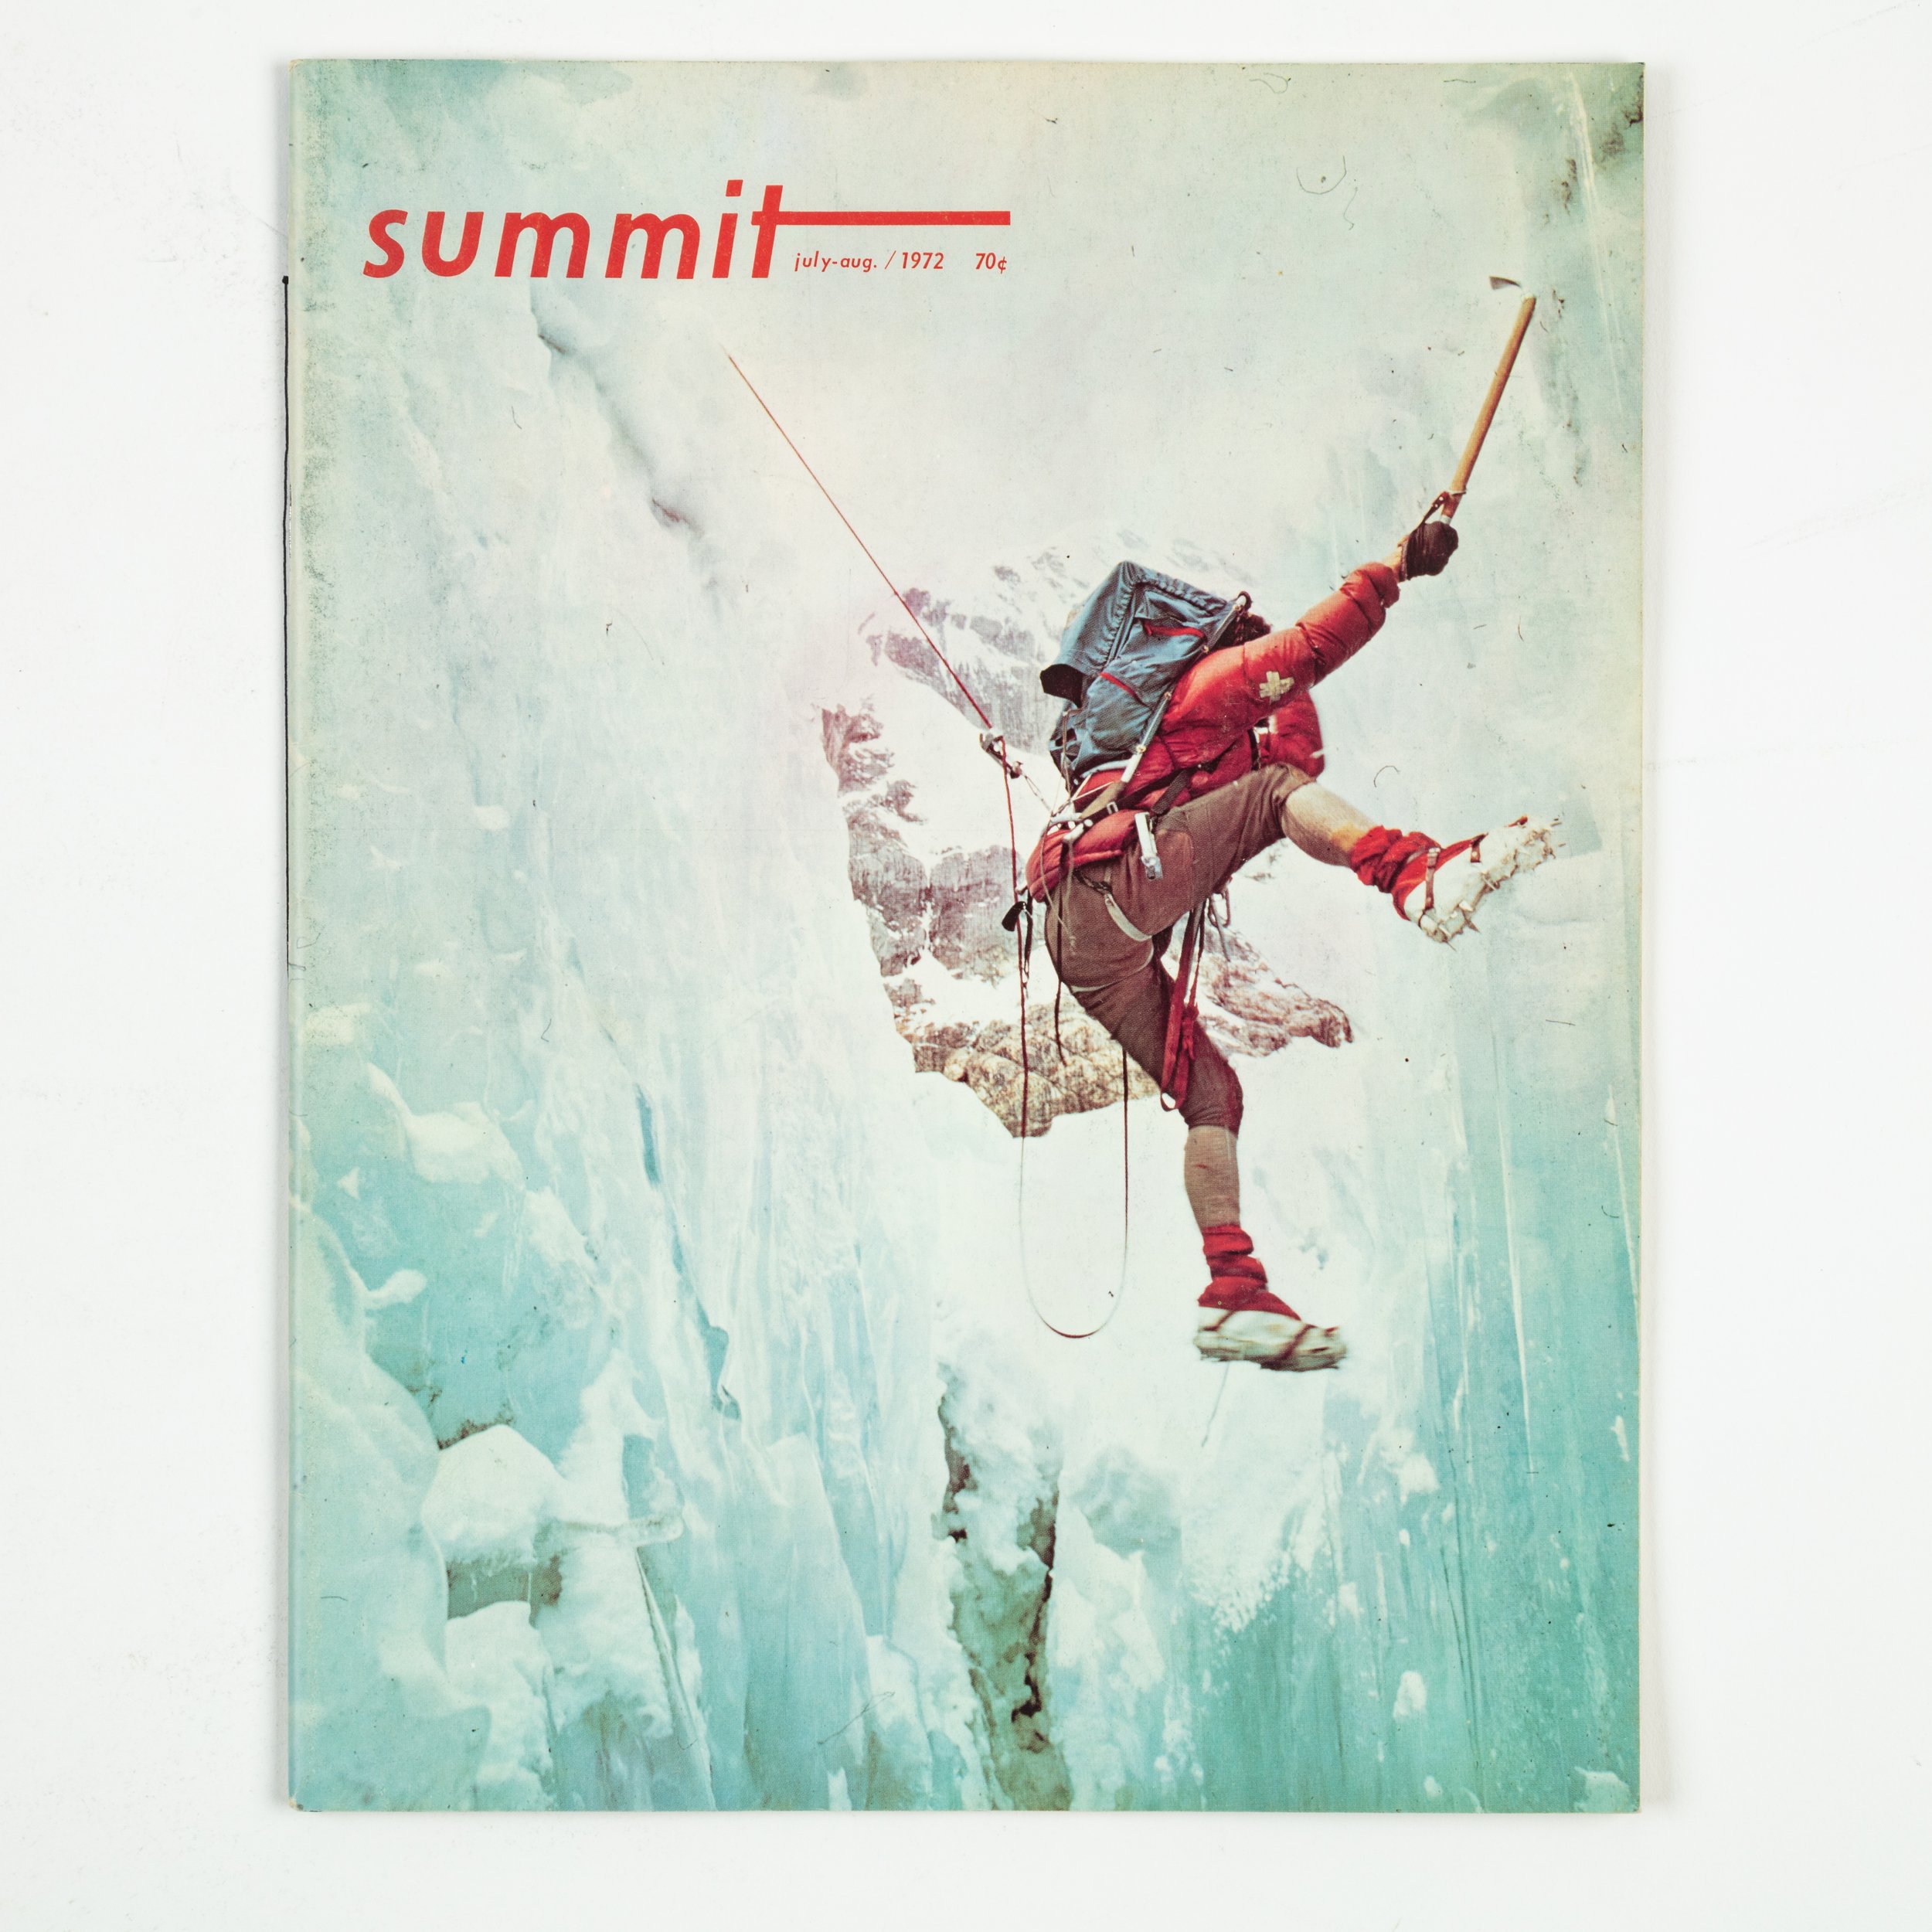
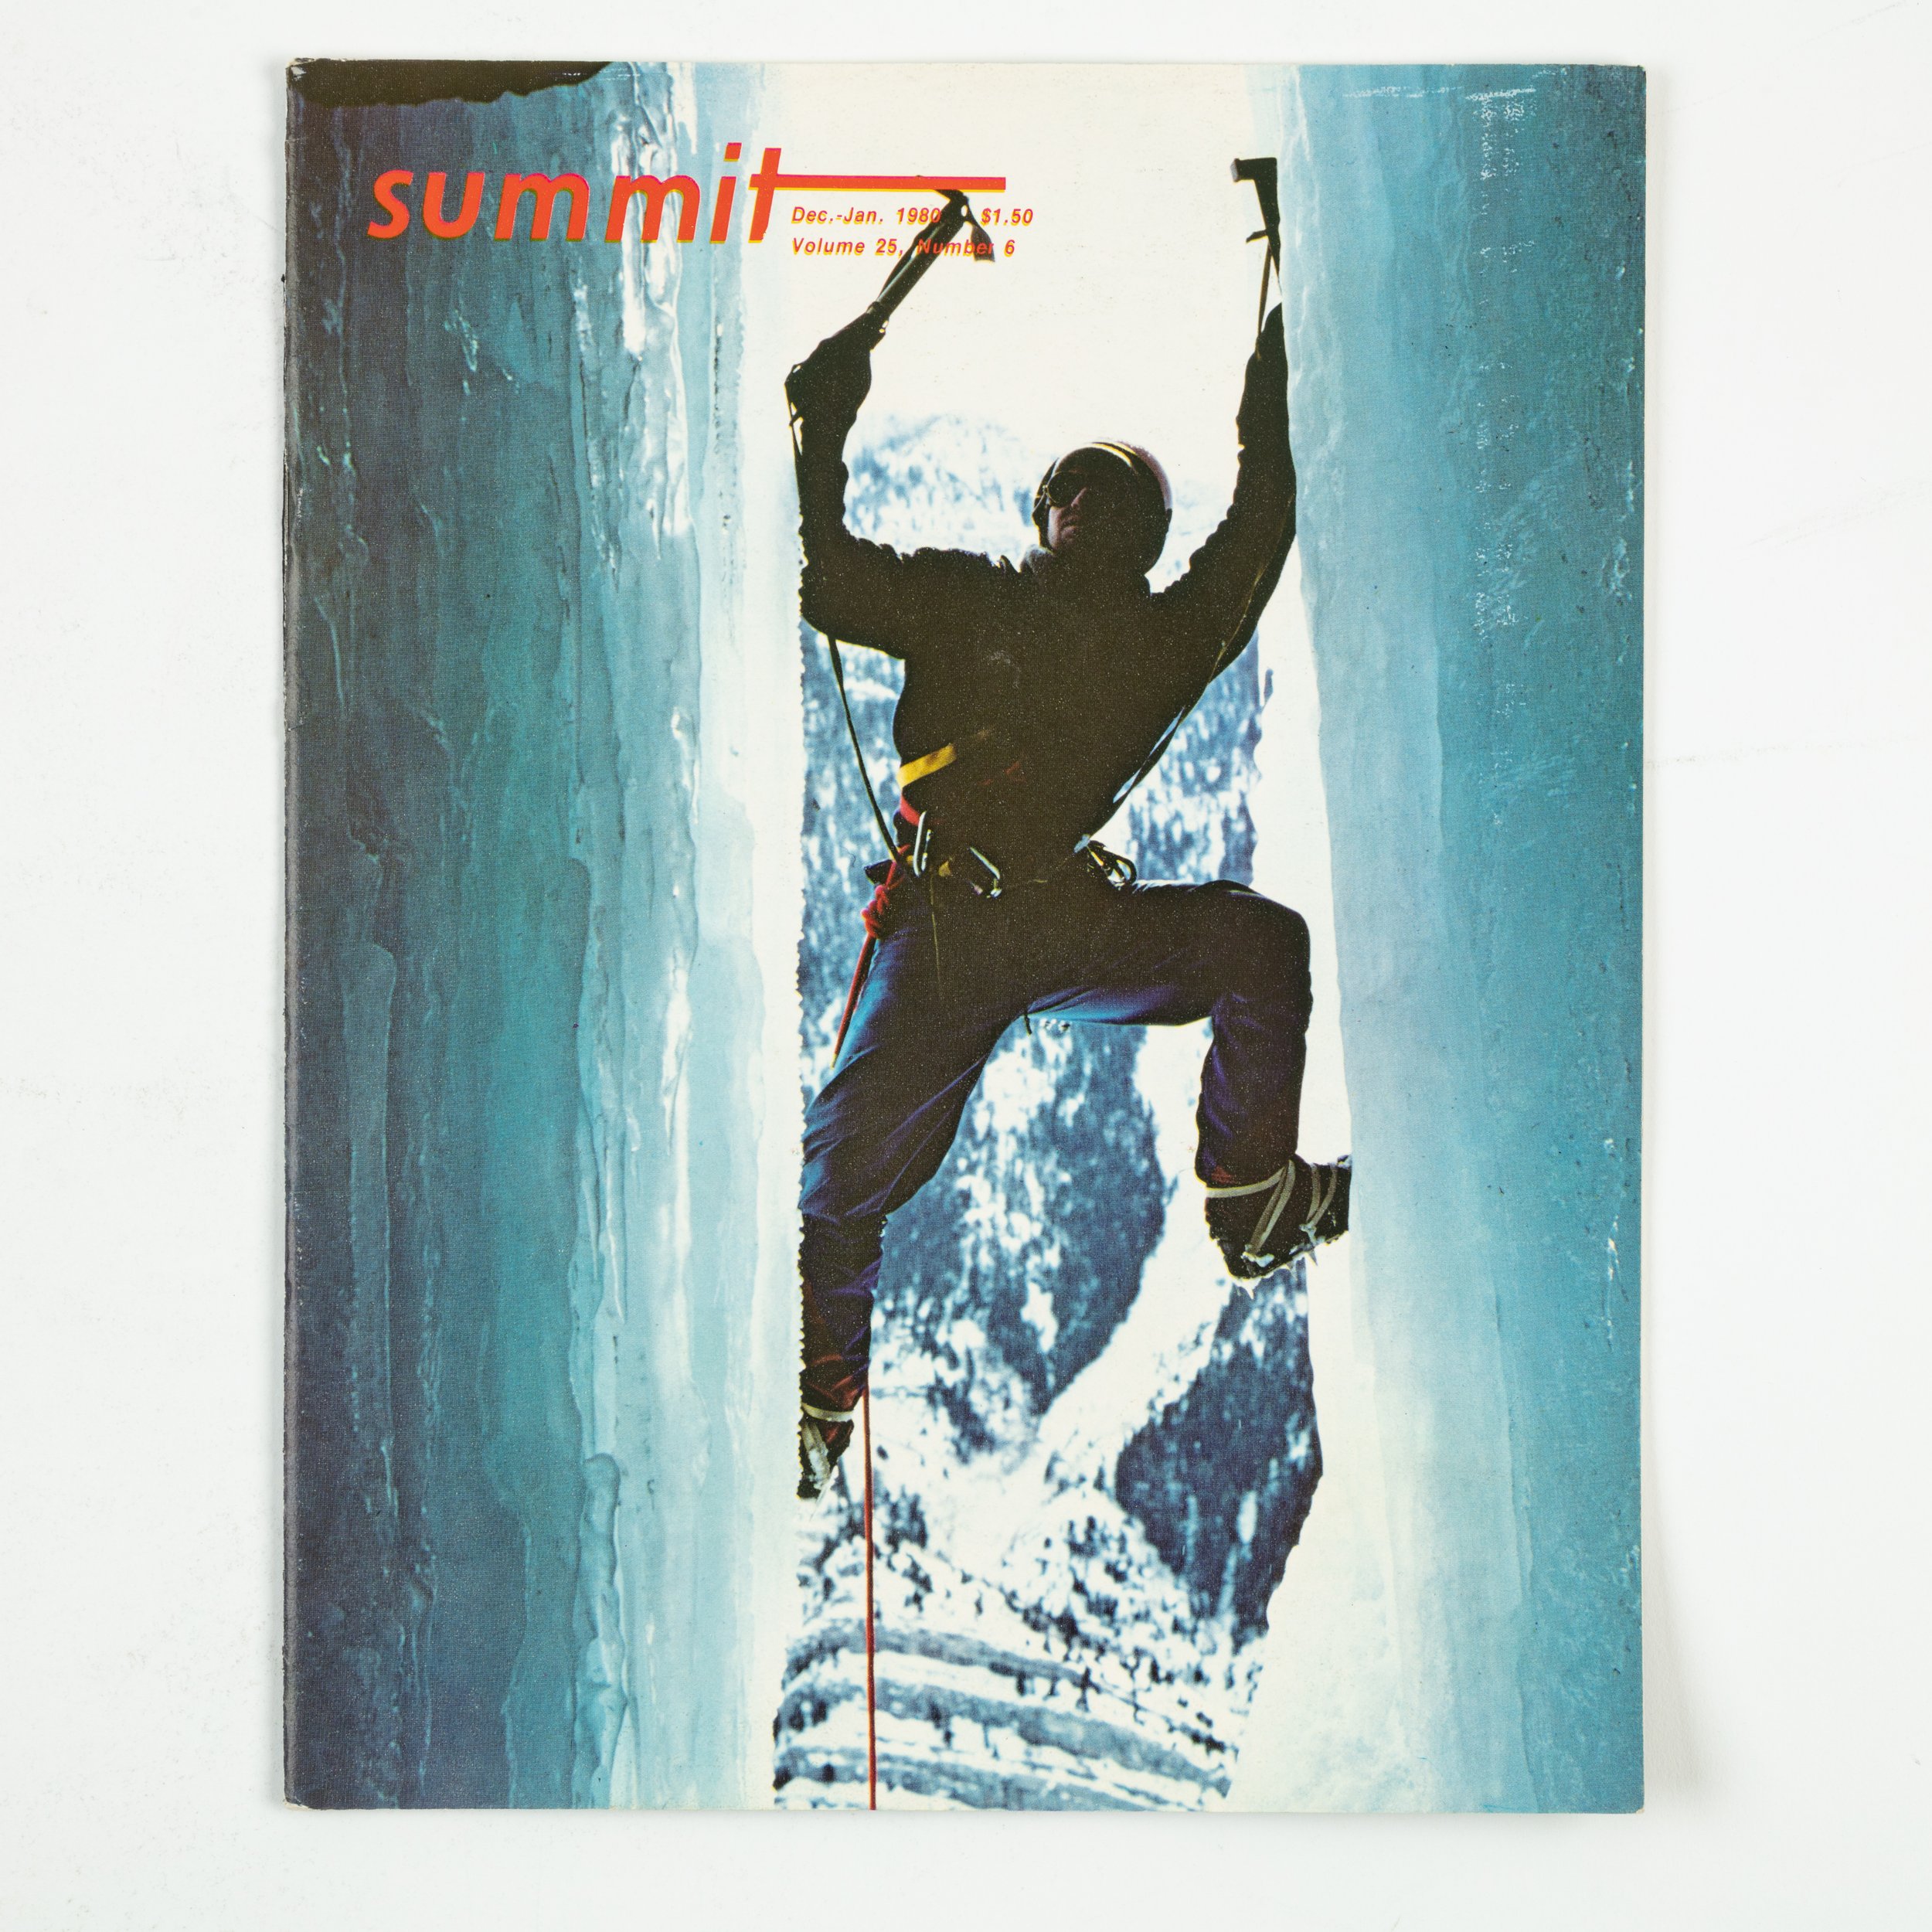
Summit Magazine

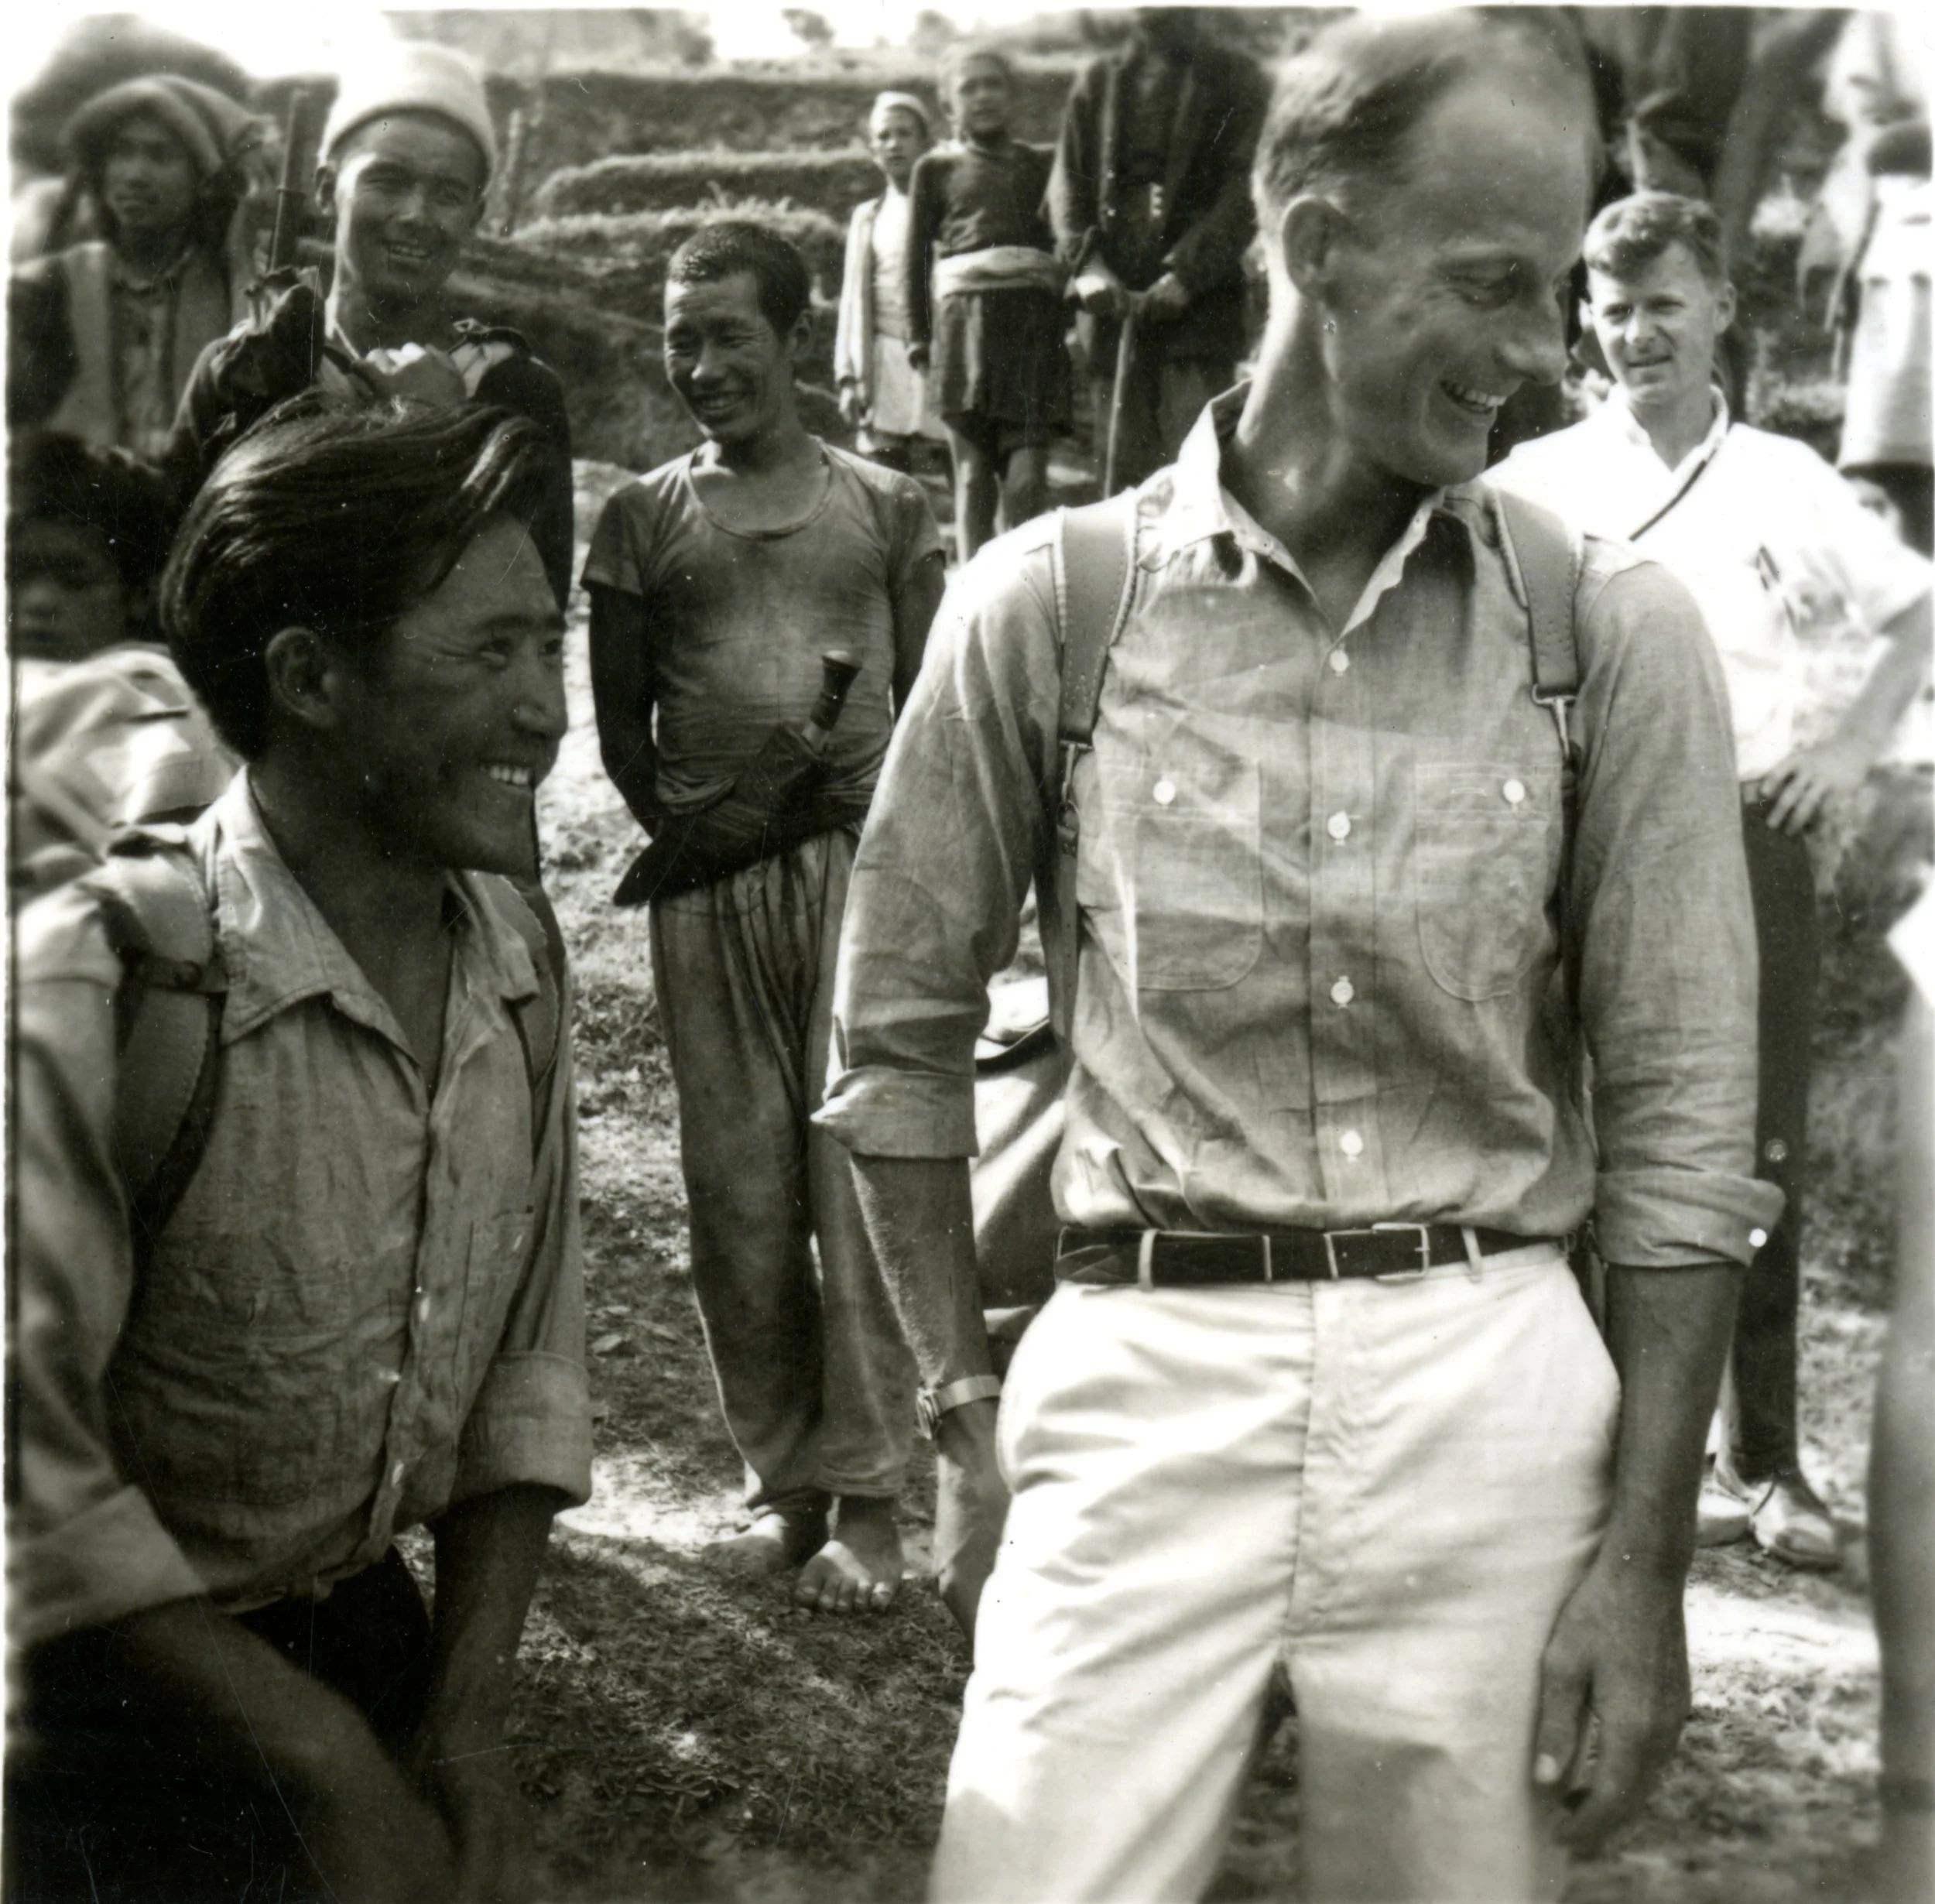
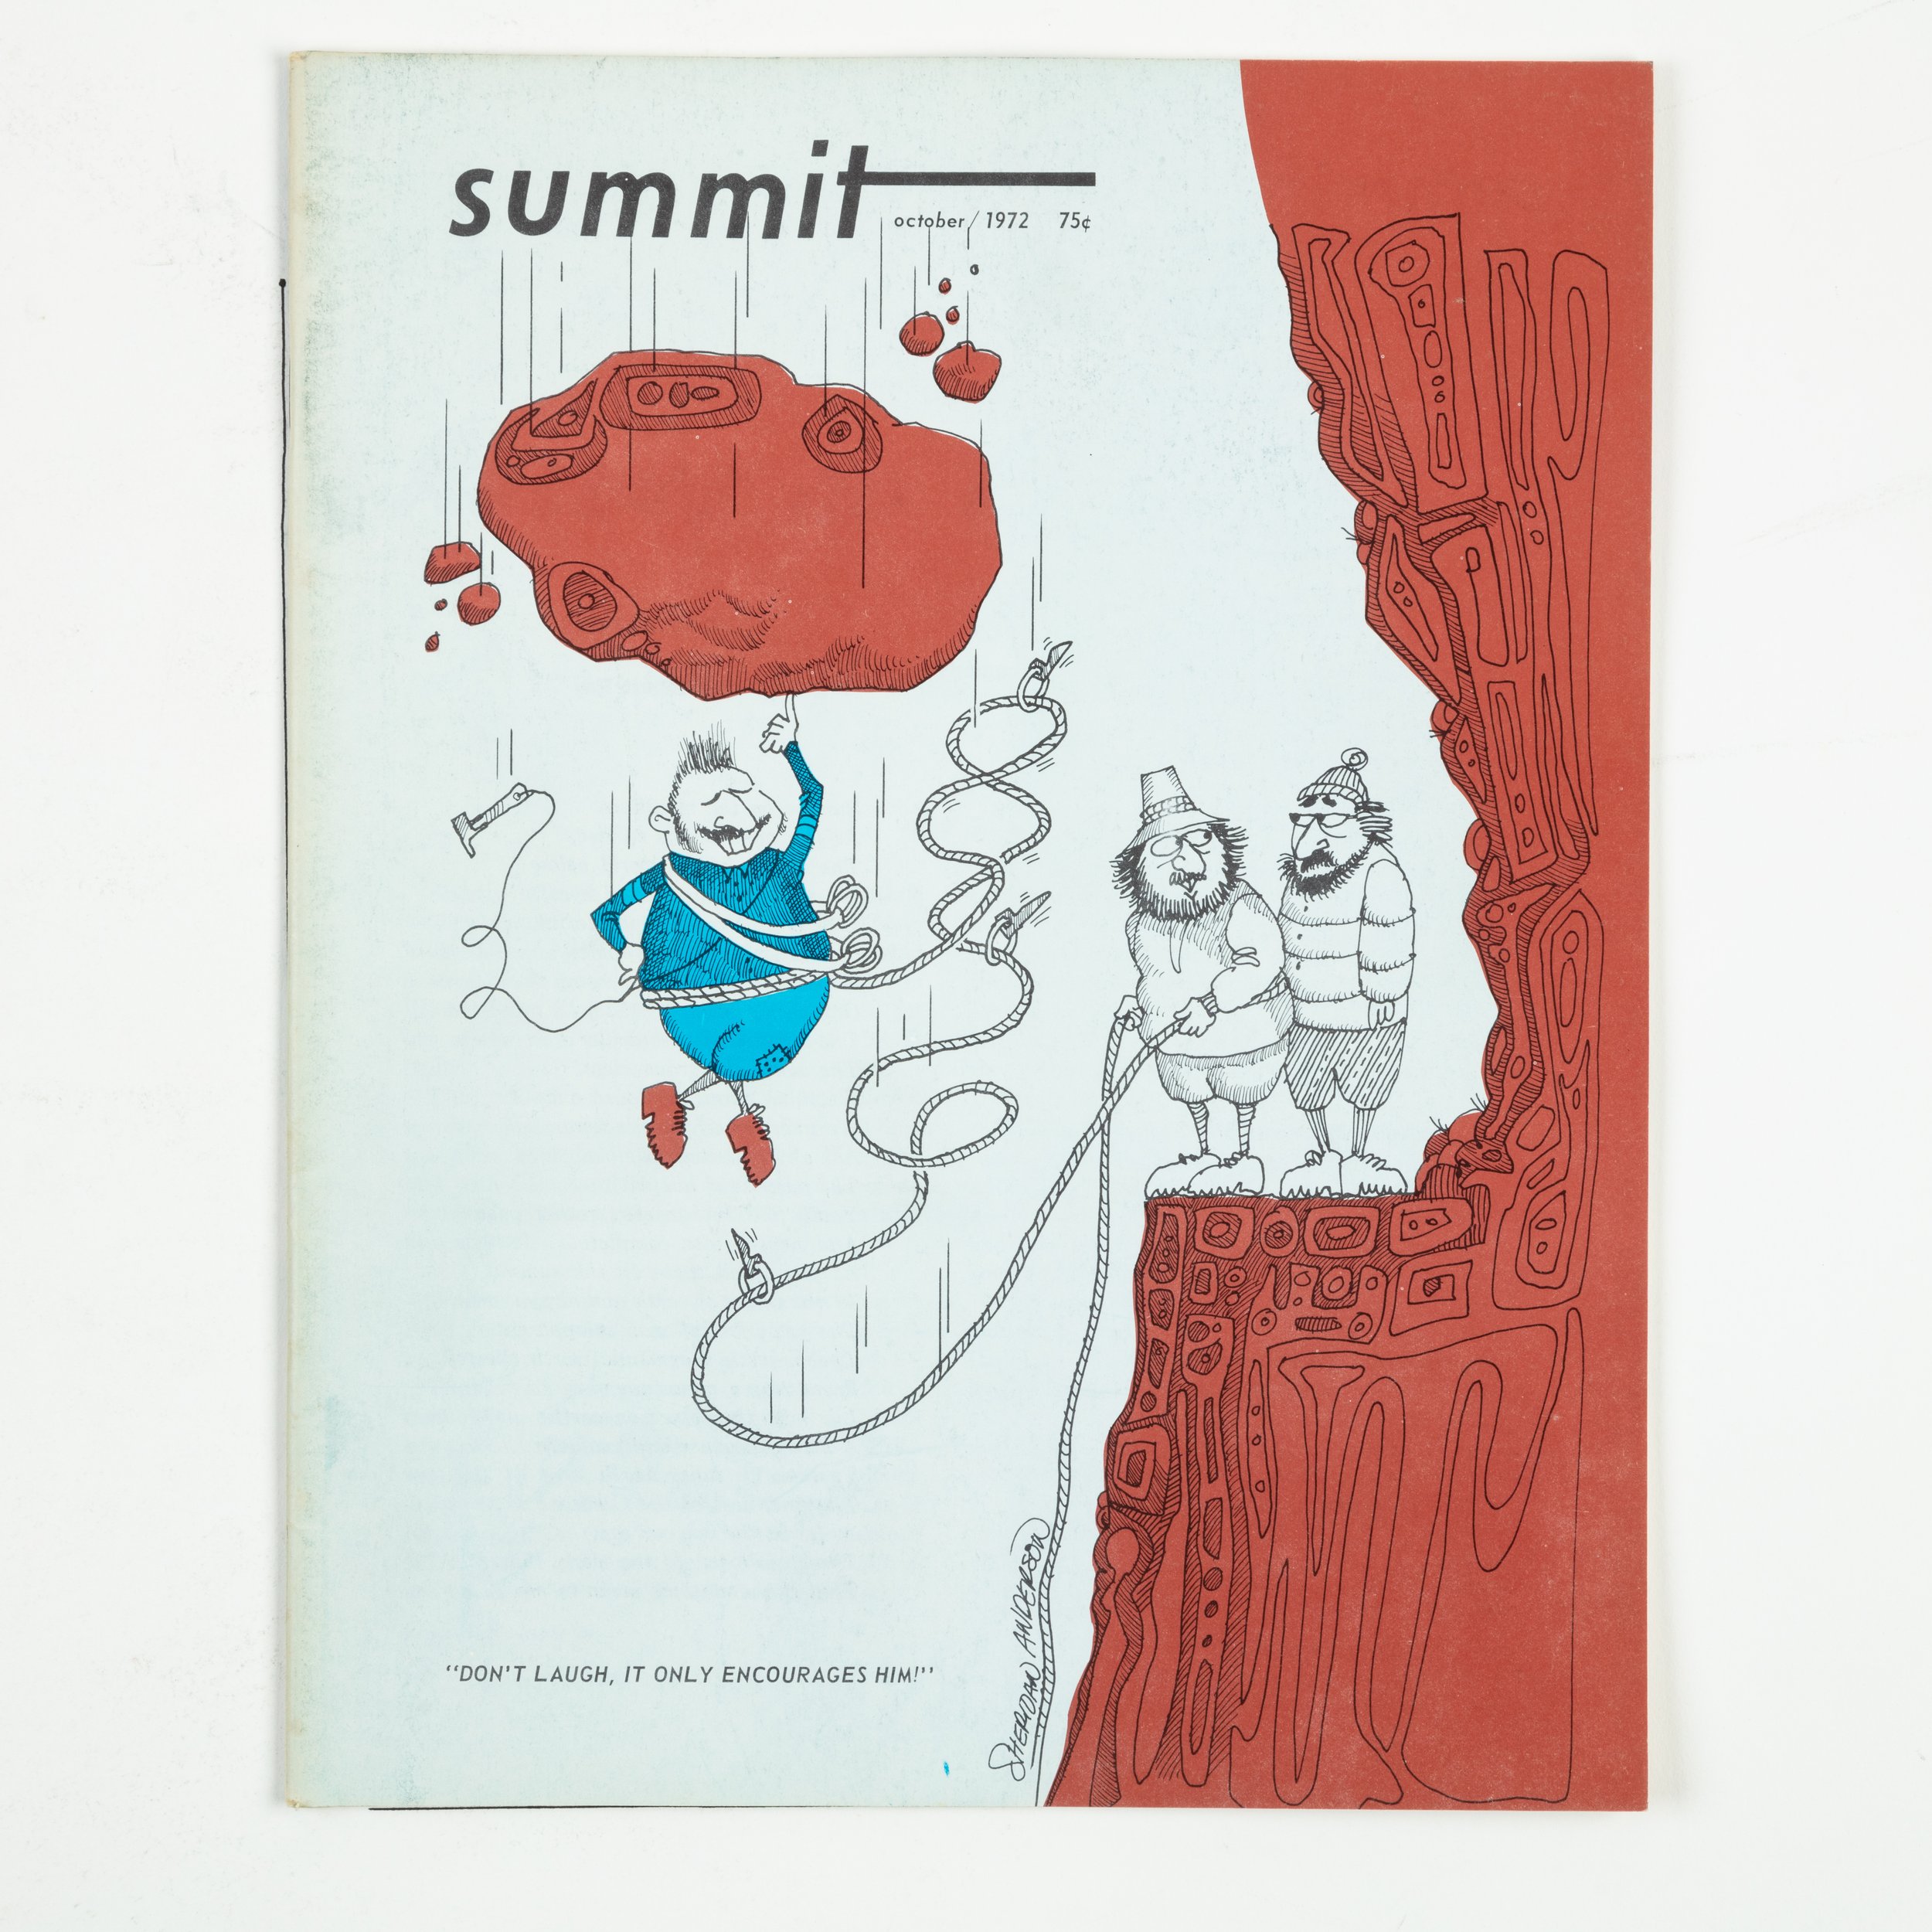
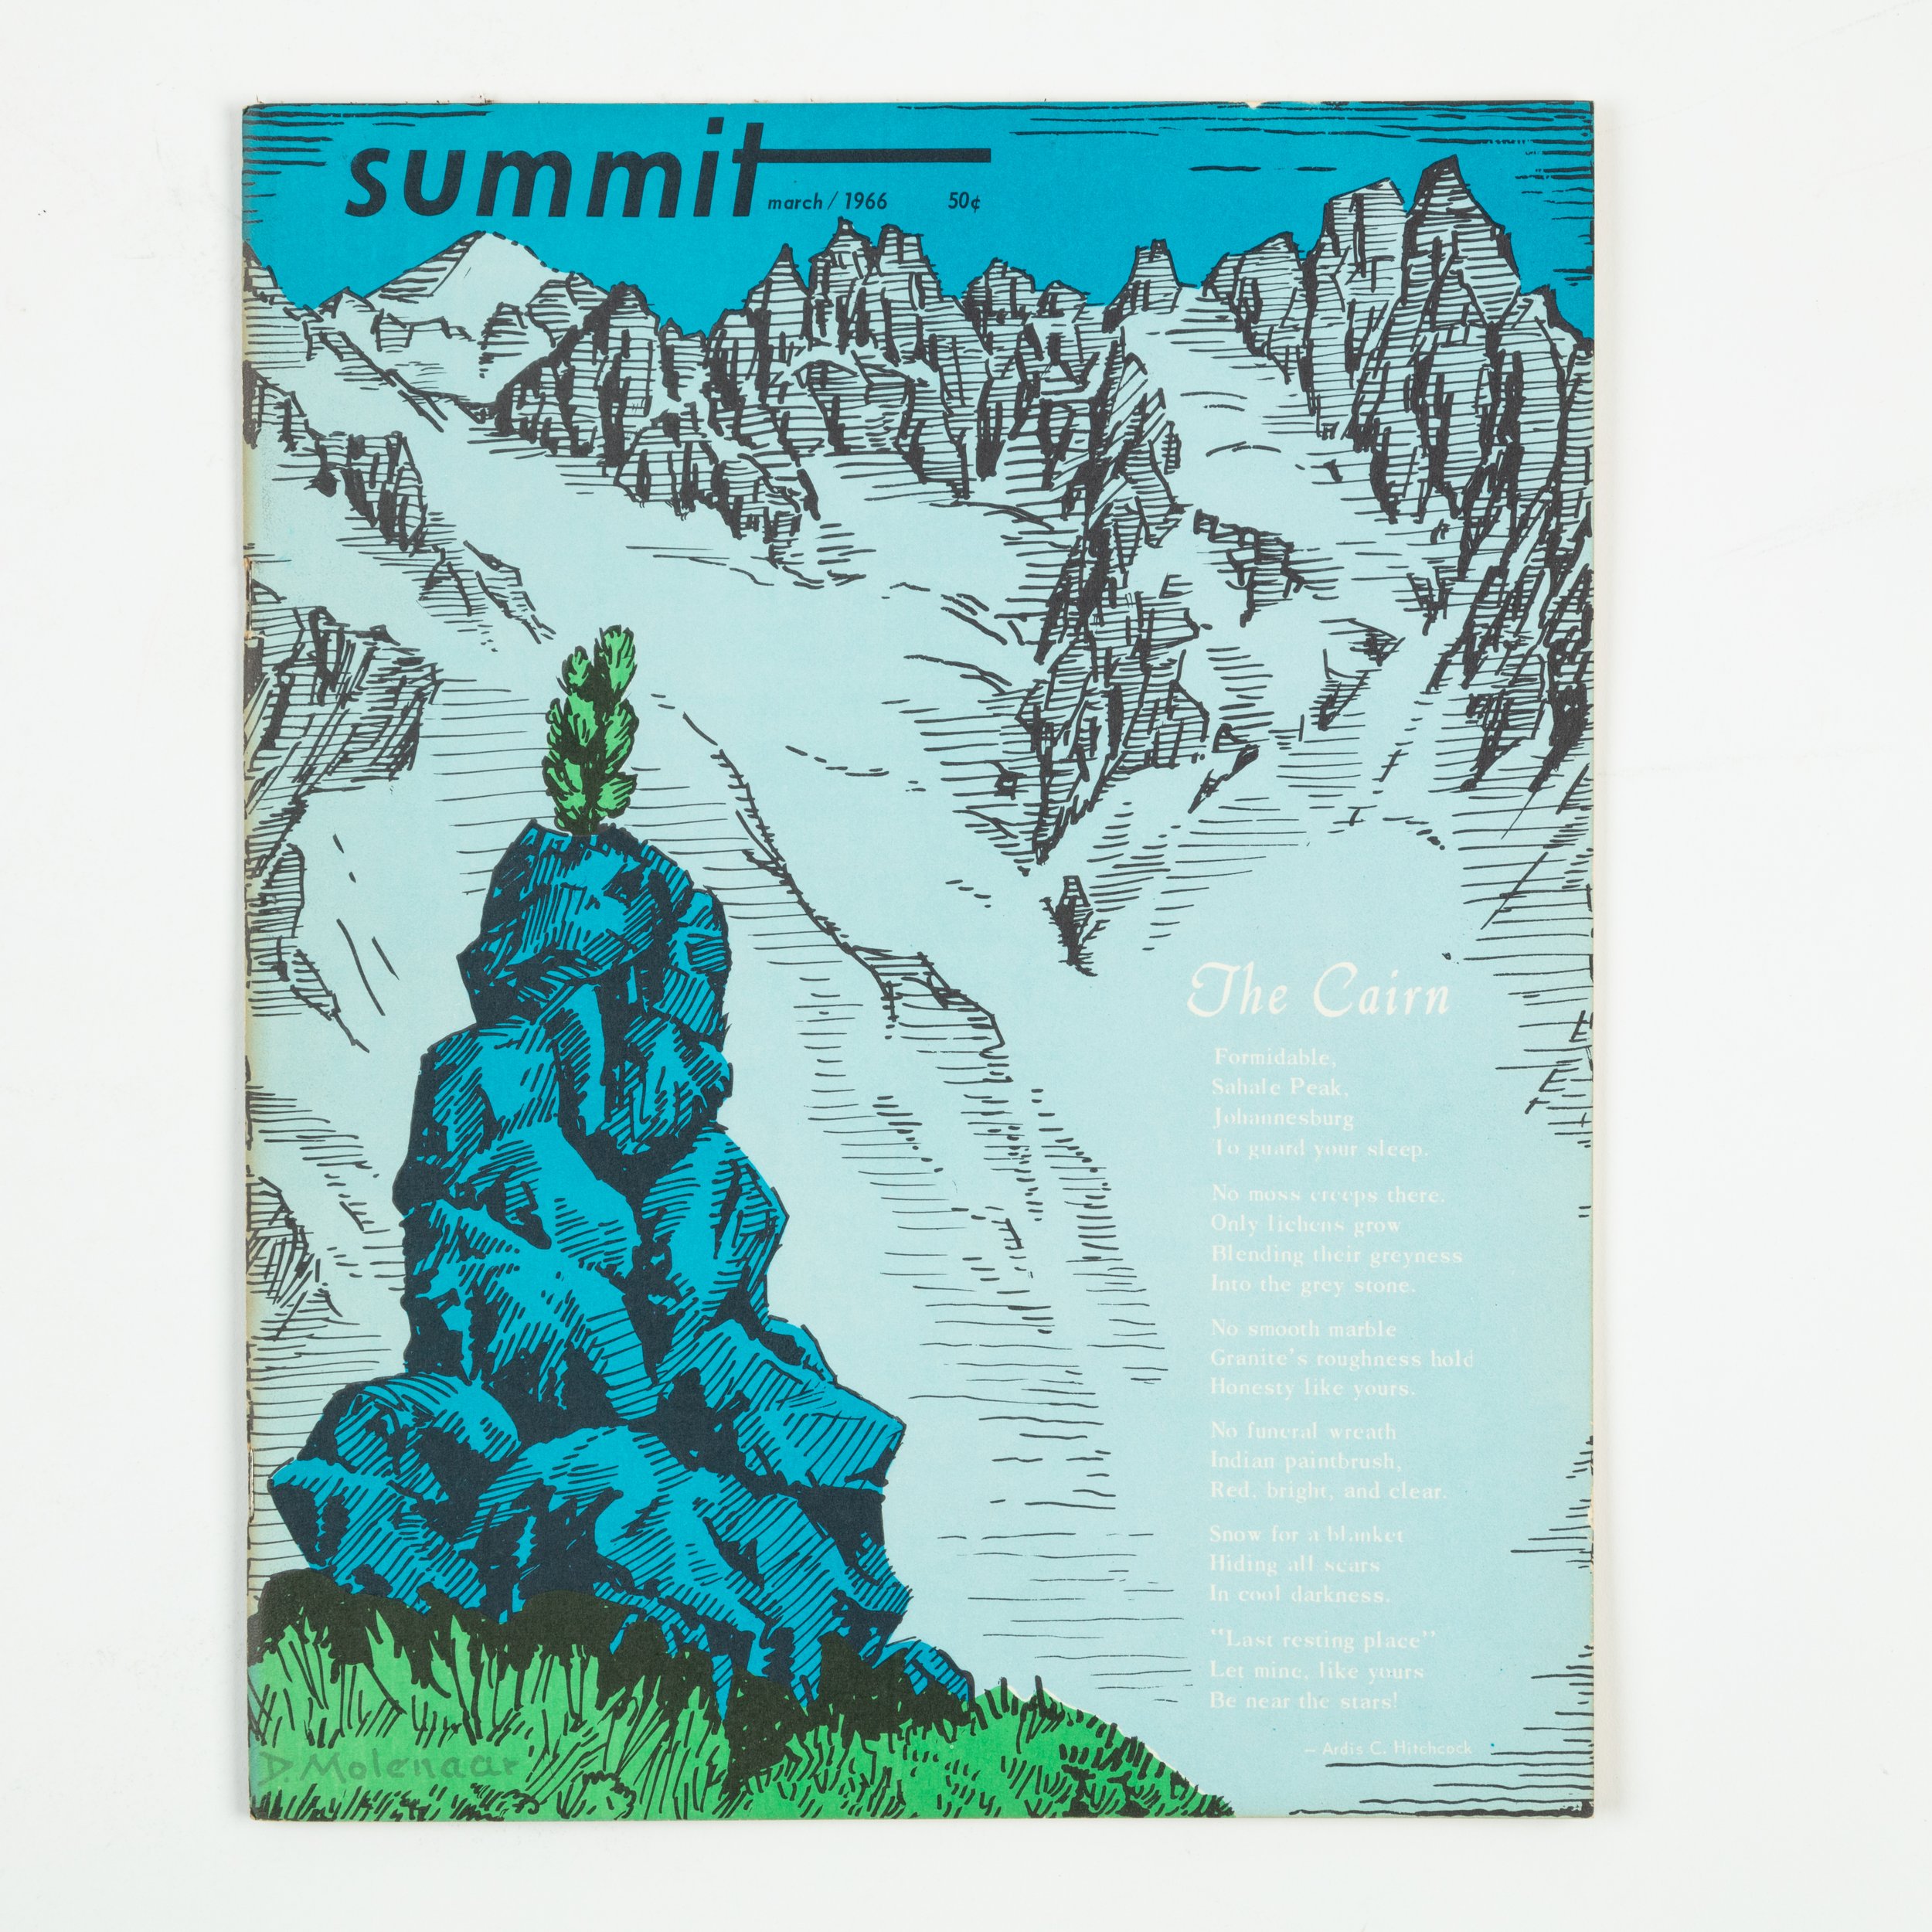
Provided by Michael Levy

A story from the AAC Library

By: Sierra McGivney

Jean Crenshaw and Helen Kilness rode their motorcycle away from the US Coast Guard base in Georgia in 1946. They had just taught themselves how to ride the motorcycle in the bike dealership's parking lot. The two had become fast friends working as Radio Operators in the Coast Guard. With the war over, they were untethered, the future and road ahead of them. Both grew up out west, so they headed that way, the wind roaring around them.

Once in California, they worked in the publishing and editing industry, and on the weekends, they went out on trips with the Sierra Club. The two fell in love with rock climbing and playing outside. They were completely inseparable. With time they moved to Big Bear, CA, to an old Forest Service cabin. They wove their two favorite things together and started a climbing magazine, the first of its kind, in 1955.

Summit Magazine was edited, published, and produced in Crenshaw and Kilness's house. The basement contained a dark room for photo and print development.

The two were some of the original dirtbags. They would make enough money and write enough content for the magazine and then run away into the mountains and play. Their first magazine cost 25 cents.

In the post-WWII climate of the United States, they went against the grain. Though not against marriage or children, Kilness and Crenshaw were committed to expanding and redefining the purview of women. Alongside the complexities of their religious commitments and their vision for climbing journalism, they were also two women who wanted to throw out the kitchen sink and replace it with summits.

Provided by Michael Levy

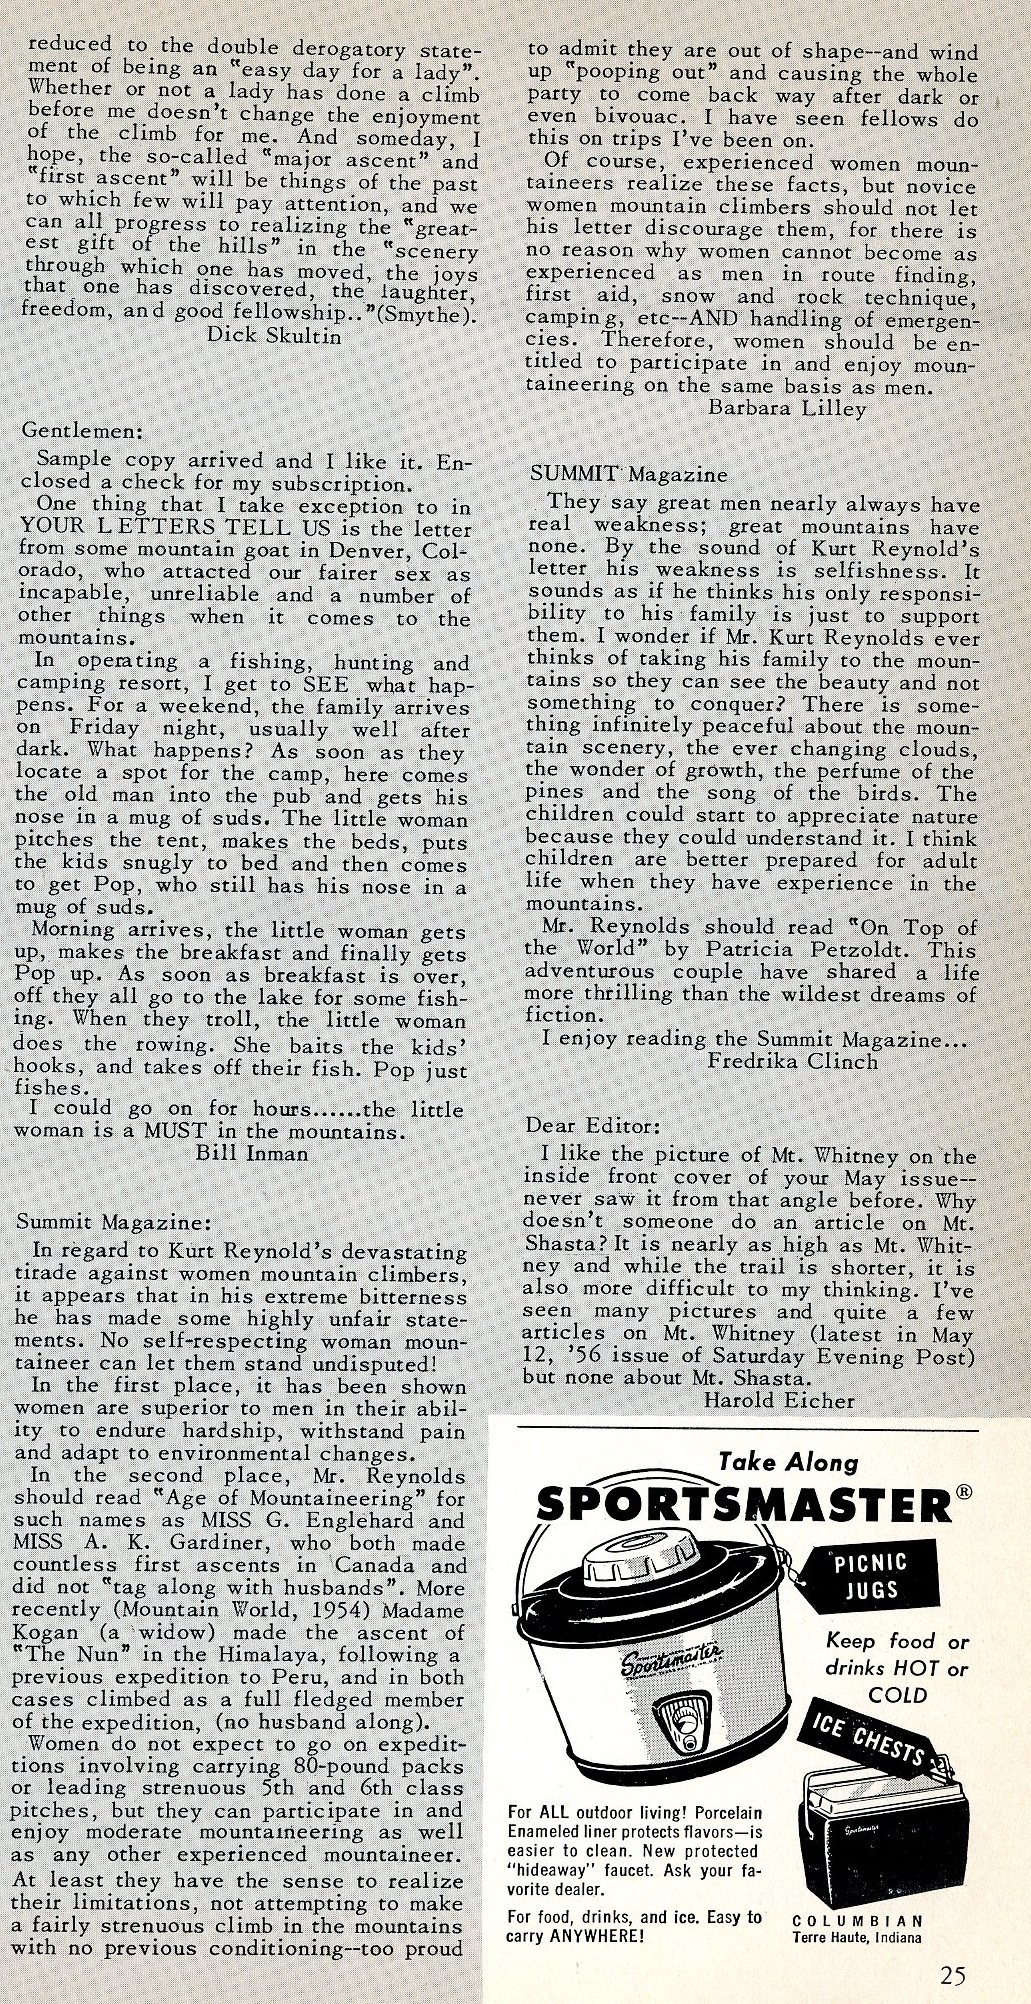
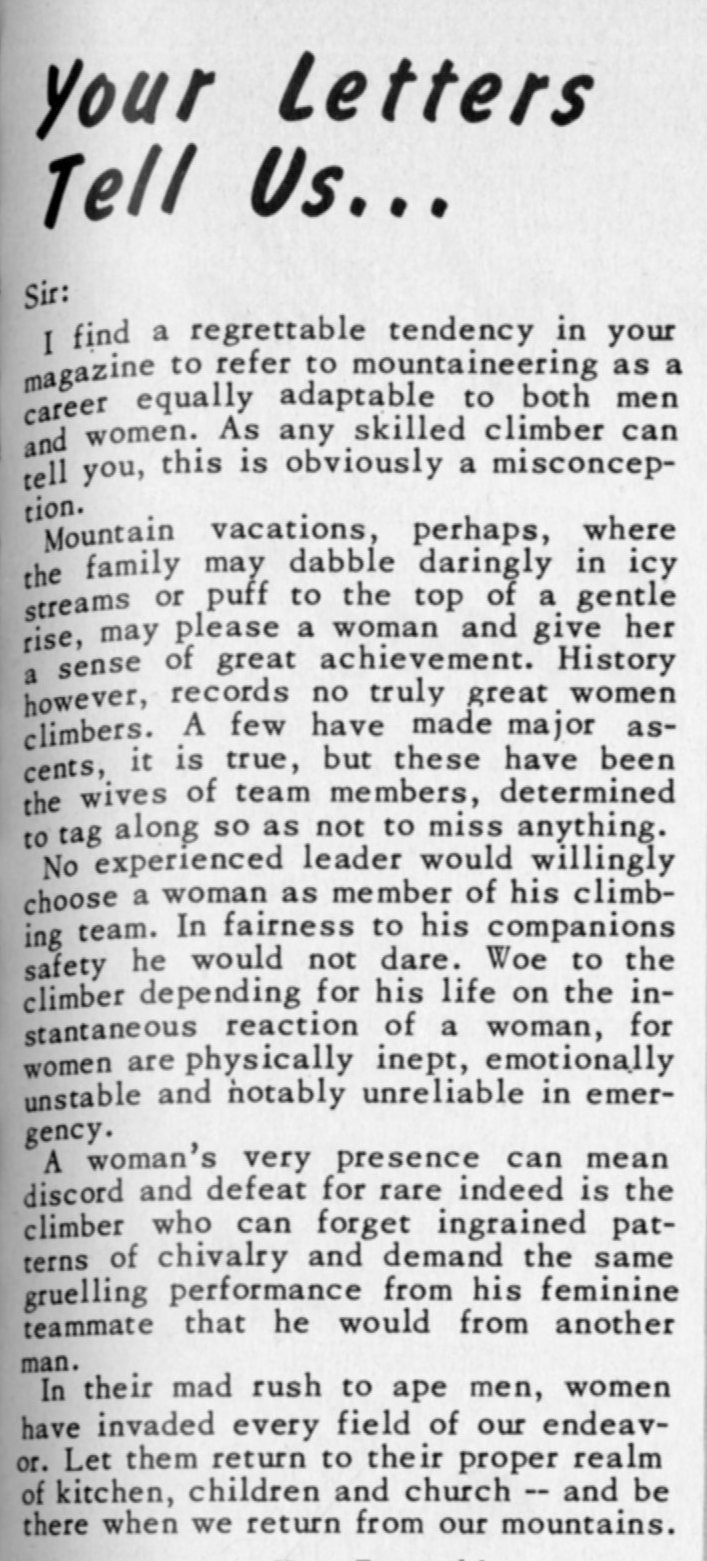
Kilness and Crenshaw avoided letting it be known that they were women on the masthead of Summit Magazine. Jean became Jene, and Helen became H.V.J Kilness. Because of this, some men felt free to write letters to the editor, denigrating women. In response, Kilness and Crenshaw would publish these letters and those that would follow, opposing these sexist views. The comments section of Summit Magazine was like the Mountain Project forum of the 1950-70s.

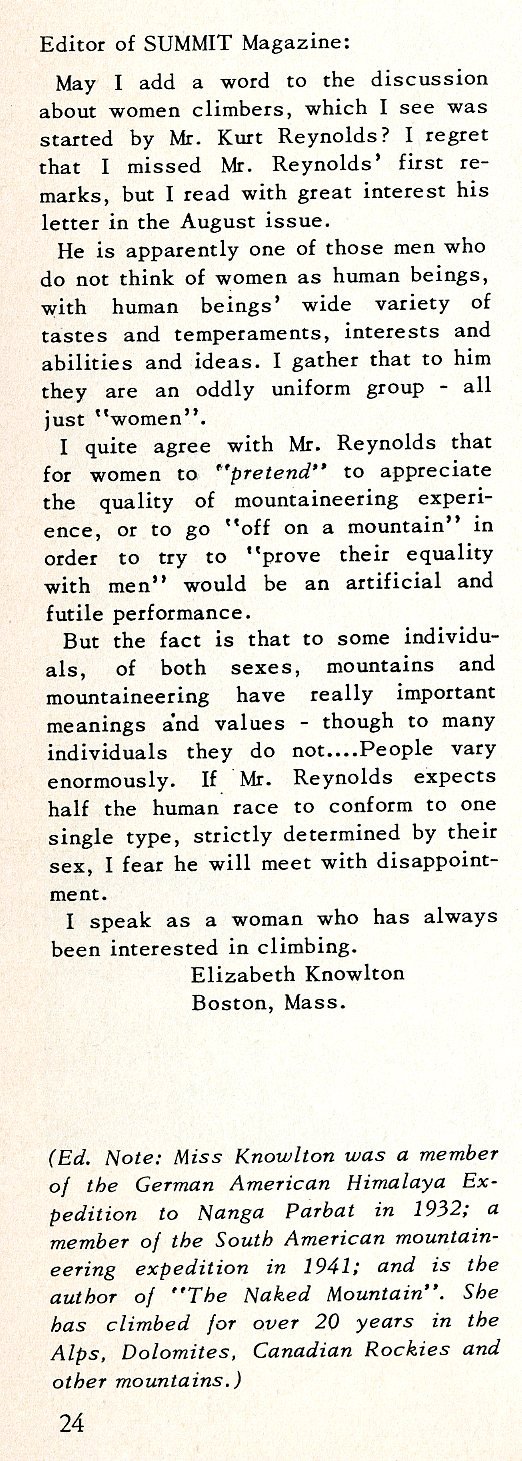
Kurt Reynolds from Denver, Colorado, wrote, "A women's very presence can mean discord and defeat, for rare indeed is the climber who can forget ingrained patterns of chivalry and demand the same grueling performance from feminine teammates that he would from another man. In their mad rush to ape men, women have invaded every field of our endeavor. Let them return to their proper realm of kitchen, children, and church–and be there when we return from the mountains."

The comments section regulated itself, and both men and women expressed their views against this comment.

Elizabeth Knowlton, a famous mountaineer, countered, "But the fact is that to some individuals, of both sexes, mountains, and mountaineering have really important meanings and values—though to many individuals they do not … People vary enormously. If Mr. Reynolds expects half the human race to conform to one single type, strictly determined by their sex, I fear he will meet with disappointment. I speak as a woman who has always been interested in climbing."

Others said in defense of women, "Mr. Kurt Reynolds rather sickened my stomach with his opinions on the female of the human species. I'm sure that no registered nurse would appreciate his statement on women being 'emotionally unstable and notably unreliable in an emergency,'" responded Dick Skultin.

Kilness and Crenshaw probably laughed whenever they received letters addressed "Dear Sir" containing sexist views of the day. Little did the men writing in know that two mountain climbing women ran Summit Magazine.

Instead of outright confronting these individuals, they proved them wrong through every magazine they produced that empowered women.

Provided by Michael Levy

The letters to the editor weren't the only place these nuanced subjects were brought up. In the fictional story "The Lassie and the Gillikin" from the June 1956 edition of the magazine, the author writes about the undertones of sexism in climbing at the time and the expectation for a woman to make herself smaller. In the story, a male climber takes Jenny climbing for the first time. She starts with beginner climbs and every weekend works to climb harder. She persists and becomes better. At one point, when Jenny succeeds on a climb, the male climber does not, and he is suddenly cold towards Jenny. This male climber has lunch with another woman when he usually eats with Jenny. He weaponizes this woman to show Jenny further how much he distastes her success.

Provided by Michael Levy

The Gilikin, a little creature that climbers blame for tangled ropes or slick holds, suggests to Jenny that he push her off a climb to make the male climber interested in her again. Jenny agrees, and after she falls off a climb, his interest in her returns, underscoring the writer's point.

Jane Collard said it best in the July 1956 comments section of Summit: "Men need to feel superior to women, especially in outdoor, rugged, manly-type activities, and a woman mountain climber is liable to give 98% of the male population an inferiority complex because there are so few men who are mountain climbers and also society says mountain climbing isn't feminine."

The richness of Summit was that it was a proving ground for these kinds of hard conversations about equity, but the editors also insisted on doing so playfully.

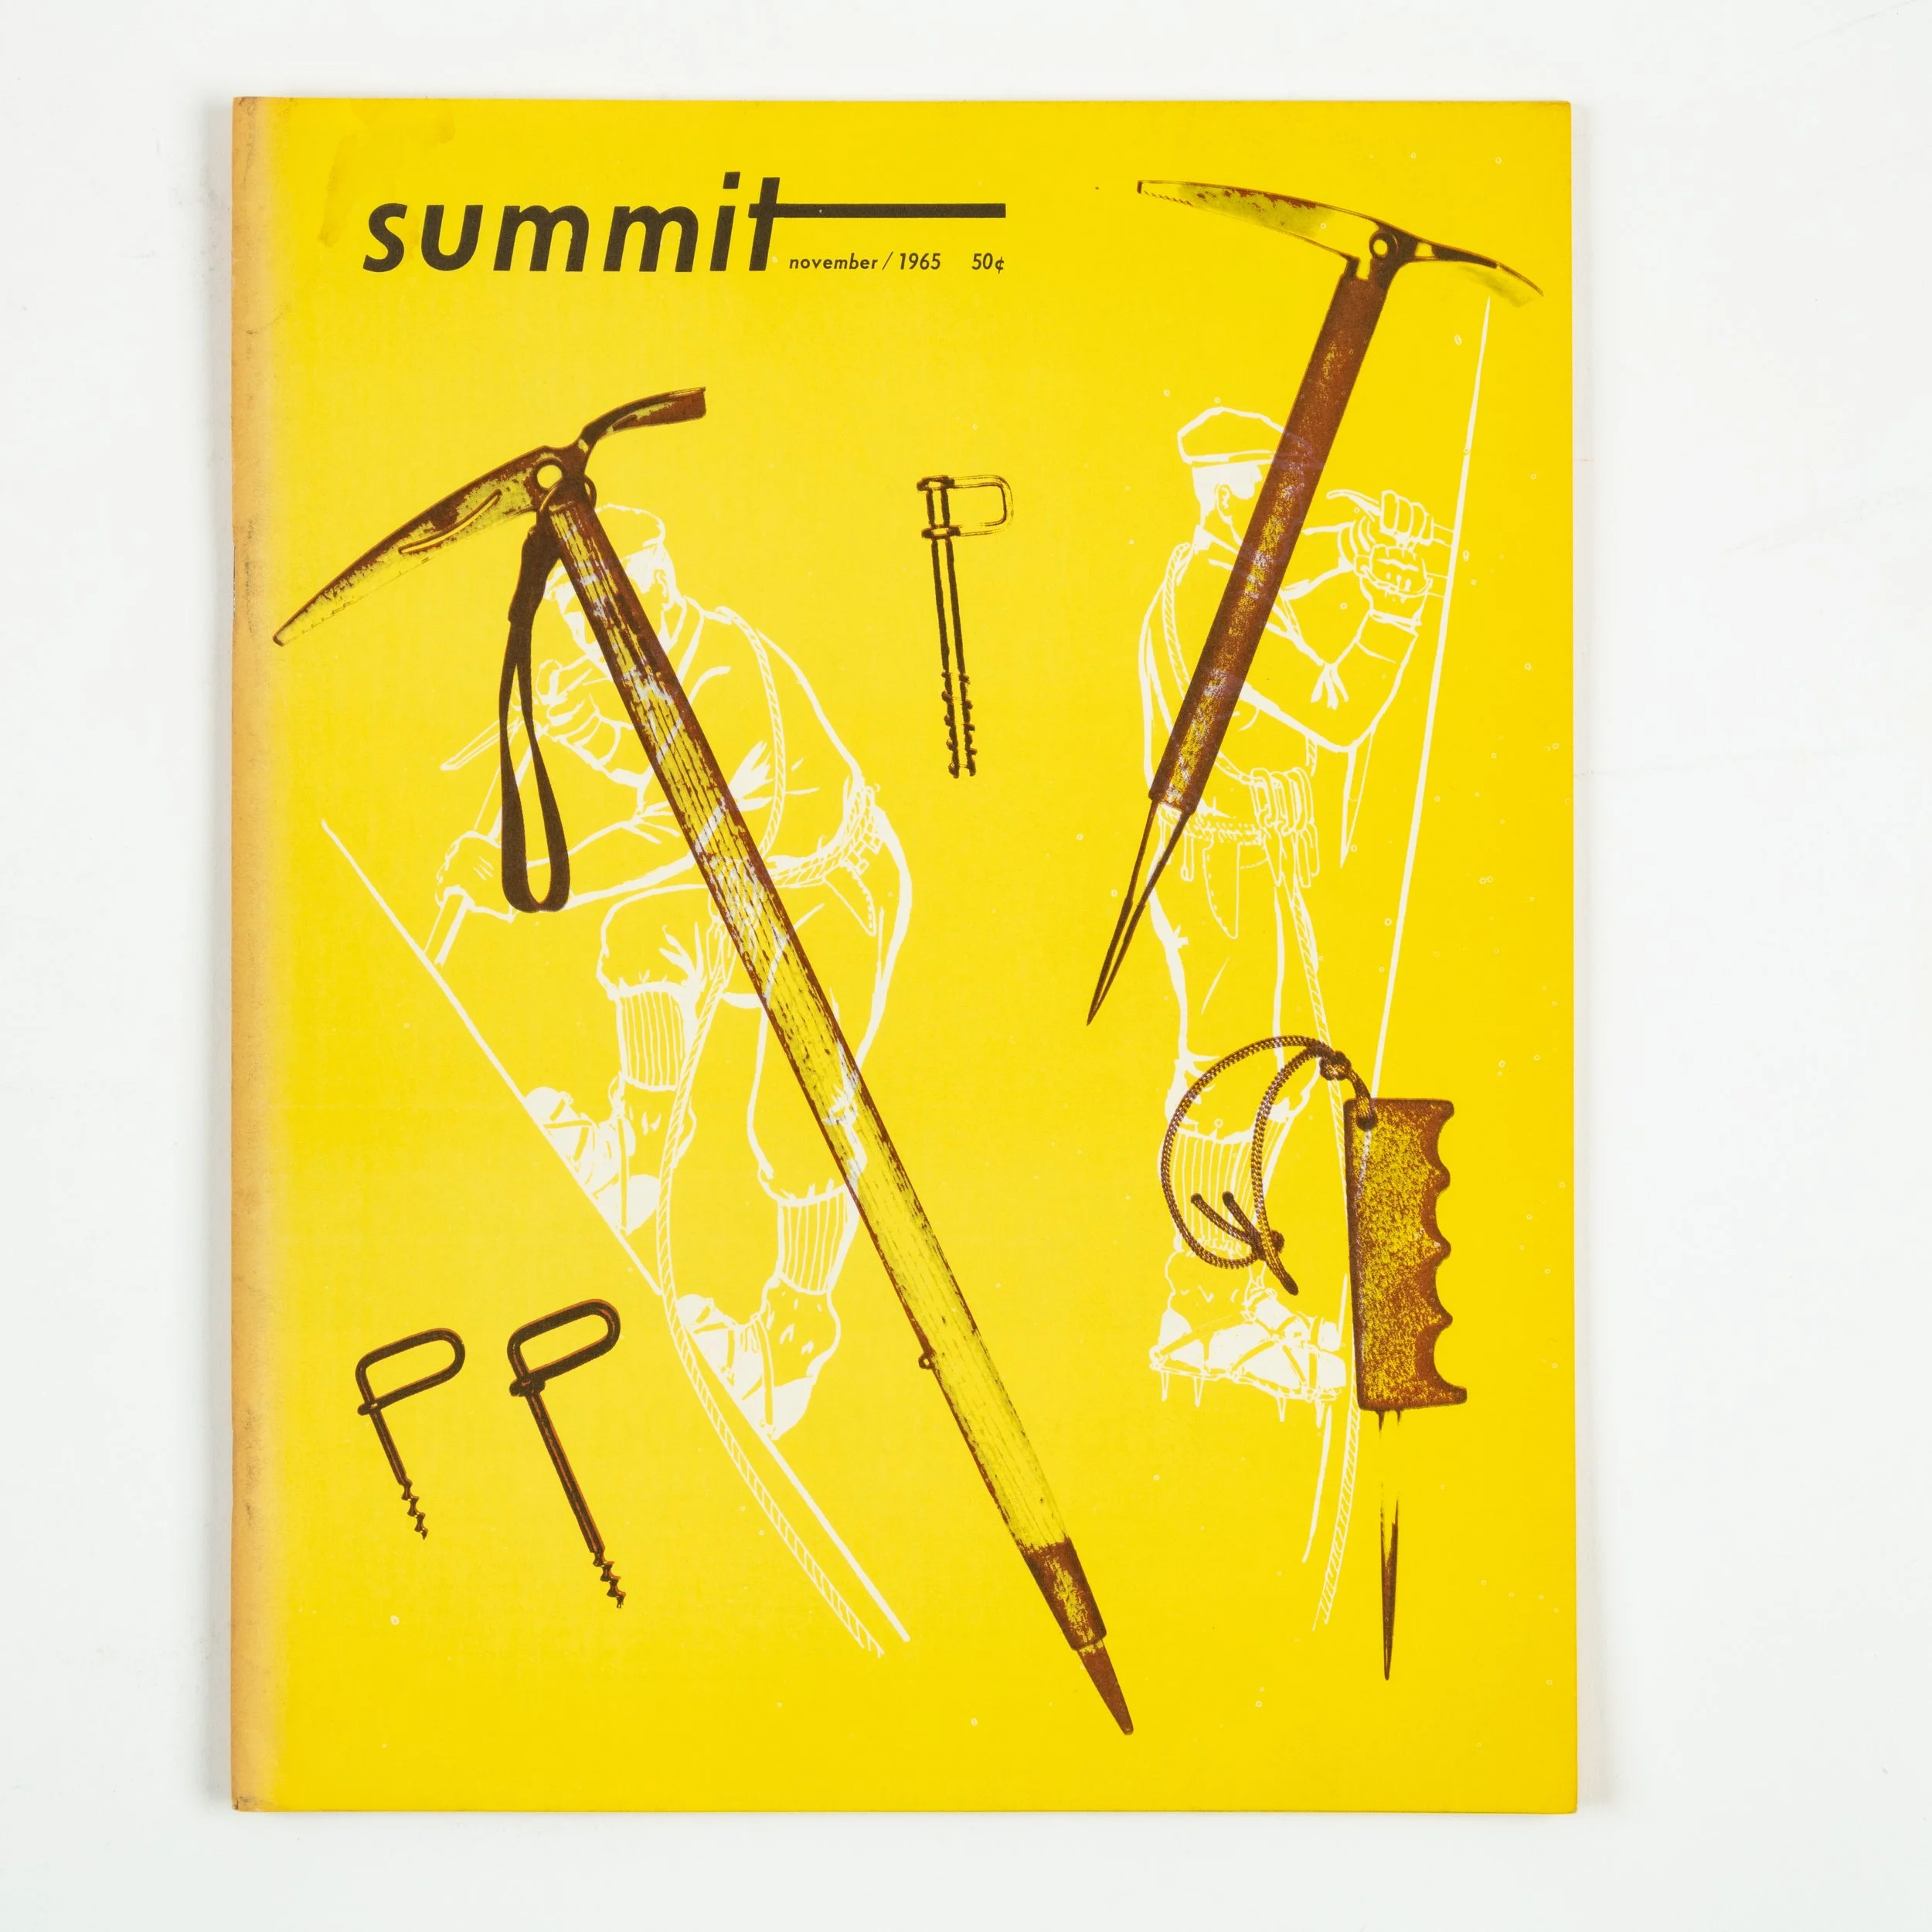
Flipping through old Summit Magazines, you'll find various cartoons and articles. A person skiing off El Capitan is on the cover of their March 1972 issue. The cover was made to look real with a photo of El Cap and a drawing of a small person with a red parachute skiing off of it. On the inside of the magazine, a complete description: "In a well planned and skillful maneuver, Rick Sylvester skied off the top of El Capitan in Yosemite National Park at approximately 50 mph, then parachuted to the valley floor." You can tell that Kilness and Crenshaw were having fun. They didn't take themselves too seriously.

Oddly enough, an ad for Vasque boots is placed on the outside cover. The ad says, "Vasque…tough books built by men who've been there…Vasque the mountain man boot."

Provided by Michael Levy

The articles in Summit had an extensive range of topics, from challenging technical climbs to backpacking and ecology. The magazine had a news section called "Scree and Talus" which always included a poem. One addition of "Scree" includes a granola recipe next to the information about an unclimbed mountain in Nepal called Gauri Shankar.

The swirly fonts, playful cartoons, and various article topics blended feminine elements into an otherwise 'masculine' sport for its time. Kilness and Crenshaw were redefining climbing to include their vision—broadening and deepening what climbing could mean and who climbing was for.

Summit was about all aspects of climbing, not just climbing difficult grades and training, which are worthwhile stories to tell but do not encompass the soul of climbing, the why of climbing. Summit Magazine was about pursuing the outdoors and having fun while doing it. Summit's depth and earnest silliness came from Kilness and Crenshaw's ability to take a step back from climbing, see their complex role in it, and in turn, climbing's role in life. That philosophical distance certainly takes the edge off the grade-chasing.


When magazines like Rock and Ice (1986) and Climbing (1970) came onto the scene, Summit fell off. Kilness and Crenshaw themselves ascribed this to their competitors' editorial focus on sending hard and putting up new technical routes. But whether cutting-edge climbing simply sells better or it was the usual story of big media winning by sheer resources, the project was no longer sustainable. Killness and Crenshaw sold the company in 1989, the same year the American Alpine Club recognized their contribution and lifetime service to the climbing community. Under new owners, Summit continued until 1996, after which it was discontinued.

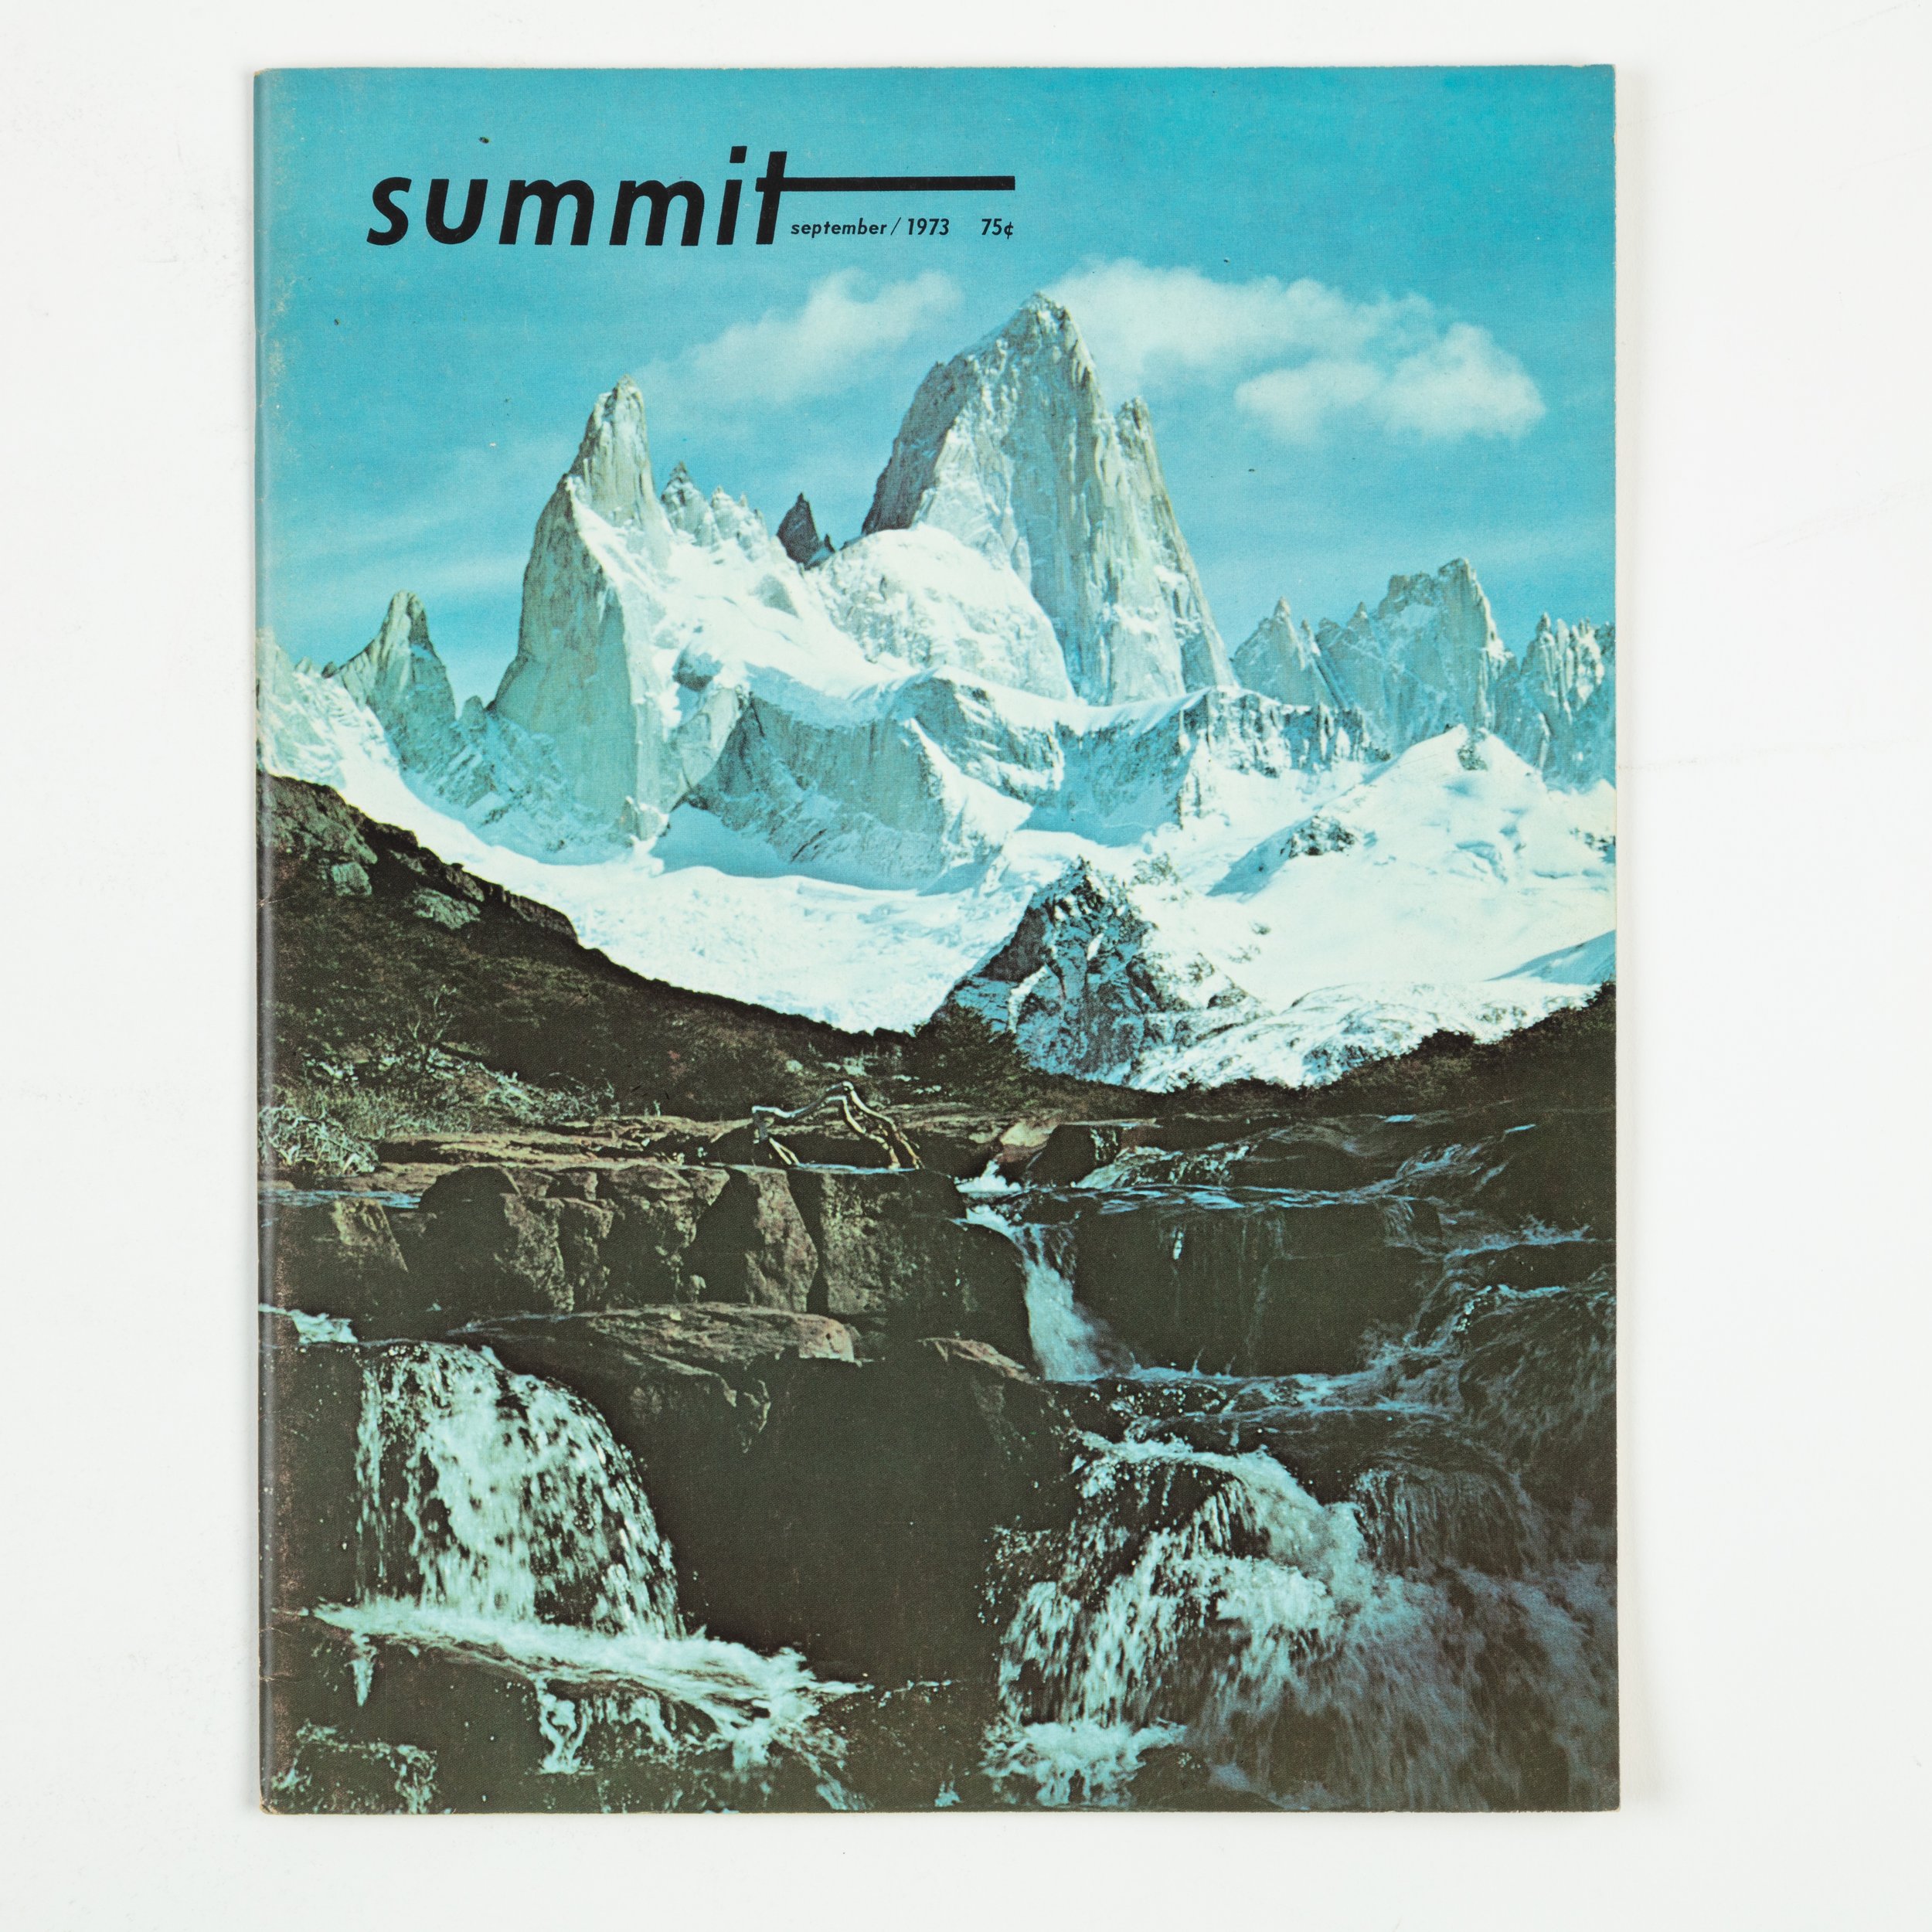
You can still be transported to 1974 and look at old photos of beautiful landscapes worldwide. The AAC library holds all issues of Summit Magazine from 1955-1996. These magazines can be an excellent resource for planning trips or a looking glass into a past era of climbing.

Provided by Michael Levy

And Summit's journey continues. Through long-form print media, Summit Journal will be produced twice a year in large format to preserve the richness of climbing storytelling. In a world of clickbait articles, Summit is daring to produce quality climbing journalism and once again encompass the soul of climbing. Hopefully, they can capture Kilness and Crenshaw's playful essence even if someone isn't skiing off El Capitan on the cover. Returning to climbing journalism's roots just might take us to new places.

The Line—July

The Line is the monthly newsletter of the American Alpine Journal.

O CANADA!

Canada is an enticing destination for U.S. climbers: an international locale that’s easy to reach and to navigate, yet with a wilder feel than many of the crowded crags and peaks back home. With the 2023 AAJ going into the mail next month, here’s a teaser from the upcoming edition: five fresh reports from five Canadian provinces and territories.

Seba Pelletti leading pitch eight of Viaje Boreal (650m, 5.11+) in Canada’s Northwest Terriorties. Photo by Pato Diaz.

Northwest Territories

Seba Pelletti, an Australian who resides in southern Chile, traveled to northern Canada last August with three Chilean friends: Pato Diaz, Michael Pedreros, and Hernan Rodriguez. The prime objective was Mt. Dracula, a hulking summit in the Vampire Peaks, about 20 kilometers to the northwest of the famed Cirque of the Unclimbables. This rainy zone rarely sees visitors, but the 2022 team was lucky, with enough good windows to put up three new routes, including a 650-meter line up a previously unclimbed face on Dracula (see photo above), possibly only the third ascent of this isolated peak. Pelletti described their adventures in his story for AAJ 2023.

Photo by Zach Clanton.

British Columbia

Near Terrace, B.C., is a striking granite pyramid known variously as the Shark’s Fin or the Saddlehorn. This peak had been climbed and even skied, but the beautiful southern prow had no known routes. Zach Clanton, Kris Pucci, and Tim Russell changed that last July, with an 11-pitch line that begs to be climbed. The first ascent went smoothly. As Zach wrote in his AAJ report, “Sometimes, very rarely, even with all of the mysteries intact, things go according to plan…. We had no brushes with death, no dicey bear encounters, and no stories of terrifying choss. And that’s just how we like it.”

Alberta

Sam Wall’s family used to run one of the backcountry lodges at Amethyst Lake in the Tonquin Valley of Jasper National Park, below the incredible quartzite walls of the Ramparts. (Those lodges were closed recently in an effort to protect a small herd of caribou in the valley.) During his years of staring at the walls, Sam picked out a possible new route up the northeast face of Oubliette Mountain. In August, he and Shep Howatt rowed across the lake to access the face and succeeded with a 900-meter new route (5.10-) to the summit. After a bivy on the ridge, they traversed along the Ramparts to climb the north ridge of Bennington Peak, also a first ascent. Read Sam’s report here.
High on the northeast face of Mt. Oubliette during the first ascent, with Amethyst Lake below. Photo by Sam Wall.

Newfoundland

Silas Rossi on Delirium, one of the new routes at the Bear’s Den near Parsons Pond in western Newfoundland. Photo by Ryan Stefiuk.

New Englanders have been making the trek to western Newfoundland for decades to explore the East’s biggest ice climbs. (See Alden Pellett’s Recon story in AAJ 2021 for the climbing history of this area.) In 2022 and 2023, a rotating crew of Northeastern U.S. climbers has focused on Parsons Pond, a remote area accessed by snowmobile. Ryan Stefiuk reveals the goods in AAJ 2023.

Nunavut

From Baffin Island in Nunavut Territory comes our final AAJ teaser: a short video about a new route up the northeast face of Mt. Turnweather by Neil Chelton, Owen Lee, and Maria Parkes. This fun look at expedition life was edited by Chelton, creator of the VDiff instructional website. Rainy Day Dream Away, the 20-pitch route they climbed, takes a direct line to the east ridge of Turnweather, a route first climbed in 1977 by former AAC vice president Clark Gerhardt and Craig McKibben. The full story of last summer’s ascent will appear soon in the 2023 AAJ and at our website.


THE 2023 COVER: A FAMILY AFFAIR

As the AAJ is being prepared for mailing, here’s a preview of the 2023 cover, showing a precarious stance on Shield of Dreams (5.13b), one of several hard new routes climbed last year on Trapezoid Peak in the High Sierra. The climber is Chase Leary, who, as Andy Puhvel writes in his AAJ report, is “a local granite master whose wizardry on the rock has earned him the nickname ‘Swami.’ Chase’s family goes back three generations in the Eastern Sierra, and his father, Kevin Leary, was one of the first climbers to establish the 5.12 grade in Tuolumne and the Eastside.”

Puhvel also has multi-generational family ties to the Sierra: He and Lisa Coleman ran the Yo! Basecamp Rock Climbing Camp in these mountains for more than 20 years, and they still operate the Nor Cal Youth Climbing League, the longest running competition series in North America. And their son, Cashus, shot this year’s spectacular cover photo!


Join the Club—United We Climb.

Get the AAJ Sent to You Annually

Partner-level members receive The American Alpine Journal book every year. Documenting mountain exploration and the year’s most significant ascents through first-person reports and photos, it’s an essential historical record and a feast of inspiration.

Rescue & Medical Expense Coverage

Climbing can be a risky pursuit, but one worth the price of admission. Partner-level members and up receive $7,500 in rescue services and $5,000 in emergency medical expense coverage. Looking for deeper coverage? Sign up for the Leader level and receive $300k in rescue services.


THE HUNTINGTON SPECIAL

The Technicolor Super Dream on Mt. Huntington. Photo by Zac Colbran.

The latest Cutting Edge podcast highlights three young climbers from the U.S. and Canada—Zac Colbran, Dane Steadman, and Grant Stewart—who found a beautiful and challenging new route up the west face of Mt. Huntington, one of North America’s most iconic peaks. Listen here.

Sign Up for AAC Emails

The Line is the newsletter of the American Alpine Journal (AAJ), emailed to more than 80,000 climbers each month. Find the archive of past editions here. Interested in supporting this online publication? Contact Billy Dixon for opportunities. Questions or suggestions? Email us: [email protected].
Chelan County Mountain Rescue

Race Against Time: Trapped Under a Boulder in the Enchantments
Enchantments, Washington

On October 10, Chelan County Mountain Rescue (CCMR) responded to an incident involving a hiker who had become trapped under a large boulder. The hiker and a friend had gotten off the trail near Lake Viviane in the Enchantments, nearly 10 miles from the road, when he dislodged the rock that pinned him.

Alerted to the accident in midmorning, the Snohomish County Helicopter Rescue Team was able to insert two medics above the patient, who was located on a very steep, rocky embankment. The situation was worse than expected. Both of the hikers’ legs and his left arm were pinned by a boulder the size of a refrigerator. The boulder also was wedged between a rock wall and a tree. The medics set up an anchor, rappelled to the site, and worked to stabilize the patient, who had already lost a lot of blood.

Chelan County Fire District and CCMR personnel arrived by helicopter, aiming to use inflatable airbags to lift the rock off the hiker. The rescuers were able to free the patient’s arm but not his legs, and any wrong move might do further damage. While personnel from the fire district, Cascade Medical, and the Helicopter Rescue Team worked with the patient, the CCMR team began planning for either a raise or lower from the location, depending on whether a helicopter hoist would be possible. They also laid plans for a potential trail evacuation.

Rescuers considered cutting down the tree anchoring the boulder, but feared the rock might roll onto a team member or crush the patient’s legs even more. One of the most experienced CCMR members hung from a rope, dug through the blood-soaked earth, and advocated for one more attempt with an airbag, despite being in the line of fire if the rock rolled. As the bag inflated, the rock shifted just enough that rescuers were able to pull out the hiker. The medics then tended to a large bleeding wound in his right leg and packaged him in a litter.

The Snohomish County Helicopter Team attempted a hoist, but sudden downdrafts caused them to abort. Another helicopter tried to land above the scene, and CCMR prepared to raise the patient and then carry him to that landing zone, but after about 10 minutes in the area, that helicopter also had to leave due to gusty winds.

CCMR set up a lowering operation to get the patient to the bottom of the face, with the expectation of carrying him to a lower landing zone or even all the way to the trailhead. They feared the patient might not survive such a long evacuation. Luckily for all involved, the Snohomish County Helicopter Rescue Team was able to return one more time and successfully hoist the patient from the scene. He was transferred to the hospital for emergency surgery and the start of a long recovery.
You can read accident reports like this and more by exploring our publications.


Listen to the Podcast Episode

When the Chelan County Mountain Rescue team first heard that there was a boulder pinning a hiker in the Enchantments, they just assumed the hiker was trailside and easily accessible. But as the helicopter dropped them off at the scene of the accident, they quickly realized that the fridge sized boulder was pinning the hiker between a tree and another rock—right above a perilous cliff edge. The patient had both of his legs pinned and one arm–and his stats were falling fast. The team had to work quickly to secure everyone on the cliff side, and utilize a novel technique to lift the boulder and free the hiker fast, and without causing more crush injuries. We sat down with Vern Nelson, President of Chelan County Mountain Rescue and one of the team leads on the mission, to talk about this new rescue technique, what he wishes climbers knew to prevent accidents in the mountains, and the culture of blame and shame around climbing and hiking accidents.


The following Search & Rescue team has been selected for the 2023 Rocky Talkie Search & Rescue Award. The selected teams were selected to highlight the unbelievable skill, dedication, and bravery of volunteer SAR members, and remind us of the critical role they play in keeping us safe in the backcountry.

Join us in recognizing and celebrating volunteer SAR by watching their stories and voting for the rescue that most inspired you.

By voting, you’ll be automatically entered to win free Rocky Talkies and American Alpine Club memberships. Voting ends August 11th.

Inyo County Search and Rescue

Overnight Multi-Pitch: Stranded on a Cliff with a Broken Leg
Mt. Emerson, Inyo County, California

At around 2 p.m. on May 27, Inyo County Search and Rescue coordinators were notified that an emergency satellite beacon had been activated on Mt. Emerson in the High Sierra. One member of a party of three climbers had been struck by rockfall at a belay station, breaking her leg and foot in several places. The climbers were about 1,500 feet up the southeast face (III 5.4), at an elevation of about 12,000 feet. The SAR team was activated, and coordinators requested a helicopter from California Highway Patrol.

The SAR team noted that a cold wind system was forecasted to arrive and persist through the weekend, possibly affecting a helicopter’s ability to hoist the patient. The expected weather also meant a potentially life-threatening situation if the party had to spend the night out on the mountain. Plan A would be to attempt a helicopter hoist, but the more likely Plan B would mean assisting the party by climbing and descending the route on Mt. Emerson. Plan B would mean an all-nighter.

Shortly before 6 p.m., an attempted helicopter hoist failed due to gusty winds. Over the next few hours, six SAR members and their equipment were dropped off at 10,500 feet. Team members started climbing the southeast face right as darkness fell, with the first member arriving at the patient by around 9:45 p.m. The patient was assessed and packaged in a vacuum splint and rescue litter. By midnight, it was time to begin the long process of descending the route.

During a previous rescue on the same route on Mt. Emerson, in 2019, an Inyo SAR member had been struck and significantly injured by rockfall. With this in mind, the descent was executed in careful stages to minimize the number of people exposed to rockfall and to mitigate the perils of working in the dark, cold, and windy conditions. One SAR member would rappel a 300-foot rope and establish an anchor in a safe spot. The uninjured subjects would rappel to that spot. Next, the litter with the injured person would be lowered on two ropes, along with three litter attendants, while each rope was controlled by a SAR member. Each of these cycles took well over an hour, and rockfall was a constant hazard.

The patient reached the ground around 9 a.m. after five 300-foot lowers. From the base of the route, about 20 SAR members, who had hiked through the night to reach the climb, carried the patient through a large talus field and wheeled the litter out to the trailhead and a waiting ambulance. She reached the hospital about 24 hours after the accident.

You can read accident reports like this and more by exploring our publications.


Listen to the Podcast Episode

When rockfall takes its toll, things get serious. Late in the day on an alpine climb in the Sierra, a microwave sized block fell and broke the leg of a climber as she stood at a belay 1,500 ft up Mt Emerson. As Inyo County Search and Rescue launched into the mission, they quickly realized that helicopter evacuation would not be possible given the weather. With freezing temperatures setting in and darkness falling, the ground team sprung into action—ultimately climbing hundreds of feet to the patient, and rigging hundreds of feet of a static lowering system to ultimately get her to a hospital 24 hours later, dodging inclement weather and rockfall hazards along the way. In this episode, we sat down with Todd Vogel, one of the team leads for the mission, to learn about the nitty gritty details of the rescue, what happens when the weather is too bad for helicopters, and how SAR teams deal with the emotional roller-coaster of their work.


The following Search & Rescue team has been selected for the 2023 Rocky Talkie Search & Rescue Award. The selected teams were selected to highlight the unbelievable skill, dedication, and bravery of volunteer SAR members, and remind us of the critical role they play in keeping us safe in the backcountry.

Join us in recognizing and celebrating volunteer SAR by watching their stories and voting for the rescue that most inspired you.

By voting, you’ll be automatically entered to win free Rocky Talkies and American Alpine Club memberships. Voting ends August 11th.

Portland Mountain Rescue

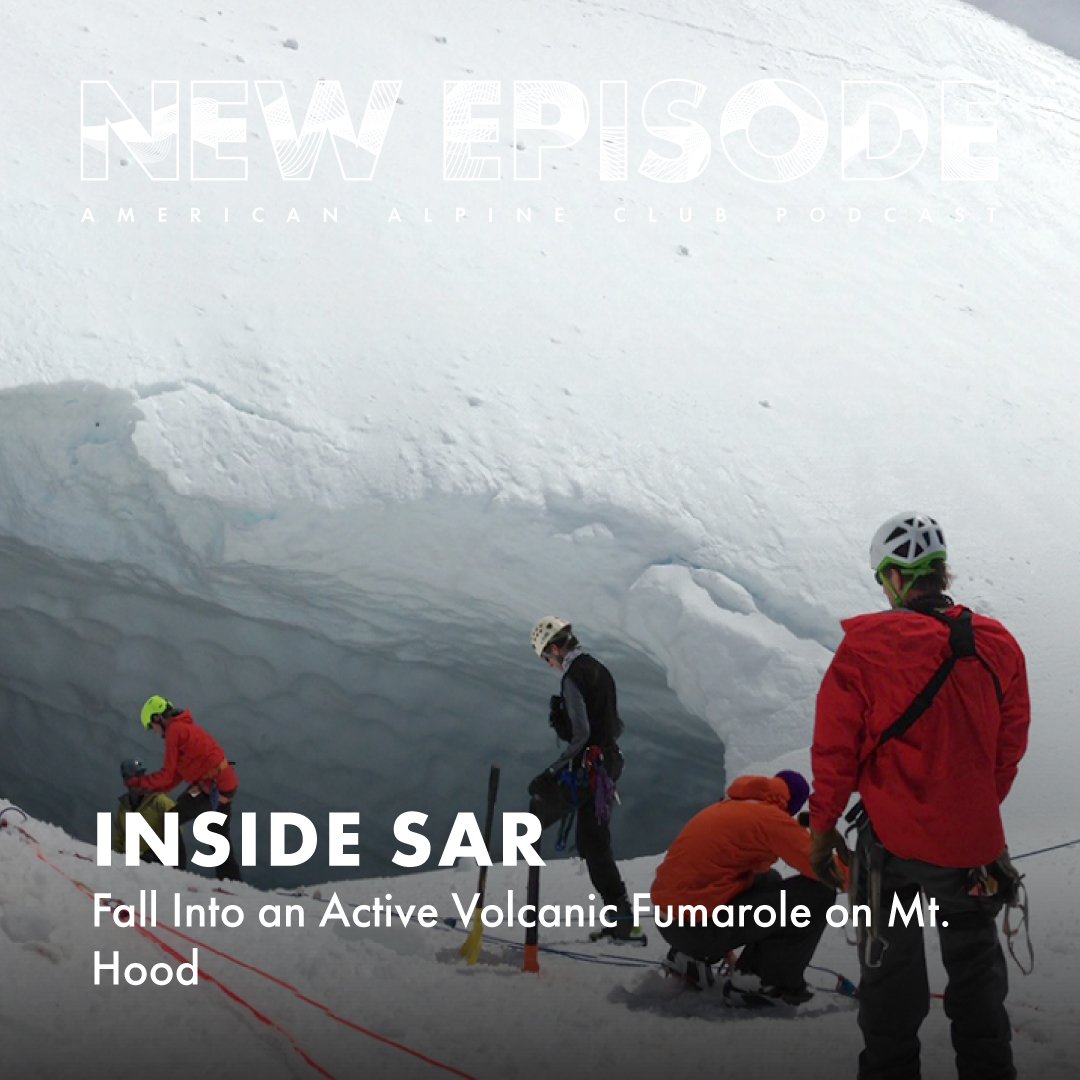
Over the Edge: Uncontrolled Slide Into an Active Volcanic Fumarole
Mt. Hood, Oregon

Around 5 p.m. on January 26, 2022, a snowboarder (male, 28) was riding off the Hogsback, a steep ridge high on Mt. Hood. The snow surface was very firm and icy, and the snowboarder lost an edge. He slid off the ridge and fell into a large cavity in the snow over the Devil’s Kitchen fumarole. (A fumarole is a vent in the earth that emits volcanic gasses.) From the snow surface, he fell about 30 feet to rocks in the bottom of the cavity. The snowboarder sustained a broken leg that prevented him from climbing out. His situation was dire because the Devil’s Kitchen fumarole vents steam and hydrogen sulfide gas that can accumulate at toxic levels in the cavity. His two partners witnessed the fall and called 911.

The Hood River Crag Rats and Portland Mountain Rescue (PMR) both were dispatched. Volunteer rescuers began arriving at Timberline Lodge around 7:30 p.m. Team 1, consisting of 10 rescuers from both units, rode a snowcat to the top of the Palmer ski lift (8,500’) and proceeded from there on foot. They reached the fumarole at 10,000 feet at roughly 10:30 p.m. The snowboarder’s two partners were becoming hypothermic, and they were provided with fluids, food, and a heat blanket.

To protect against toxic hydrogen sulfide gas, any rescuer entering a fumarole snow cavity must wear a respirator, goggles, and a monitor that sounds an alarm if gas concentrations reach dangerous levels. To determine if it is safe for a rescuer to be in a fumarole cavity even with protective equipment, PMR uses a second monitor to remotely measure gas levels. One rescuer donned protective equipment while others rigged the PMR-designed Counterweight Fumarole Extraction system, with which rescuers on the surface can haul a rescuer and patient out using mechanical advantage.

When the rescuer reached the patient at the bottom of the fumarole cavity at 11:10 p.m., he found the patient’s injuries would require using a litter for extraction. Another rescuer, a physician, rappelled into the fumarole on a second rope system to assist in packaging the patient. Team 1 then extracted both rescuers and the patient from the fumarole about six hours after he fell in.

Team 2, consisting of rescuers from both units as well as paramedics from American Medical Response, arrived at Devil’s Kitchen around midnight. One member of Team 2 escorted the injured party’s partners down to Timberline Lodge. Team 2 then began lowering the patient in a litter 1,500 feet down to the Palmer ski lift on extremely icy, steep slopes. From the top of the lift, the patient was transferred into a snowcat and transported to the parking lot, where an ambulance was waiting. All personnel were out of the field by 3:45 a.m.

You can read accident reports like this and more by exploring our publications.


Listen to the Podcast Episode

A skier on Mt. Hood had slid out and fallen into an open volcanic pit—the Devil’s Kitchen Fumerole. With a broken femur and the toxic gasses of the volcano swirling in the air—the situation was dire. Many of the folks on Portland Mountain Rescue and the Hood River Crag Rats weren’t sure that the patient would survive when they first got the call. But with their unique fumerole self-lowering rope system, PMR and the Crag Rats were able get the patient out of that alien world of ice and snow and toxic gasses. To dig into the details of the mission, we sat down with Cully Wiseman, a surgeon and the head medical lead on this mission, and Scott Norton, a rescue leader on the mission. Learn about their decision making process during rescues, the types of accidents they most often see, and what they wish climbers knew about SAR.


The following Search & Rescue team has been selected for the 2023 Rocky Talkie Search & Rescue Award. The selected teams were selected to highlight the unbelievable skill, dedication, and bravery of volunteer SAR members, and remind us of the critical role they play in keeping us safe in the backcountry.

Join us in recognizing and celebrating volunteer SAR by watching their stories and voting for the rescue that most inspired you.

By voting, you’ll be automatically entered to win free Rocky Talkies and American Alpine Club memberships. Voting ends August 11th.


Protecting Pine Mountain

A Story from the AAC Policy Team

by Chris Morissette

man mantles over the lip boulder top out

PC: AAC member Nate Ptacek

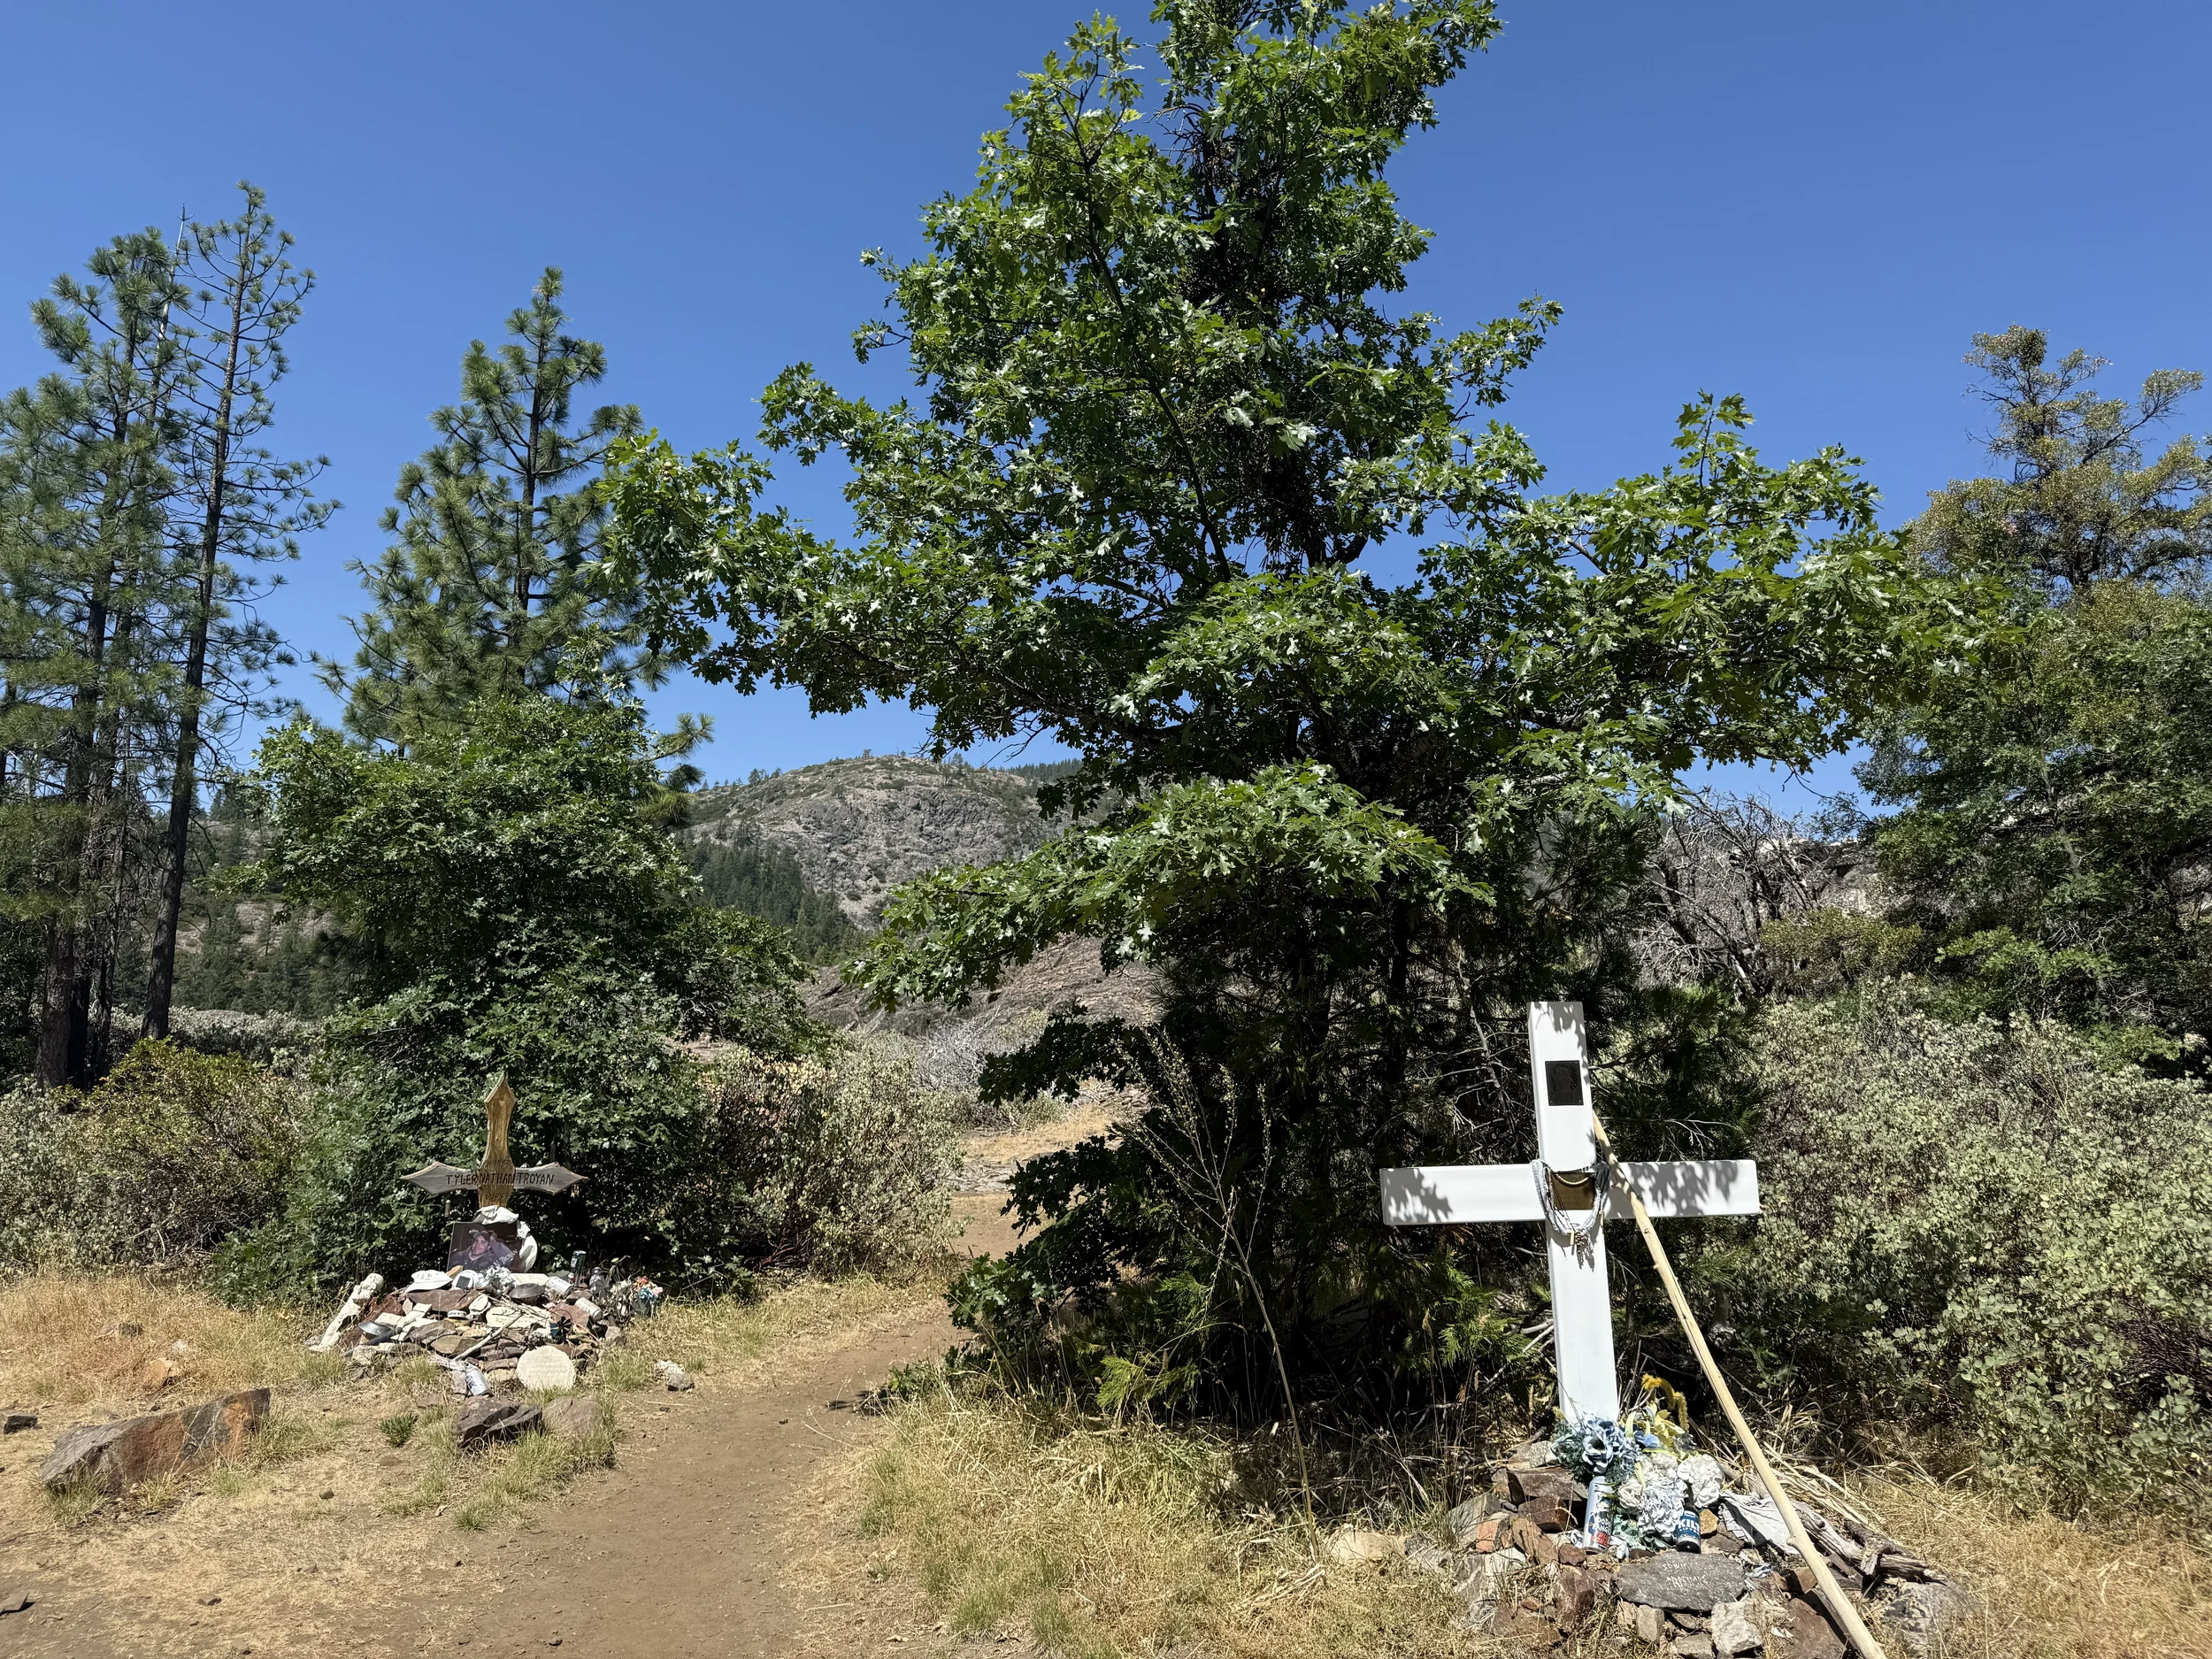
Only an hour and a half drive from the coast, Pine Mountain is one of a few remaining sky islands in California, a unique geological formation that consists of isolated mountains surrounded by radically different lowland environments. At an elevation of 7,000’, it is one of the best summer bouldering, hiking, and camping destinations almost anywhere in central and southern California. However, its under attack. The Reyes Peak Forest Health and Fuels Reduction Project is the United States Forest Service’s (USFS) plan to cut trees and clear chaparral across 755 acres on the Pine Mountain ridgeline. This story covers why logging on Pine Mountain would be a disaster for the ecology of this area, why the area is so culturally important for climbers and local Tribes, and the legal action that the AAC is taking to address this.


Update on Pine Mountain Litigation

We are disappointed to learn that a federal judge in the U.S. District Court for the Central District of California ruled against protecting a 755 acre tract of land on the top of Pine Mountain and Reyes Peak in the Los Padres National Forest area. The AAC, Los Padres ForestWatch, Keep Sespe Wild Committee, and Earth Island Institute—collectively represented by the Environmental Defense Center—joined up with the Center for Biological Diversity, California Chaparral Institute, and Patagonia Works—represented by the Center for Biological Diversity. Together, we filed a lawsuit in 2022 to halt a controversial logging and vegetation clearing project (The Reyes Peak Forest Health and Fuels Reduction Project) the U.S. Forest approved nearly two-years ago. The area, enjoyed by climbers, hikers, bikers and other outdoor enthusiasts, is one of the few remaining "sky islands" in California. The lawsuit alleged violations of NEPA, Roadless Area Conservation Rule, Endangered Species Act, and the National Forest Management Act. The AAC is working with their partners in the litigation and their legal team to determine next steps.

Carl Blaurock, A Voice from the AAC Archives

By Walter R. Borneman

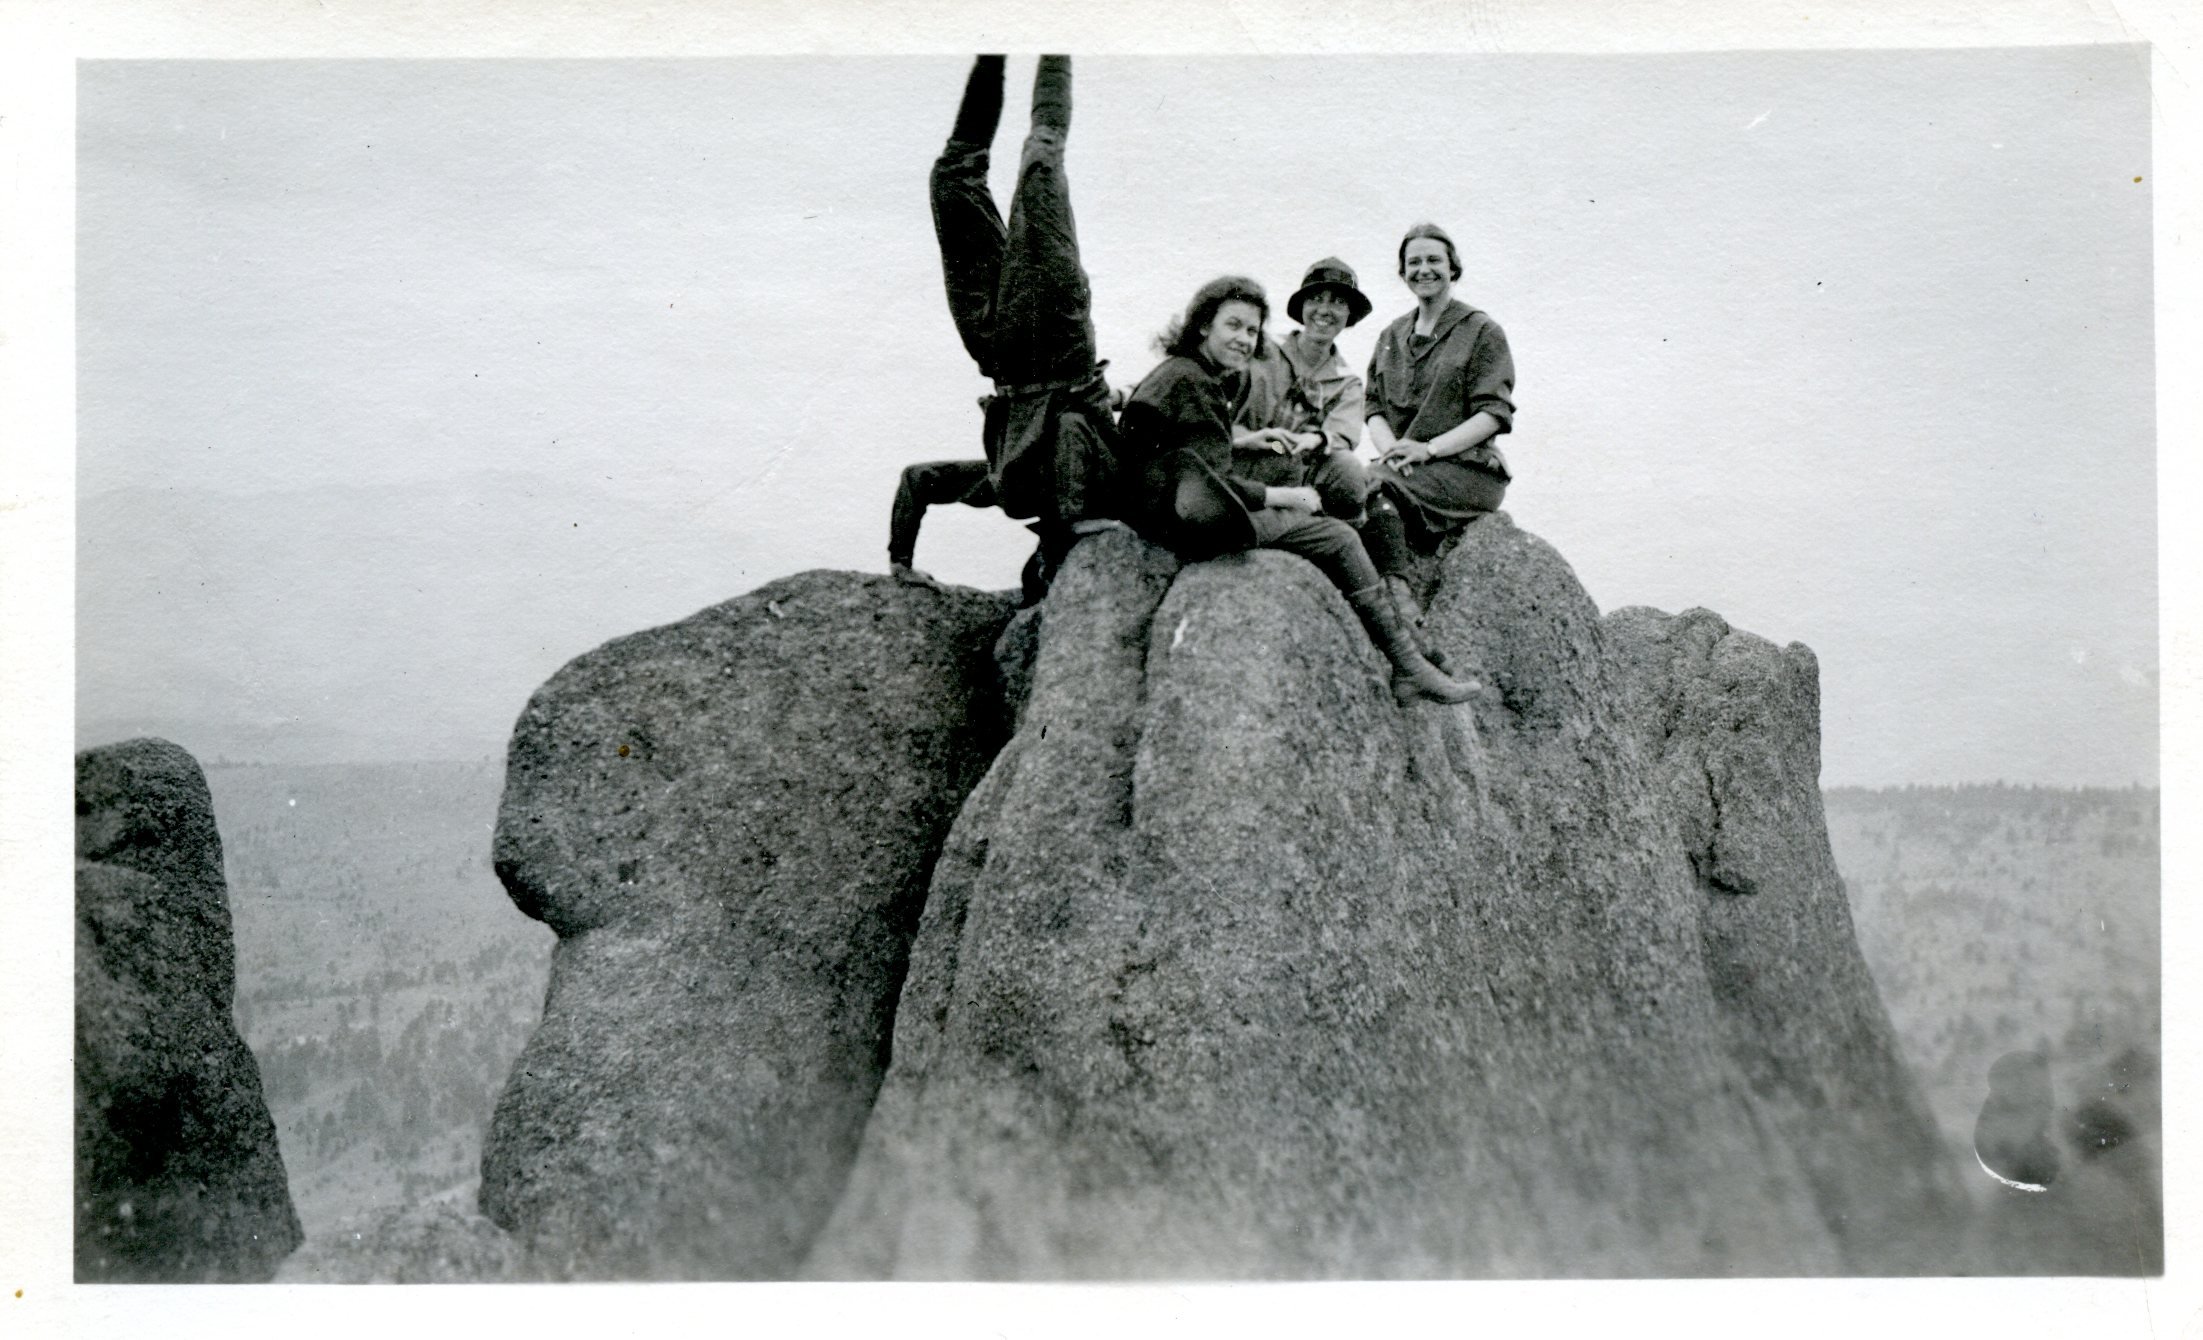
Carl Blaurock performing a headstand with (left to right) unknown woman, Sally Rogers, and Agnes Vaille. Photo by Bill Ervin. Agnes Vaille Collection, American Alpine Club Library.

Reading the photo captions Carl Blaurock wrote in white ink on black album pages while in his 20s, one hears the same voice that in his 90s chortled about his long-ago exploits. Such antics included standing on his head atop mountains so that, in Carl’s words, “I would have my feet higher on that mountain than anybody else.” Archives are more than stacks of paper or piles of black and white photos. Look closer. Archives convey a sense of time but are also a reflection of individual personality.

Hermann & Elmina Buhl with Carl Blaurock (standing) and Albert Ellingwood at the Summit on Gannett—11 Aug 1924—Ellingwood Collection, American Alpine Club Library.

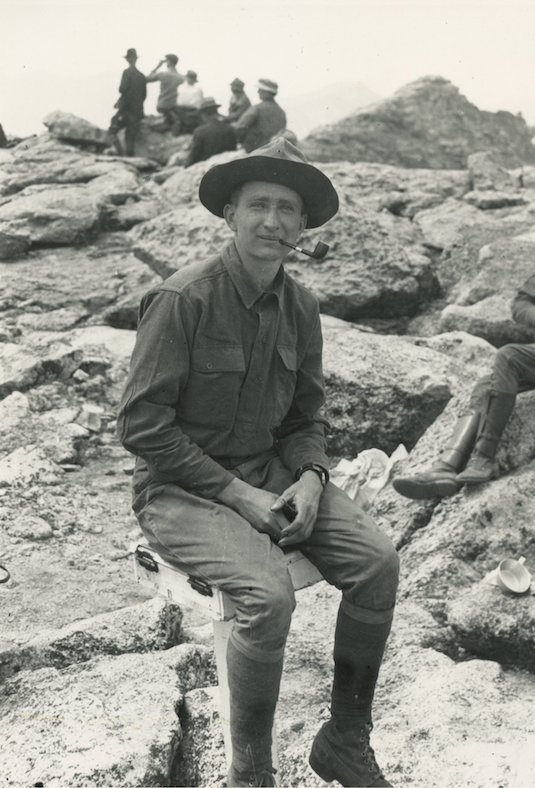
Carl Blaurock was born in Denver in 1894, attended Colorado School of Mines, and became a goldsmith like his father. Having climbed Pikes Peak as his first big mountain, Carl became an early member of the Colorado Mountain Club (CMC). A story circulates that Carl was a founding member of the club, but consult the archives. The signature page of the CMC charter from April 1912—a history of Denver society in and of itself—does not include Blaurock’s name among the twenty-five signers. Nonetheless, Carl and his climbing buddy, Bill Ervin, became Colorado Mountain Club mainstays and the first to climb all of Colorado’s fourteeners, the peaks above 14,000 feet, of which 46 were recognized in 1923. 

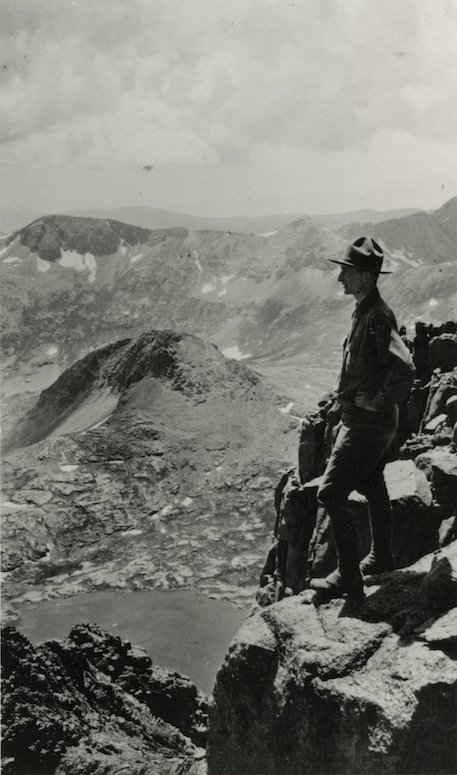
Carl’s exploits with pioneering woman mountaineer Agnes Vaille, college professor and roped climbing aficionado Albert Ellingwood, attorney and historian Stephen H. Hart and others were difficult for the time and sometimes challenged by mishaps just getting to the trailhead. On a 1924 trek into the Wind Rivers, Blaurock and Ellingwood were slowed by three tire blowouts in the first few miles between Denver and Longmont. Years later, the Wyoming State Geological Survey would find Carl’s photos from the trip a valuable record in studying glacial retreat.

I first met Carl in 1983, when he was an energetic 89 years young. Thanks to the efforts of climber and attorney Barbara J. Euser, Cordillera Press was publishing “his” book, A Climber’s Climber, under Barbara’s steady hand. Carl and I sipped his homemade chokecherry brandy—he was quite proud of it—as we looked through his photo albums. It was like opening a time capsule. Not just decades but three-quarters of a century fell away as I read his impish photo captions and listened to his stories. 

Albert Ellingwood and Carl Blaurock on the Summit of Mt Harding on 10 Aug 1924—Ellingwood Collection.

Carl’s admiration for Albert Ellingwood as an early technical climber was rock solid and long-held. So, too, was Carl’s continuing disdain over many decades for Walter Kiener, Agnes Vaille’s “smart aleck” companion on her fatal Longs Peak climb. Agnes had wanted to be the first to climb its east face in winter. The three of them tried several times late in the fall of 1924, but when Agnes and Kiener set off without Carl on a January attempt, Carl warned her, “Don’t go, Agnes.” He called retrieving her body “one of the saddest events in my life.”

The Blaurock Collection in the AAC Library includes the photos from A Climber’s Climber, digital copies of 8mm films from climbs in the 1930s and 1940s, and Carl’s bedroll and tripod. You will also find the articles he wrote for Trail and Timberline. Many of the photographs Carl took—he was a talented and relentless photographer—are scattered throughout fifty years of the publication. Carl’s last major climb and photography quest was up Notch Mountain in 1973 to replicate William Henry Jackson’s famous photo of Mount of the Holy Cross on its 100th anniversary.

Carl’s favorite photo—labeled as such in one of his albums—was one he took of 14,197-foot Crestone Needle in 1920 from the northern slopes of Marble Mountain. The clouds are surreal, and plenty of late spring snow adorns the peaks. It should come as no surprise that a large print of this photograph, a gift from Carl, hangs in my home. I never look at it without hearing his voice.

Carl’s Favorite: Crestone Needle, 1920. CMC Collection, AAC Library.


Walter R. Borneman co-authored A Climbing Guide to Colorado’s Fourteeners in 1978. His other books include Alaska, Iron Horses, The Admirals, and Brothers Down. He has spent a lot of time on mountains and in archives.

Behind the Scenes of United in Yosemite

Dig into the details of the first ever United in Yosemite event, hosted by The American Alpine Club (through our Climb United program), Yosemite National Park, and the Yosemite Conservancy. This climbing festival was an intentional space created to celebrate the diverse voices of climbing—to make sure the big walls are the only intimidating thing about this legendary climbing location, not the culture or community. Dive into the photos and participant reflections about the event below.

For all current United in Yosemite information click here.
Behind the Scenes of United in Yosemite

CLIMB: Behind the Scenes of the USA Climbing Training Center

olympics; climbing comps; USA training center

In this episode of the podcast, we’re featuring a conversation between guest host and AAC board member Cody Kaemmerlen, and USA Climbing’s Head Coach, Josh Larson. Cody and Josh hang out at the USA Training Center to record this conversation, and talk team culture, behind the scenes of comp training, and even a bit about how the Olympics is shaping competitive climbing. This isn’t your typical training podcast. We’re taking a deep dive into the inner workings of an ever evolving and cutting edge part of our sport. Listen in to get some insights on the philosophy powering the USA Climbing Team, from the coach who trains some of the best climbers in America. 


Prescription—July

Mt. Assiniboine is nicknamed the "Matterhorn of the Rockies." Both peaks share an imposing geometry—and plenty of loose limestone. On August 12, 2022, a climber fell to his death (yellow line) from the popular and “moderate” North Ridge route after slipping from a slick handhold. Photo courtesy of Parks Canada

Fatal Slip on Rock | Climbing Unroped

British Columbia, Assiniboine Provincial Park

On August 12, 2022, a party of two climbers left the Hind Hut to ascend the North Ridge of Mt. Assiniboine (AD 5.5). By late morning, they had reached one of the steeper upper steps at about 3,500 meters (11,482 feet). The pair had soloed everything up to this point and arrived several minutes apart. The first climber to arrive (Climber 1) assessed the next step and determined they would likely use a rope due to the steep angle and sloping nature of some of the holds. When Climber 2 arrived, the pair took a break and considered their options. Meanwhile, a separate party downclimbed the step. This party was unroped.

After watching the other party downclimb, Climber 2 decided he would try soloing the step and started up the pitch while Climber 1 packed the rope. As Climber 2 started up, Climber 1 watched him grab a sloping hold, slip, and fall down the north face. He fell out of sight. Climber 1 tried to gain a better vantage point by carefully climbing to the top of the rock step but was not able to see his partner. He then triggered an SOS on his satellite communication device. At the top of the step, he met a guided group on their way down. The guide radioed for assistance and helped Climber 1 down to a flat ledge. After communicating with the rescue team, it was determined that the guided group would remain with Climber 1 and wait for a rescue.

A team arrived by helicopter approximately one hour later and located Climber 1 and the guided group. Two other guided parties were located near the summit, and the deceased, fallen climber was located at approximately 3,300 meters (10,826’). After surveying the scene, it was determined that all the parties would be removed prior to accessing the fallen climber, in order to minimize rockfall hazard to the rescuers below. All climbers were flown or slung down to the Hind Hut, and the fallen climber was then accessed and slung down to the hut as well.

The uninjured climber who lost his partner to a fatal fall waits for rescue below the steep upper step on the North Ridge of Mt Assiniboine. Photo courtesy of Parks Canada

Analysis

The North Ridge of Mt. Assiniboine is often soloed due to its low technical difficulty. However, it requires a great deal of care and experience to climb safely. The route is very exposed, and a route-finding mistake can quickly elevate the technical grade. Loose, sloping, or slippery rock is common. While the route was dry on this day, snow, ice, or verglas are common in the upper sections.

While we cannot know with certainty why Climber 2 decided to solo the steep step, prior to the ascent he had expressed interest in climbing the route unroped. His decision may have been influenced by watching the other unroped party. Fatigue and limited technical rock climbing experience may have also played a part. Whatever influenced his decision, this incident highlights the risks involved in soloing exposed terrain. Easy terrain can prove fatal.

Communications during this incident were very good, in large part due to the guided parties (who had radios) and a satellite communication device. The rescue team was able to coordinate the pickup of the three groups, thereby eliminating the potential for human-generated rockfall during the recovery. It is not always possible to remove other climbing parties from an accident scene. If you find yourself in a situation where a rescue is occurring nearby or below you, it is very important to remain stationary or move with extreme care to prevent rockfall hazard. (Source: Parks Canada.)

This accident is eerily similar to another we reported in 2017.


Resources for Loss

Climbing is inherently dangerous, but that does not make loss easier. If you are struggling after the loss of a loved one, check out our Climbing Grief Fund Directory. Whatever you are facing, we believe you are worthy of hope, effective therapy, and access to the best mental health resources.


Updates on Auto Belays

In January 2023, we reported an auto belay accident that sadly occurs with some frequency. This accident had a happy ending and contained a powerful lesson.

Last month, the Climbing Wall Association (CWA) released updated Auto Belay Guidance in hope of reducing auto belay incidents and improve the culture of responsibility in the sport of climbing. The CWA is a trade association dedicated to protecting, connecting, and educating the indoor climbing industry.

Along with its updated guidance, the CWA released a commissioned study conducted by Prof. Jon Heshka of Thompson Rivers University, titled “Understanding Climber Behaviour in Climbing Gyms.” The study sheds light on climbers’ behavior and attitudes toward auto belay usage and climbing gyms in general.


Shop the ANAC Collection


Join the Club—United We Climb.

Get Accidents Sent to You Annually

Partner-level members receive the Accidents in North American Climbing book every year. Detailing the most noteworthy climbing and skiing accidents each year, climbers, rangers, rescue professionals, and editors analyze what went wrong, so you can learn from others’ mistakes.

Rescue & Medical Expense Coverage

Climbing can be a risky pursuit, but one worth the price of admission. Partner-level members receive $7,500 in rescue services and $5,000 in emergency medical expense coverage. Looking for deeper coverage? Sign up for the Leader level and receive $300k in rescue services.


Sign Up for AAC Emails

Assisted Braking Devices

Assisted Braking Devices have been a part of American climbing for a long time. By 1992, American climbers and belayers were alternately condemning and commending the new tools, and most of those perceptions persist today.  In many cases, the GriGri is unfairly given credit for securing belays in an unprecedented way.  In other cases, the GriGri is maligned as symbolic of complacency, poor belaying, and laziness.  Over the years, American belayers have over-heard epithets like:

“The GriGri promotes lazy belaying.”

“The GriGri has an automatic brake.  You can’t mess it up.”

“GriGris might be great for toproping or sport climbing, but it’s unsafe to use them for trad.”

“GriGris are the industry standard for belaying a toprope.”

These statements and the reductive thinking behind them have inhibited Assisted Braking Devices from taking their logical place in American climbing. This article will seek to unpack and explain some of the historical and cultural underpinnings of assisted braking devices like the GriGri in order to explore how these devices have gotten to the point that they are neither appreciated for their contributions to climbing nor adequately respected for their complexity and intricacy.  

To get there, we will need to clarify the current and historic role of backups in any technical system related to climbing. We will need to explain how these tactics long preceded the invention of the GriGri, because they are still just as important in the era of assisted braking devices as they were before GriGris hit the scene in the early ’90s.  Then, every climber will be better equipped to discover what Assisted Braking Devices offer to the overall security of a belay or rappelling system.

This article will qualify the use of Assistant Braking Devices according to the following principles:

  • Assisted Braking Devices, when used correctly, provide a reliable backup to any belayer.  

  • Assisted Braking Devices, when used correctly, offer the greatest movement economy when delivering slack to a lead climber.

  • Unlike Manual Braking Devices (like any tube style device), ABDs have widely variable performance characteristics from one model to the next.

Backups

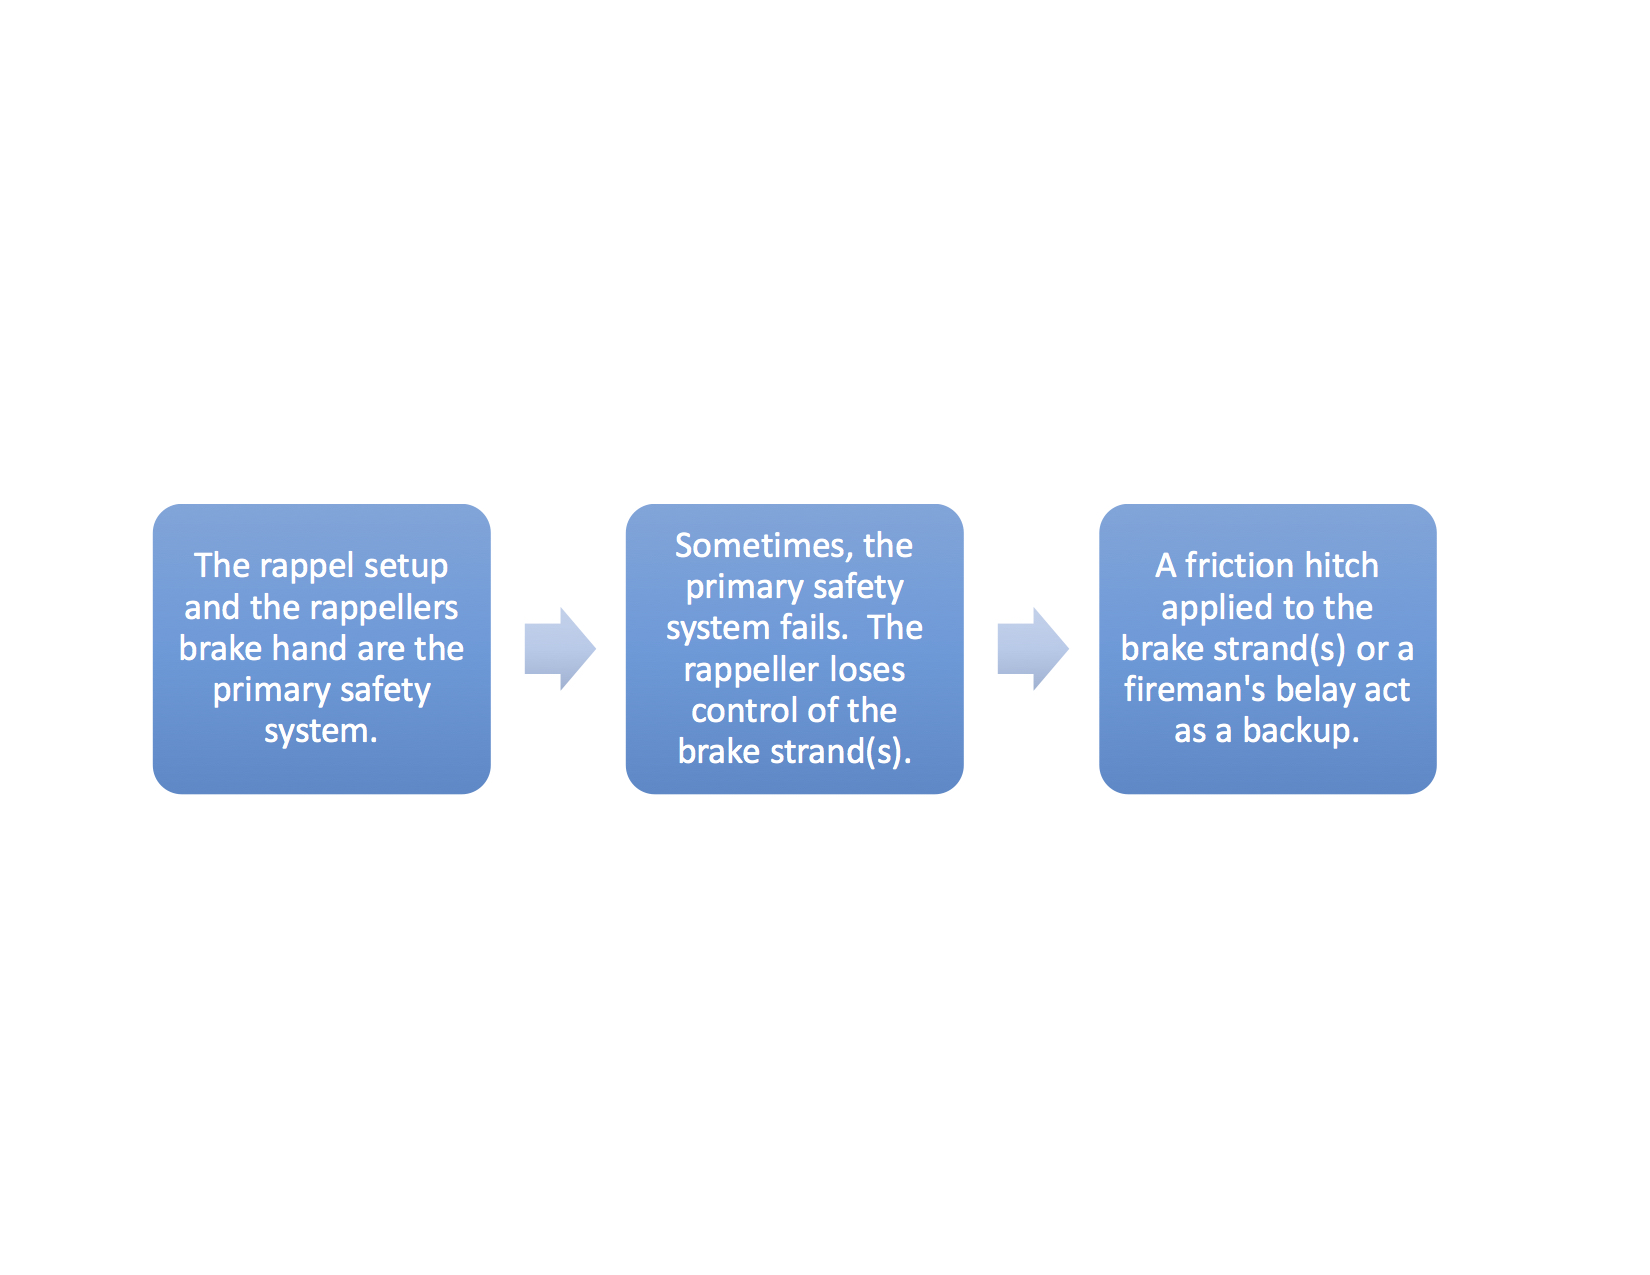
In climbing, we use backups all the time.  We use them as an integral part of our systems and we often use words like redundancy and security when we’re talking about backups.  In every case, the basic concept is the same: a climber relies on one system to stay safe, and there is another system that acts as a back-up in case the primary system fails or malfunctions.  

Let’s look at some of the most common examples:

Climbing

climbing backups.jpg


Rappelling

Anchoring

Backups are a great idea, and they help us have a lot more confidence that we’re going to survive an error, a slip, an oversight, or a freak occurrence.  When we choose not to use a backup, we’re often flirting with unnecessary risks.

Let’s look at some examples:

Free Soloing

Lowering with an MBD without a backup

lowering sans backup.jpg

It is not common to think of backups in this way. However, when a climber analyzes the role of backups and looks at all climbing practices through that lens, it is difficult to escape the conclusion that holding a climber’s weight with a manual braking device and lowering a climber with that same device is tantamount to free-soloing. Unlike free-soloing, though, belaying usually involves two people; they are both complicit in this arrangement.

Before Assisted Braking Devices were an option, conservative belay teams relied on backups that are still options today. 

belaying; how to belay; how to back up a belay

Since climbers are often standing around in groups of three or four, it's easy to offer a backup belay.

backing up a belay; how to belay

If a backup belayer is not standing behind the belay device, in the braking plane of the device, the value of the backup might be nominal.

backup knots; rock climbing knots

These backup knots, tied every 10 to 15 feet, provide a backup to the belayer when she does not have someone available to provide a backup belay.

belay back up; friction hitch

While a friction hitch can provide an adequate backup for lowering, it takes practice to tie this hitch while holding a climber,  and it won't work on every harness' leg loop design.

A careful observer of these traditional forms of backup will notice that an incompetent belayer (or pair of belayers) still has the capacity to injure a climber. So, an unstated but obvious addendum to the application of any backup to any system is that incompetence is presumed to be negated. It’s an important distinction to make. Gross incompetence can override all reasonable backup systems, and safeguarding against incompetence quickly becomes impracticable.  

Belaying systems presume functional cooperative competence as a starting point, and backups safeguard unforeseen forces and circumstances that can unexpectedly incapacitate a belayer. So, it’s important to combine fundamental belay principles to any belay device, regardless of the braking apparatus. All devices require a belayer to keep a brake hand on at all times, slide or alternate the brake hand only when the rope is in the braking plane of the device, and use the hand wrist and arms according to their natural strength.

Assisted Braking Device = Backups

An assisted braking device, operated within the fundamental principles of belaying, is an especially valuable tool if climbing teams prioritize backups. If a belayer takes an honest self-assessment of all the things that might thwart the best intentions of a diligent and competent belay, then it is difficult to justify not prioritizing backups. It is perfectly reasonable, and perfectly human, to accept that any number of sights, sounds, and distractions compete for a belayer’s attention. Other climbers, friends and acquaintances, passersby, flora and fauna, changes in weather, they all distract even the most committed belayers. In these perfectly predictable and likely circumstances, the assisted braking mechanism of an ABD can provide the ready-to-go attentiveness that the belayer momentarily lacks.

More persuasively, there are occurrences in the climbing environment that can easily incapacitate a belayer, regardless of their position relative to the climber (above or below). If a belayer is willing to indulge the imagination, these hazards quickly accumulate:

  • Rockfall generated by climbers above in a separate party

  • Rockfall generated by a climber in one’s own party

  • Natural rockfall

  • Icefall (for all the same reasons)

  • Avalanche (for all the same reasons)

  • Electricity of all kinds

  • Aggressive Fauna (stinging insects and arachnids, snakes, large predators)

  • Aggressive Flora (treefall, deadfall, prickling plants, poisonous plants)

  • A leader climber falling and impacting the belayer

  • Medical problems (allergies, asthma, diabetes, seizures, other chronic conditions)

Accident archives and anecdotal evidence demonstrate, again and again, that the selection of an ABD provides belayers and climbers with a backup should any of the aforementioned hazards incapacitate the belayer.

On one notable example, a pair of proficient climbers had a spectacularly close call in Eldorado Canyon in 2008. In much the same manner catalogued above, the leader climber dislodged a large rock during a lead fall.  That rock fell and hit the belayer.  The belayer, having selected an ABD, managed to arrest the leader’s fall despite the severe injuries he sustained.  Had the belayer selected a manual breaking device instead, like an ATC, without any sort of backup, the leader would have likely been severely injured as well. As it turned out, the leader was able to run for help and assist rescuers to evacuate his partner.

climbing accident report; rock fall accident

An ABD is not a panacea for mishap or incident, but it does provide all belay teams, like this team from Eldorado Canyon, with a margin of error. Surely, that’s an adequate incentive for any climbing team to learn more about ABDs, and it’s a sound reason to learn to use them correctly. 

Movement Economy while Lead Belaying

Many assisted braking devices offer the greatest economy of movement when delivering slack to the lead climber. Even though many belayers assert that ABDs have cumbersome mechanics resulting in a jammed rope and an inability to provide adequate slack, most of these assertions are based on a lack familiarity with the techniques needed to use an ABD to belay a lead climber.

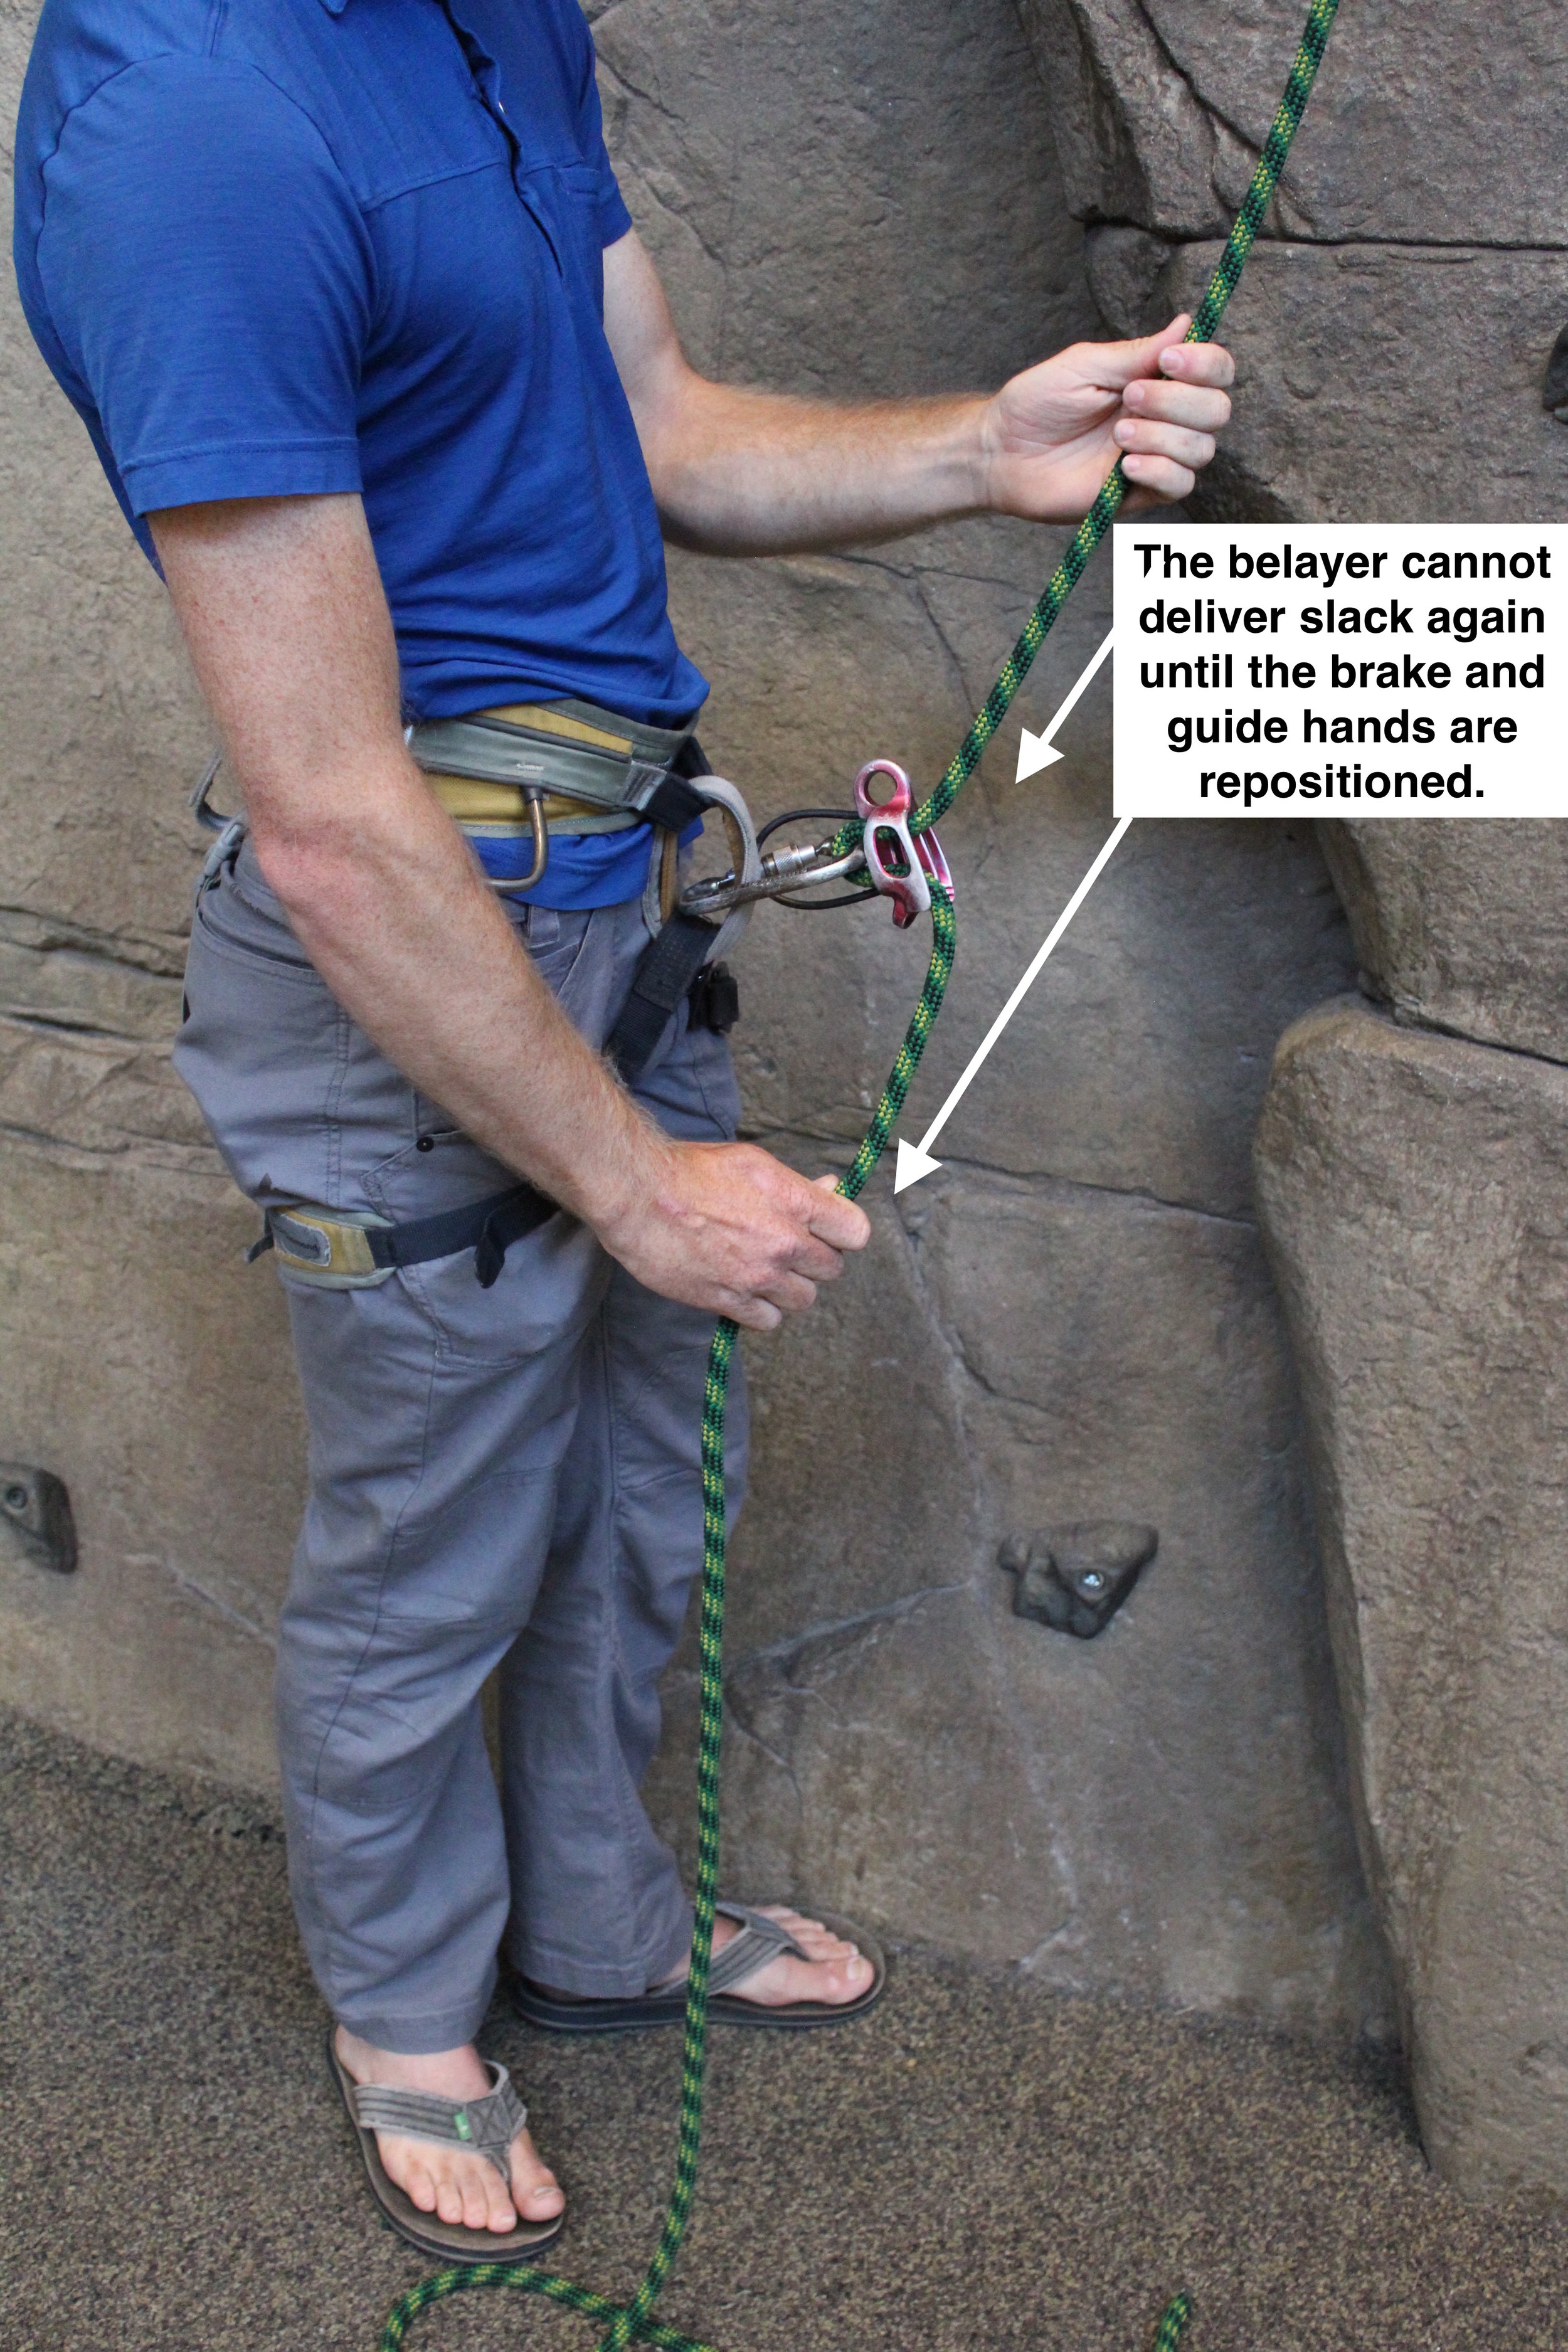
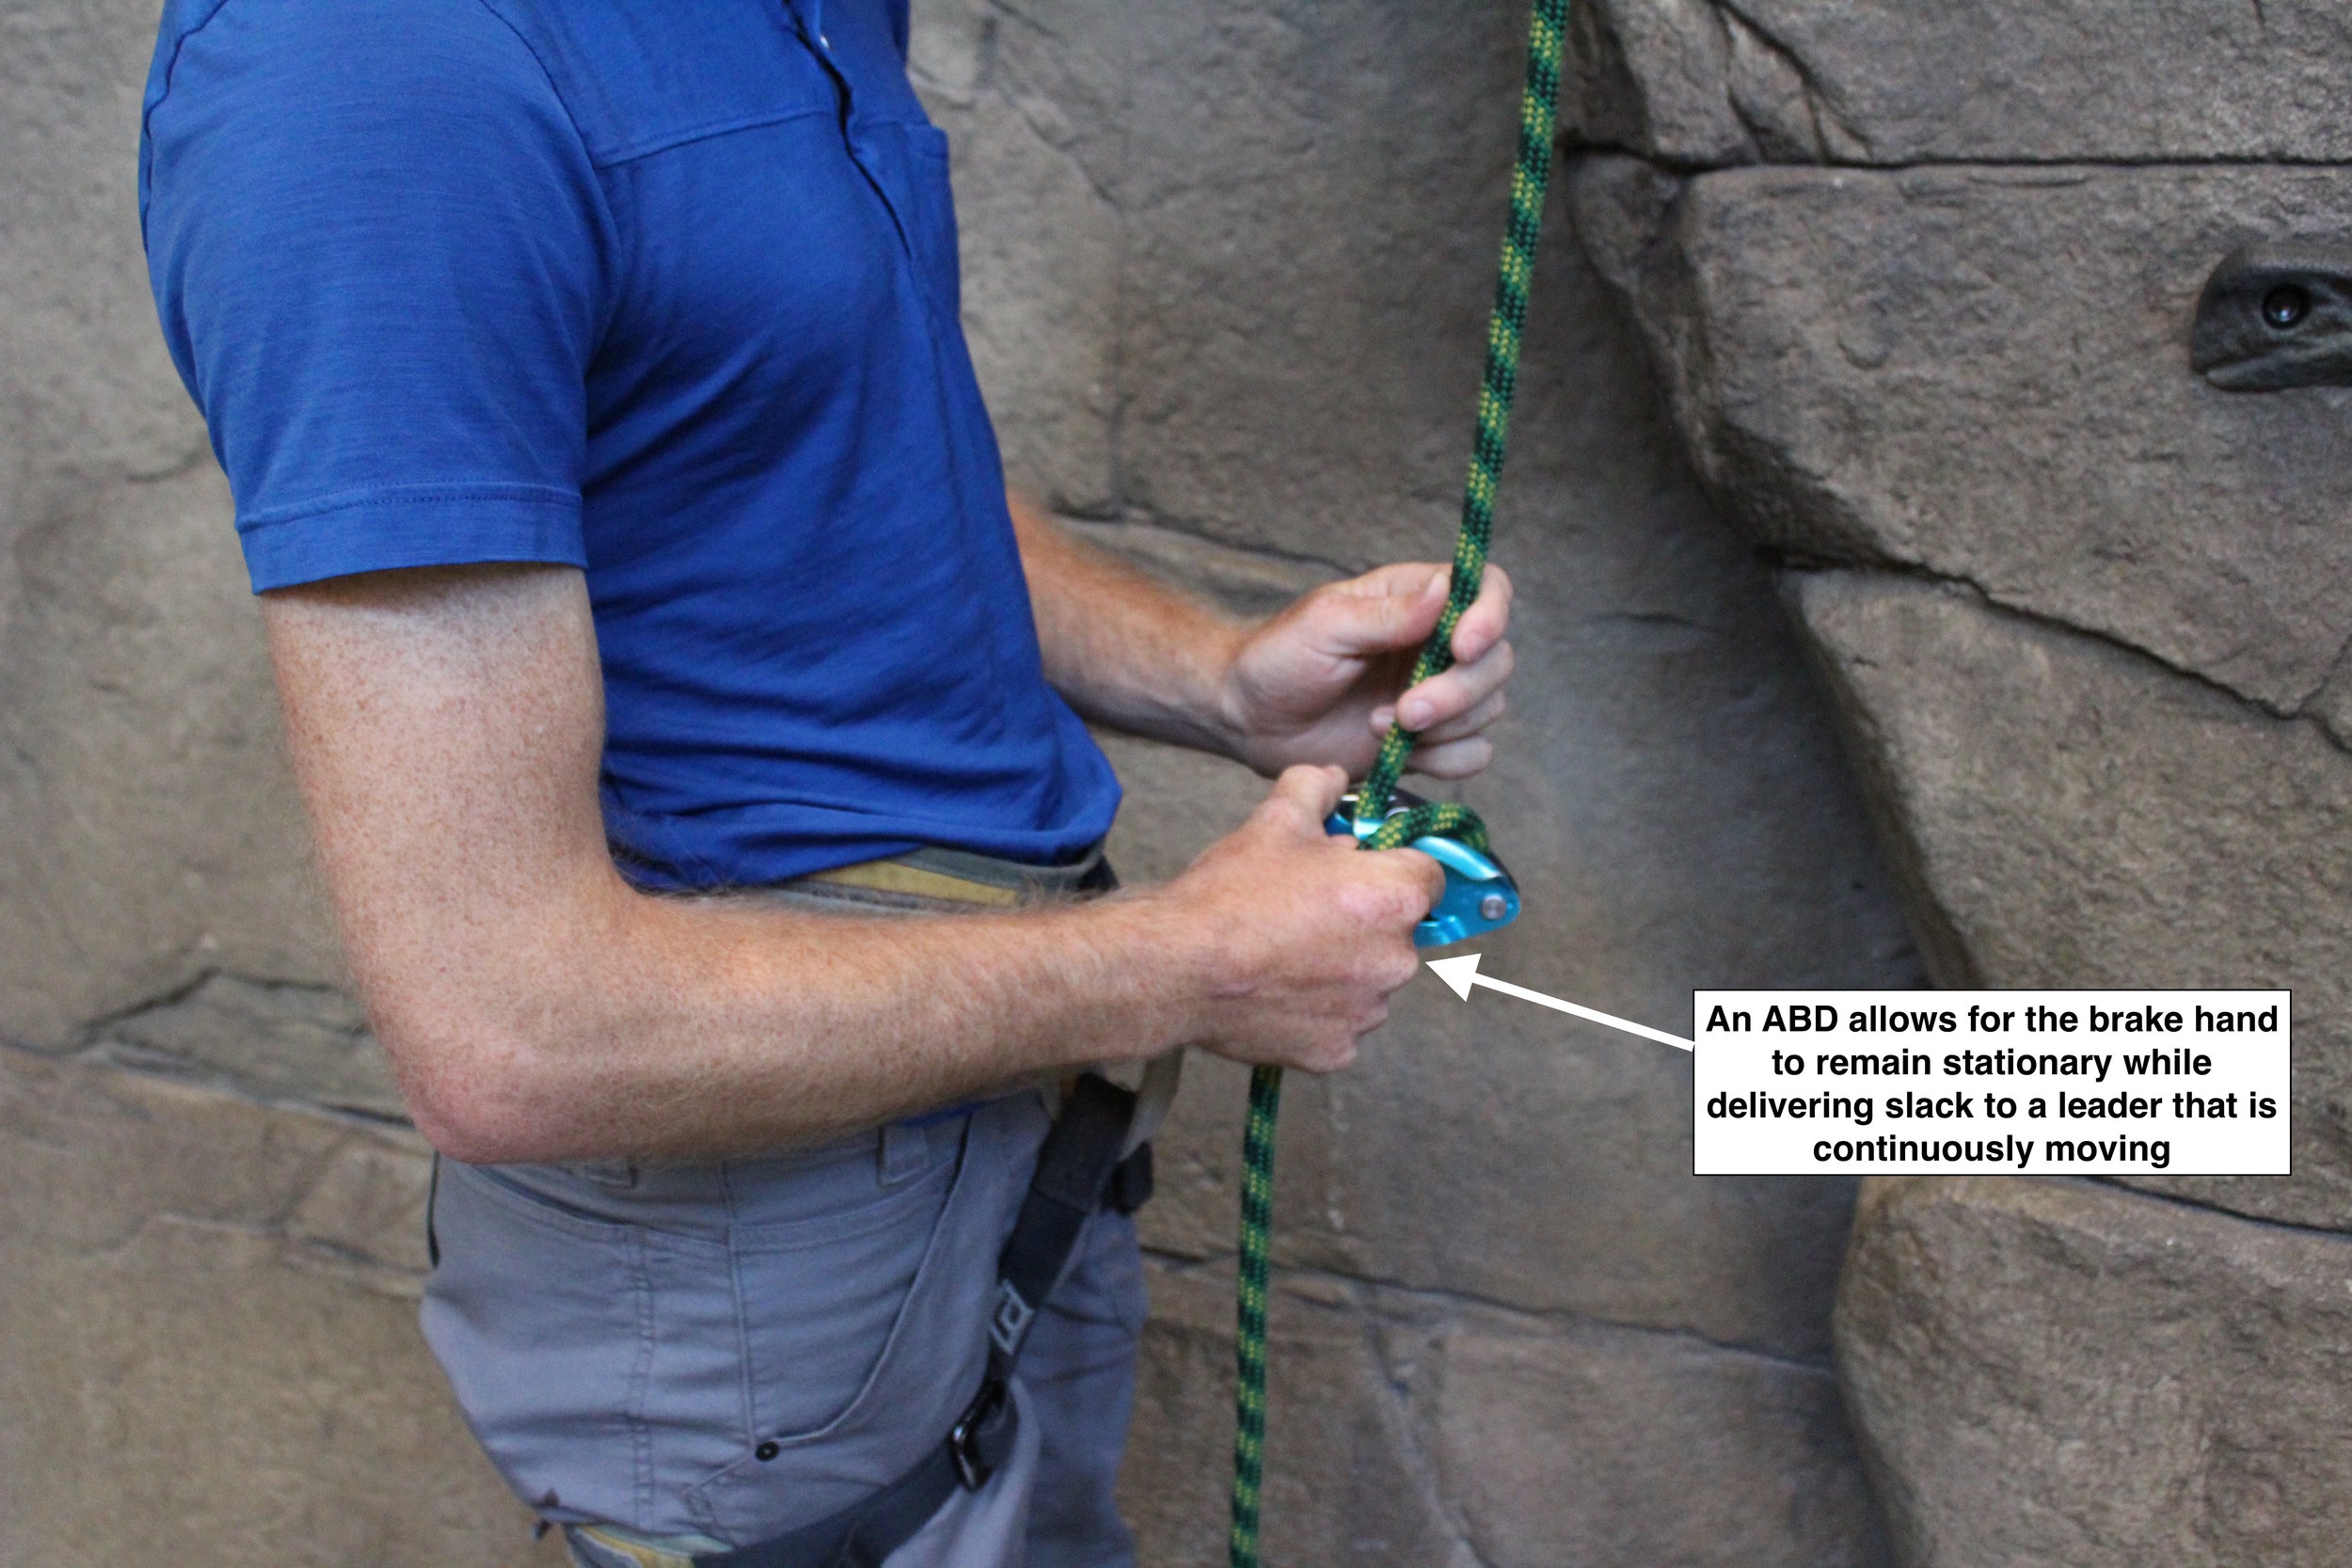
The key to this movement economy involves a stationary brake hand. It might be helpful to see fundamental belaying with an MBD contrasted with an ABD to demonstrate this concept explicitly.

giving slack while belaying; belaying with an ATC
how to belay with an ATC
how to belay with an ATC; break hand

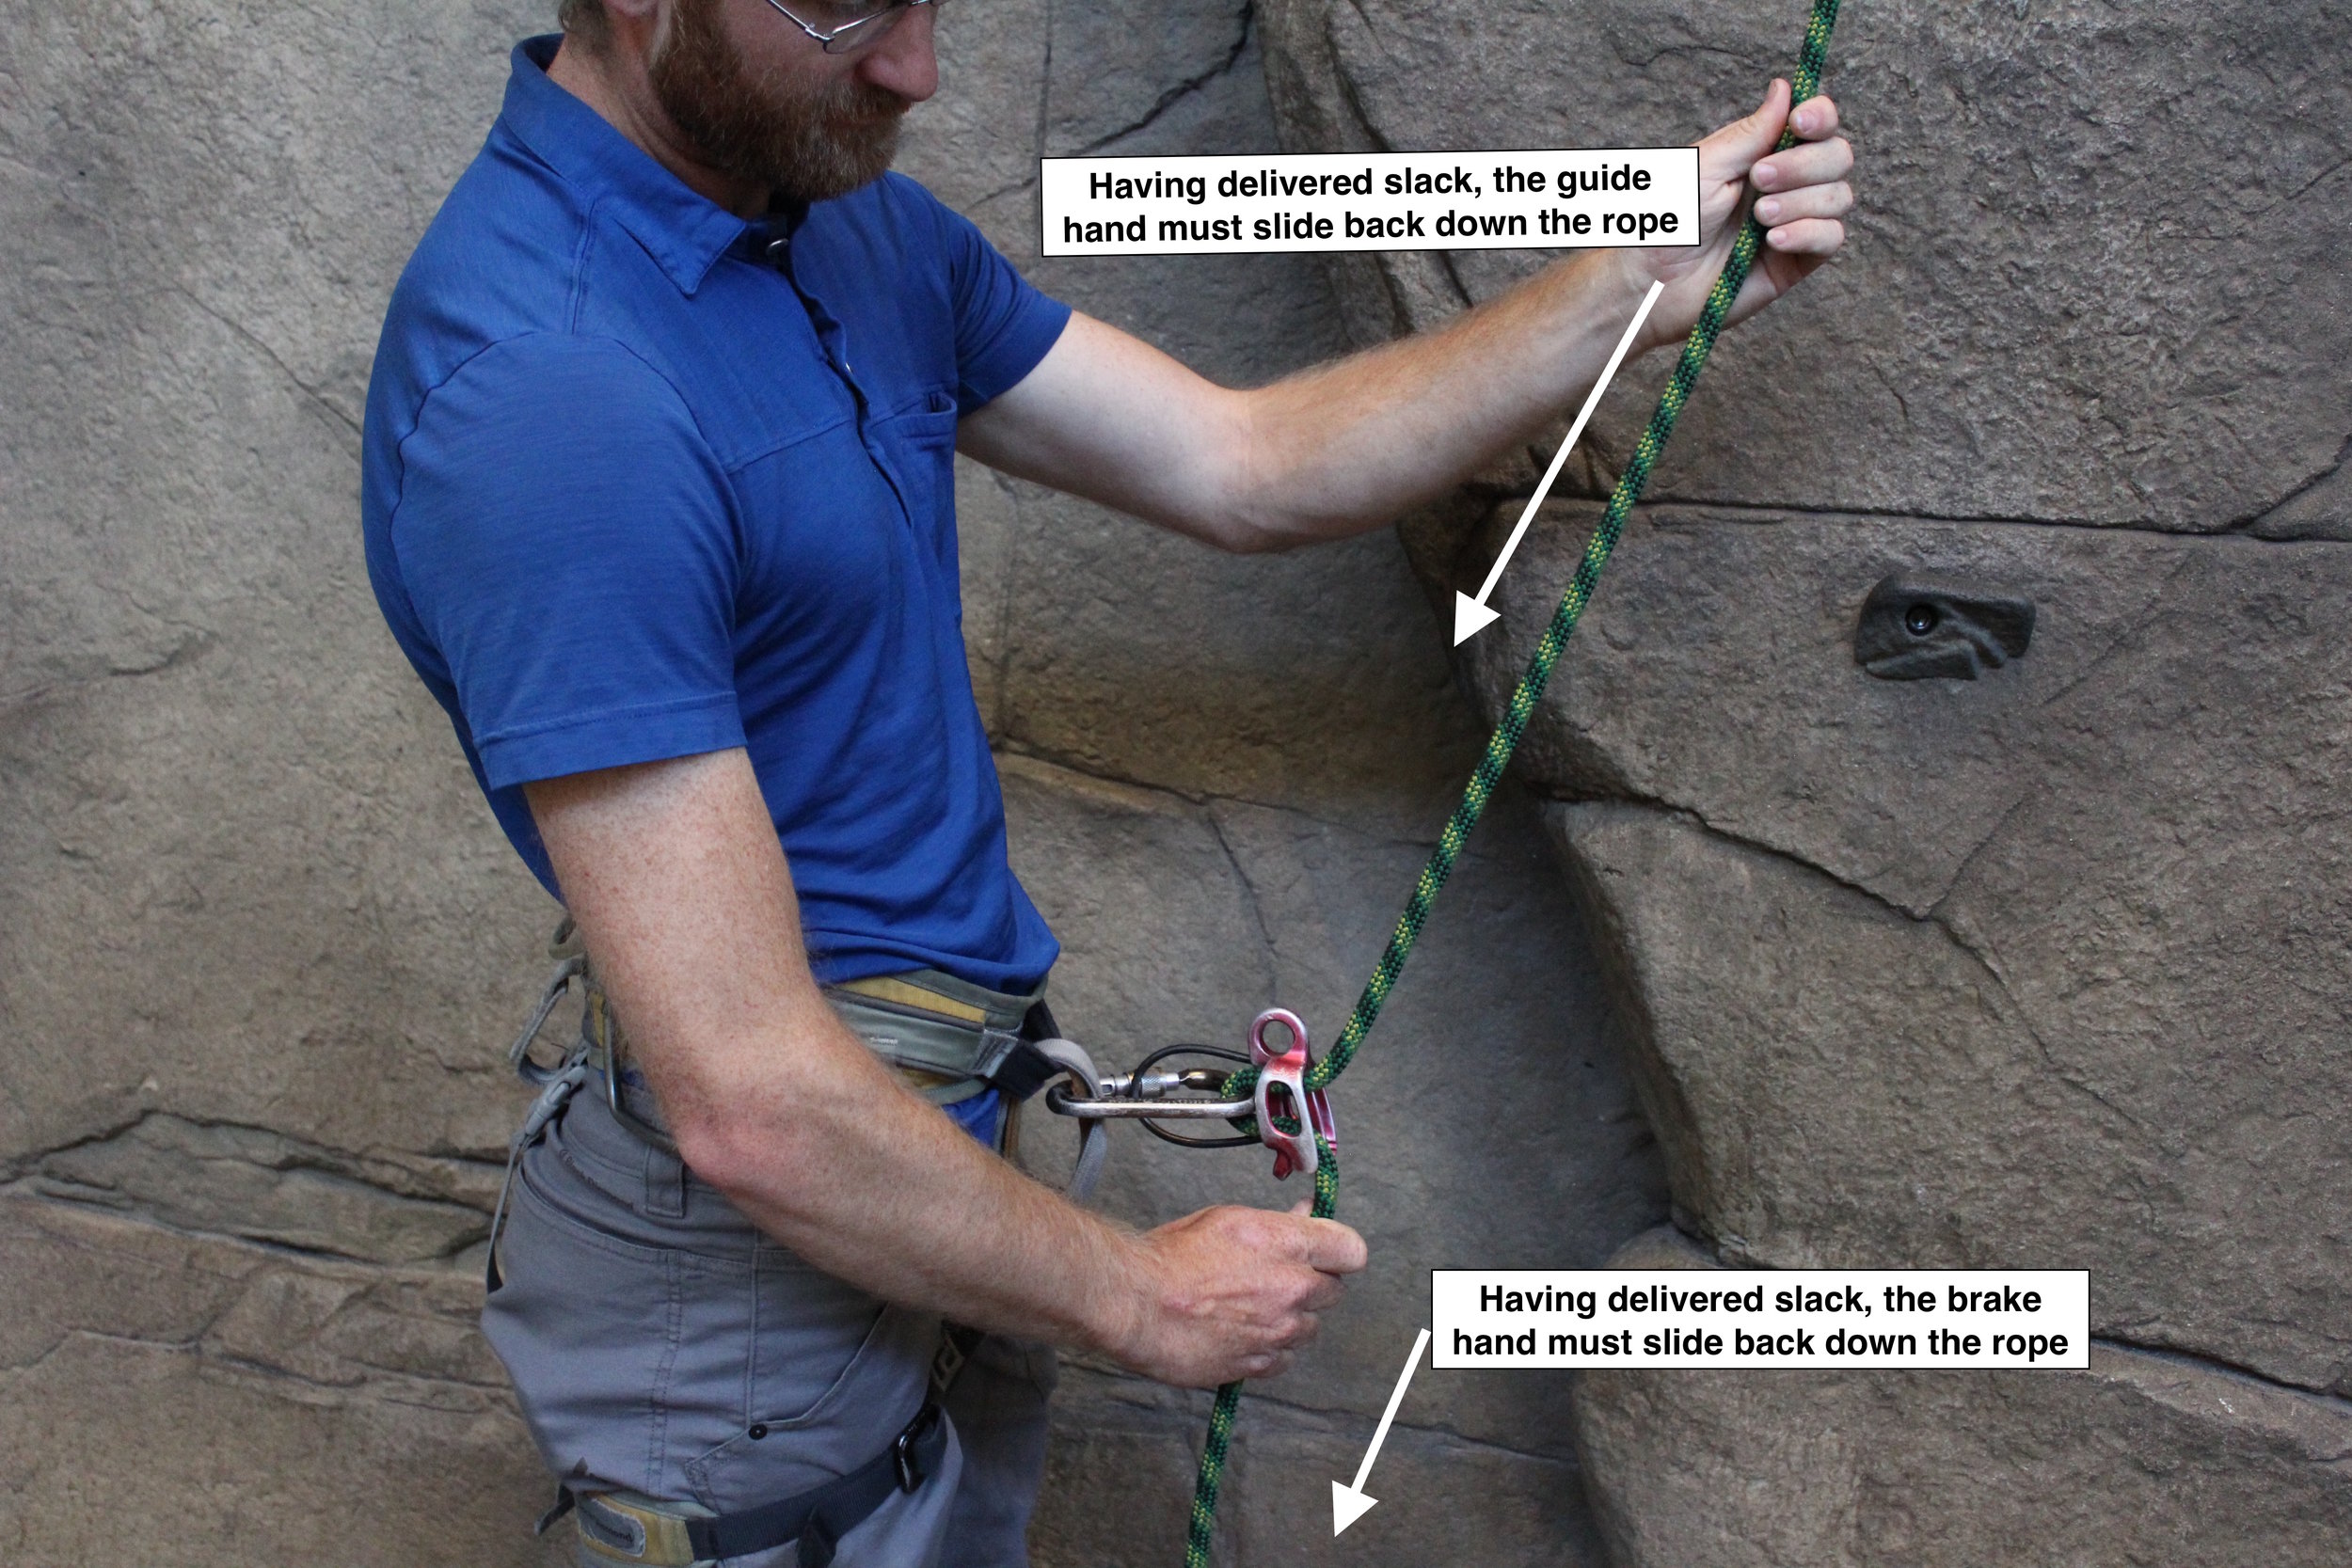
Many ABDs, by contrast, keep the brake hand stationary, eliminating an entire step in the belay cycle. As result, there can be a 50% increase in overall efficiency when the belayer delivers slack to the leader.

belaying with a grigri; how to belay

This movement economy is especially useful on easy or moderate terrain, when the leader is unlikely to fall. One of the greatest hazards to the leader in that terrain might be getting tripped or snagged by an inadequate supply of slack from the belayer.  An imperative to provide adequate slack is also common on low-angled terrain when the leader tends to move in long strides. That kind of movement necessitates adequate slack because the leader’s balance is often precarious and unstable. In any case, it may be valuable for a belayer to opt for a belay tool and technique that provides slack to the leader as efficiently as possible while also adhering to the fundamental principles of belaying.

Variations among ABDs

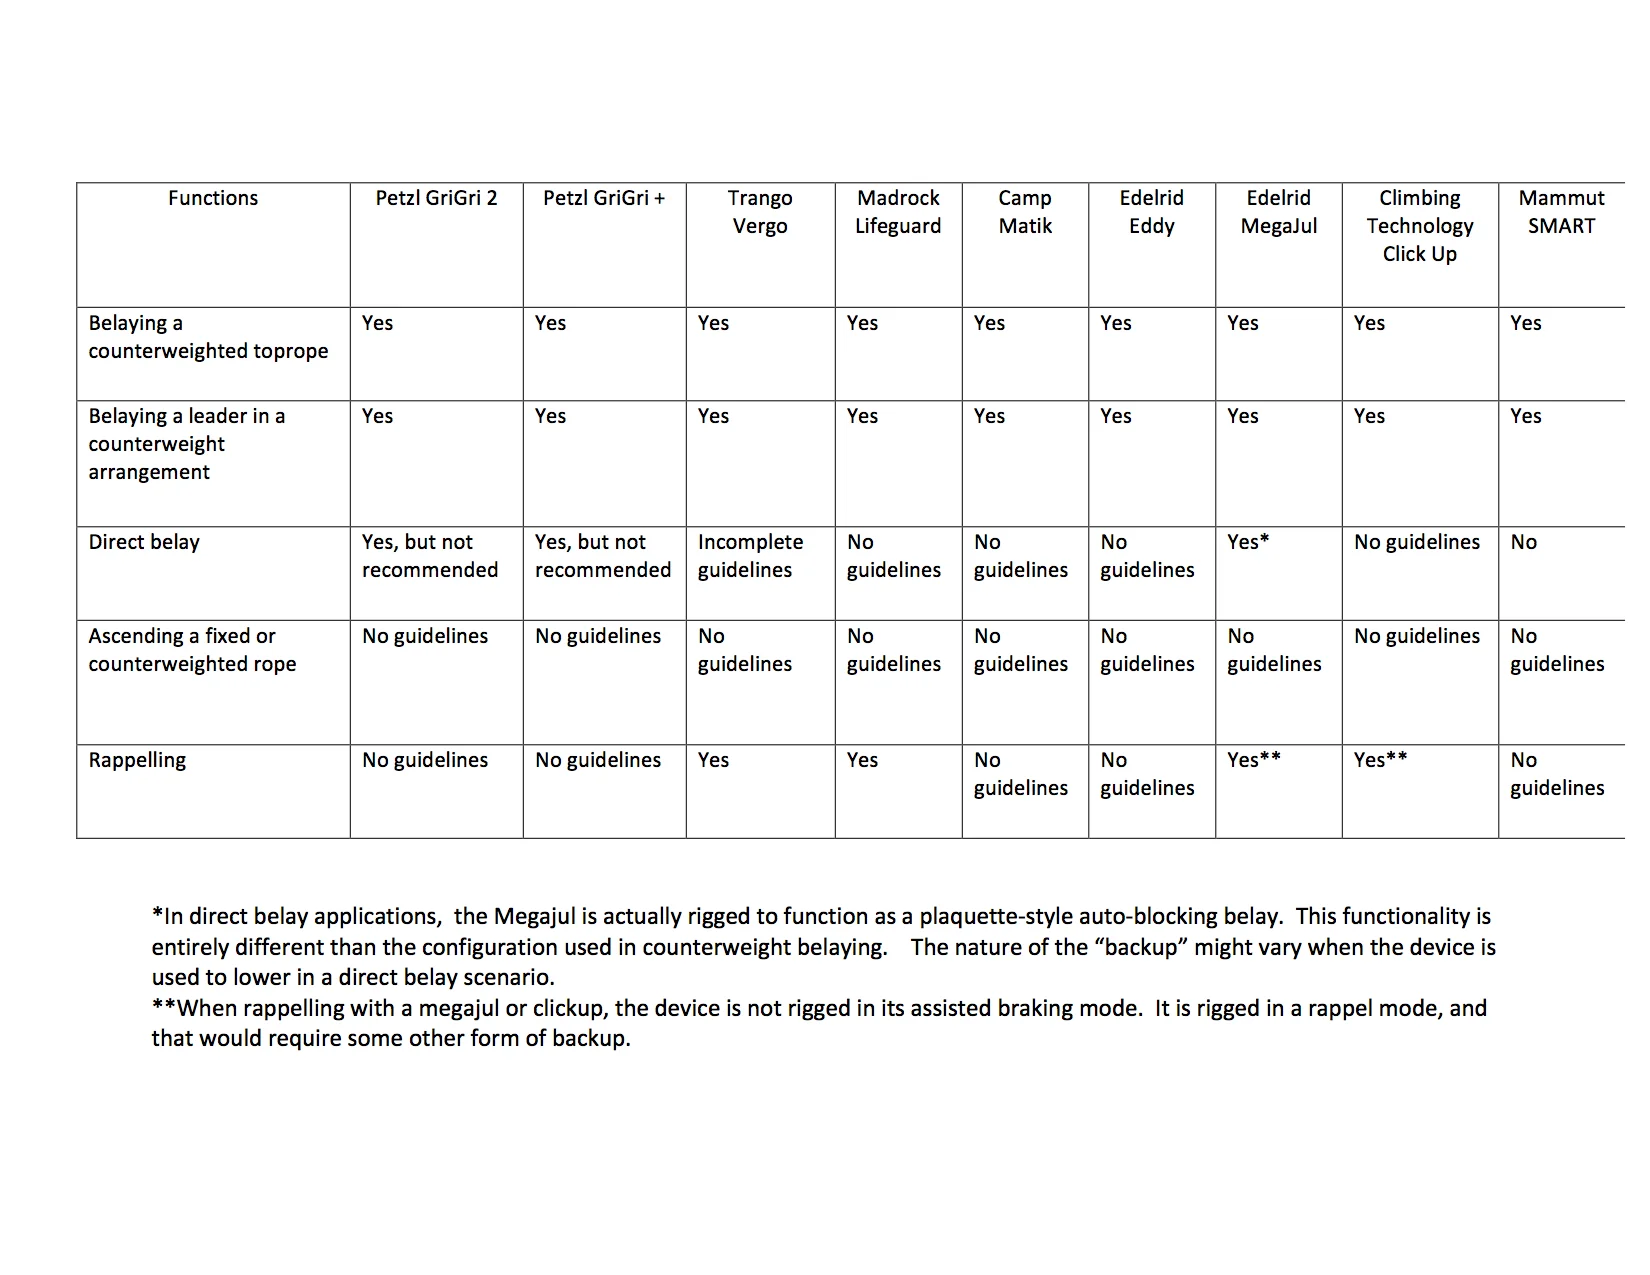
While the Petzl GriGri tends to represent the entire genre of ABDs due to its popularity and history, it is not the only ABD available. A careful analysis of the various functions, applications, and performance characteristics of each ABD should help belayers make an informed choice when they select a device. 

Applications

ABDs are typically deployed in the following contexts, although many of these applications are not necessarily recommended by the manufacturer. Manufacturers tend to create recommended use guidelines that pertain to the most common usage, and any application outside of that usage is implicitly discouraged. Nevertheless, many climbers rely on these kinds of applications, so it will be important to disclose the nature of each application, even though the manufacturers may not. These applications will be listed from most to least common. An ABD’s ability to perform these applications and functions help climbers decide when and how to use one tool or another.

1.     Belaying a counterweighted toprope. In a toproping scenario, ABDs are commonly deployed by institutional programs, climbing gyms, and professional climbing instructors. The values of an ABD as a backup are especially conspicuous to these users.

2.     Belaying a leader in a counterweight arrangement. The belayer’s body weight anchors a leader’s ascent in protection increments. Sometimes this arrangement is distorted by the use of a ground anchor or a connection that protects the belayer from an upward pull. An ABD can predictably increase the impact forces generated by lead falls. Impact forces are measurably increased on the belayer’s body, the climber’s body, and the protection/anchor. In most scenarios lead climbing scenarios, however, the differences in impact force would not have catastrophic consequences.  

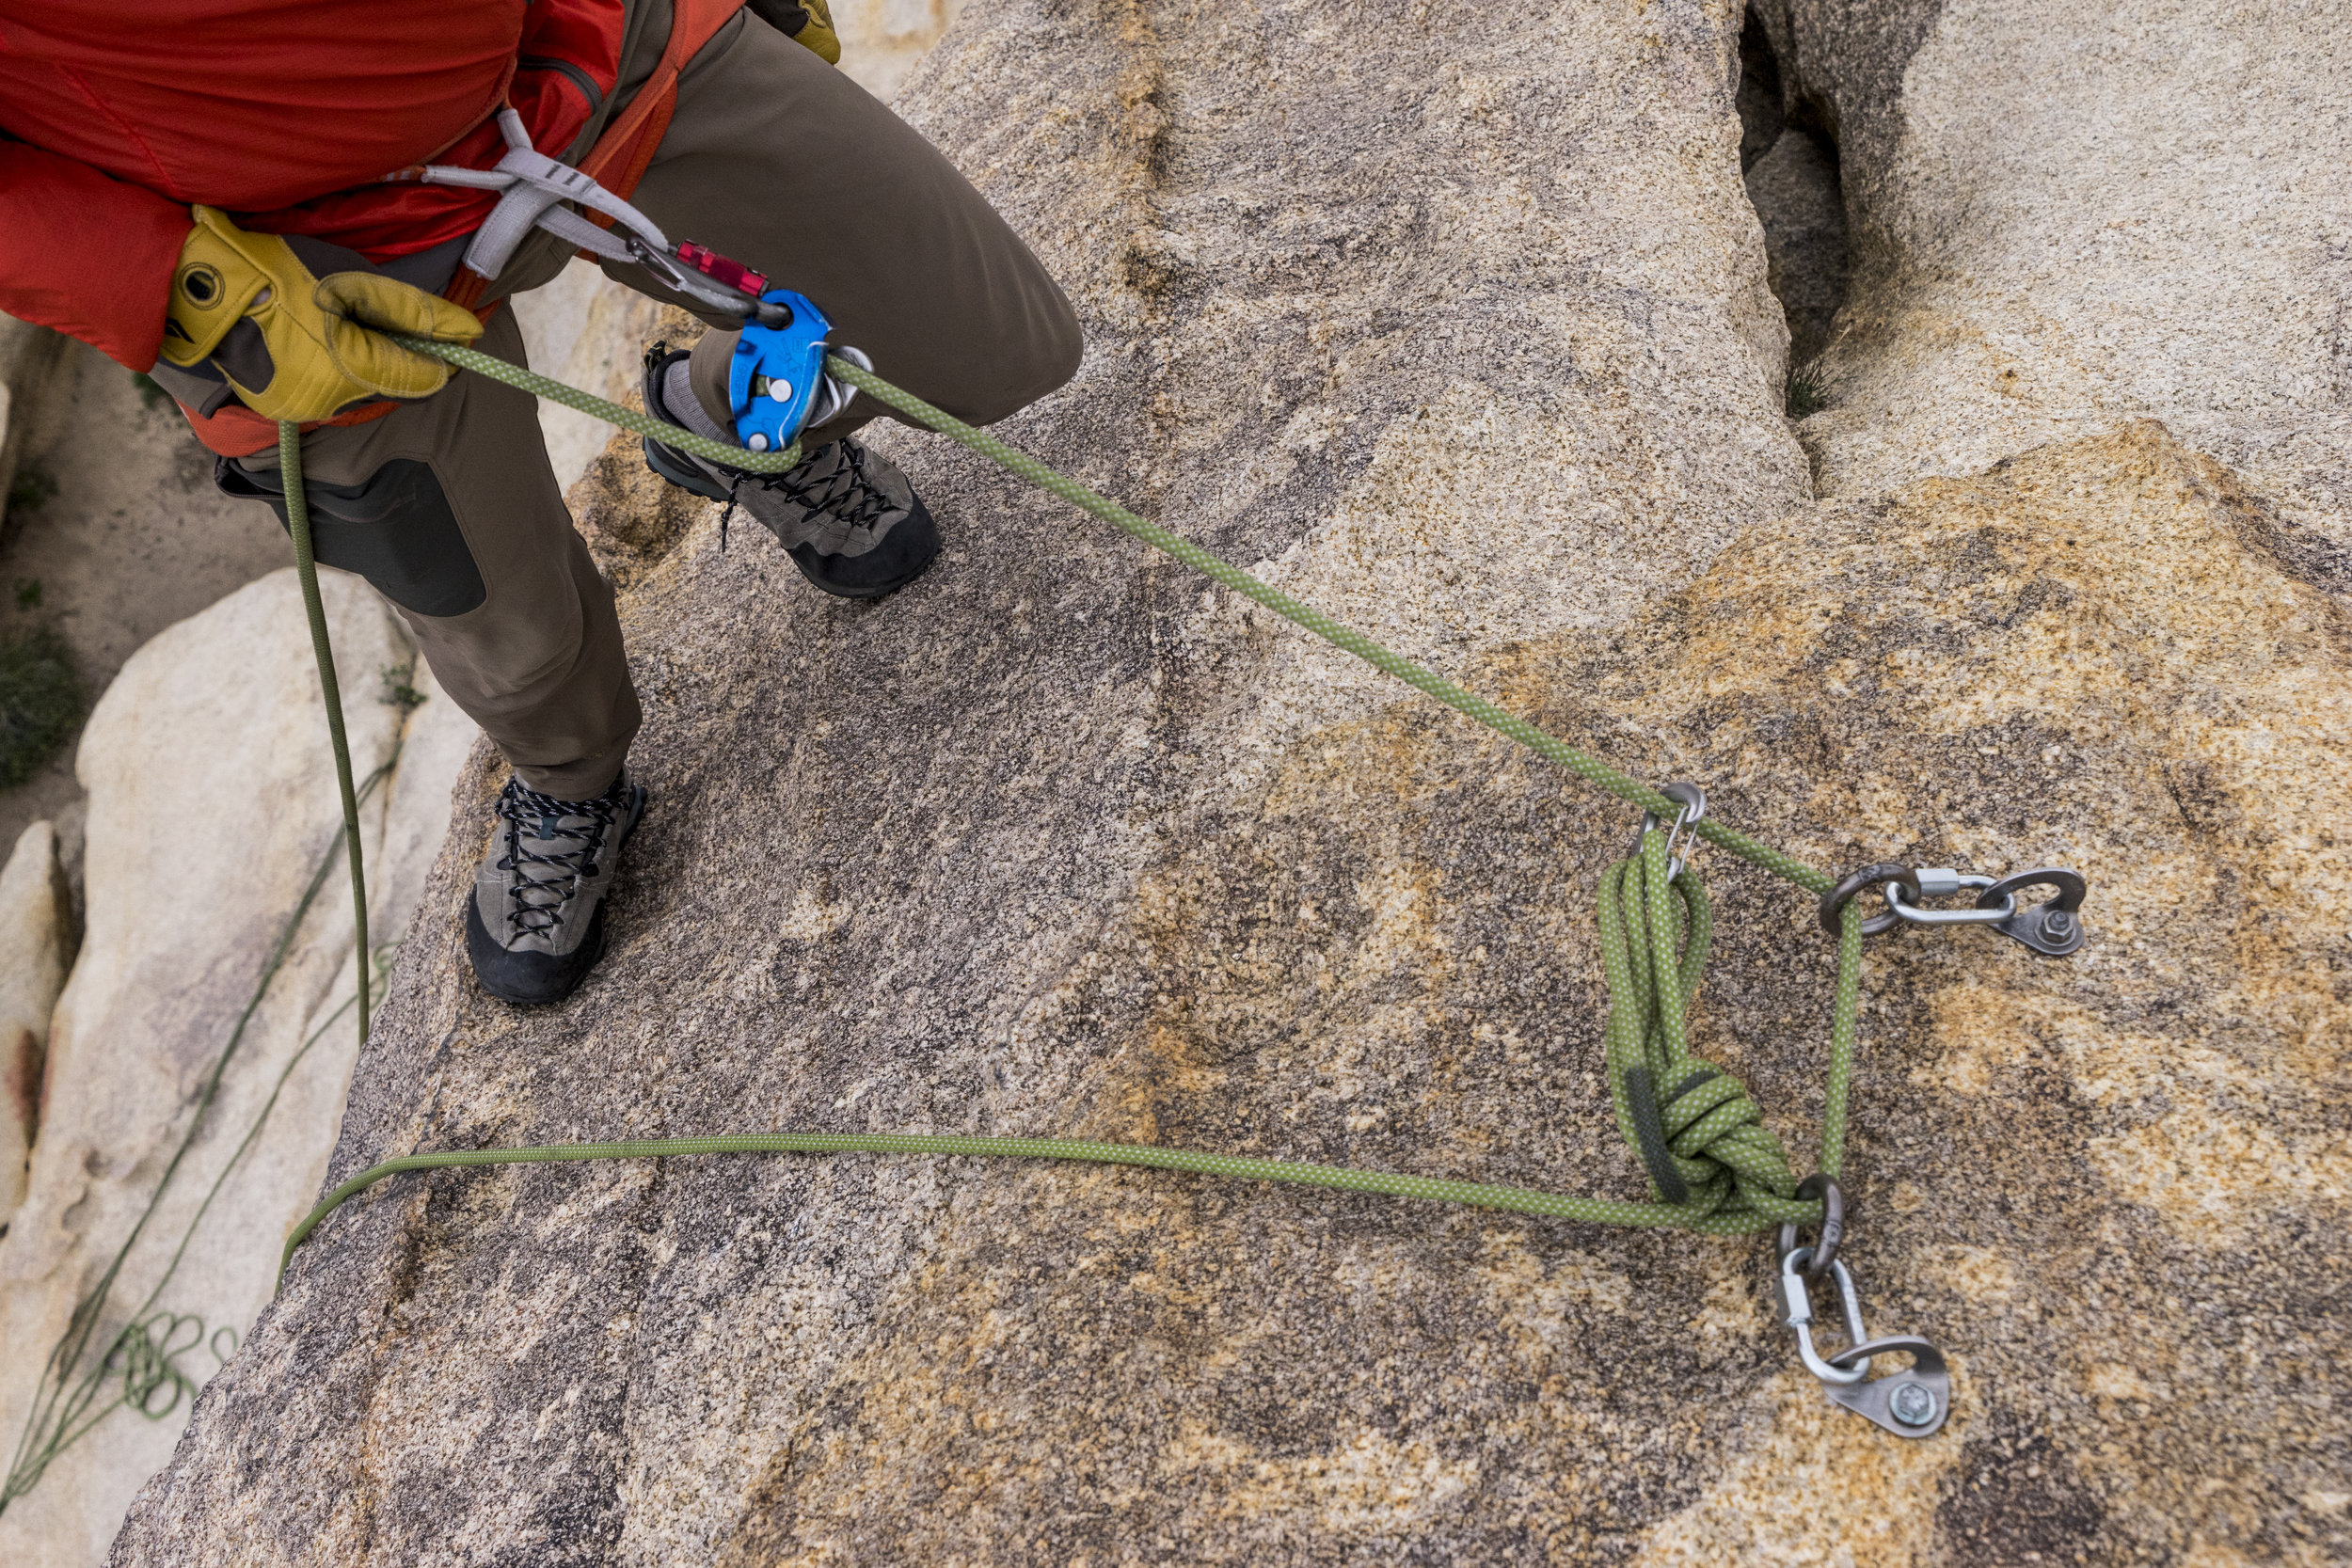
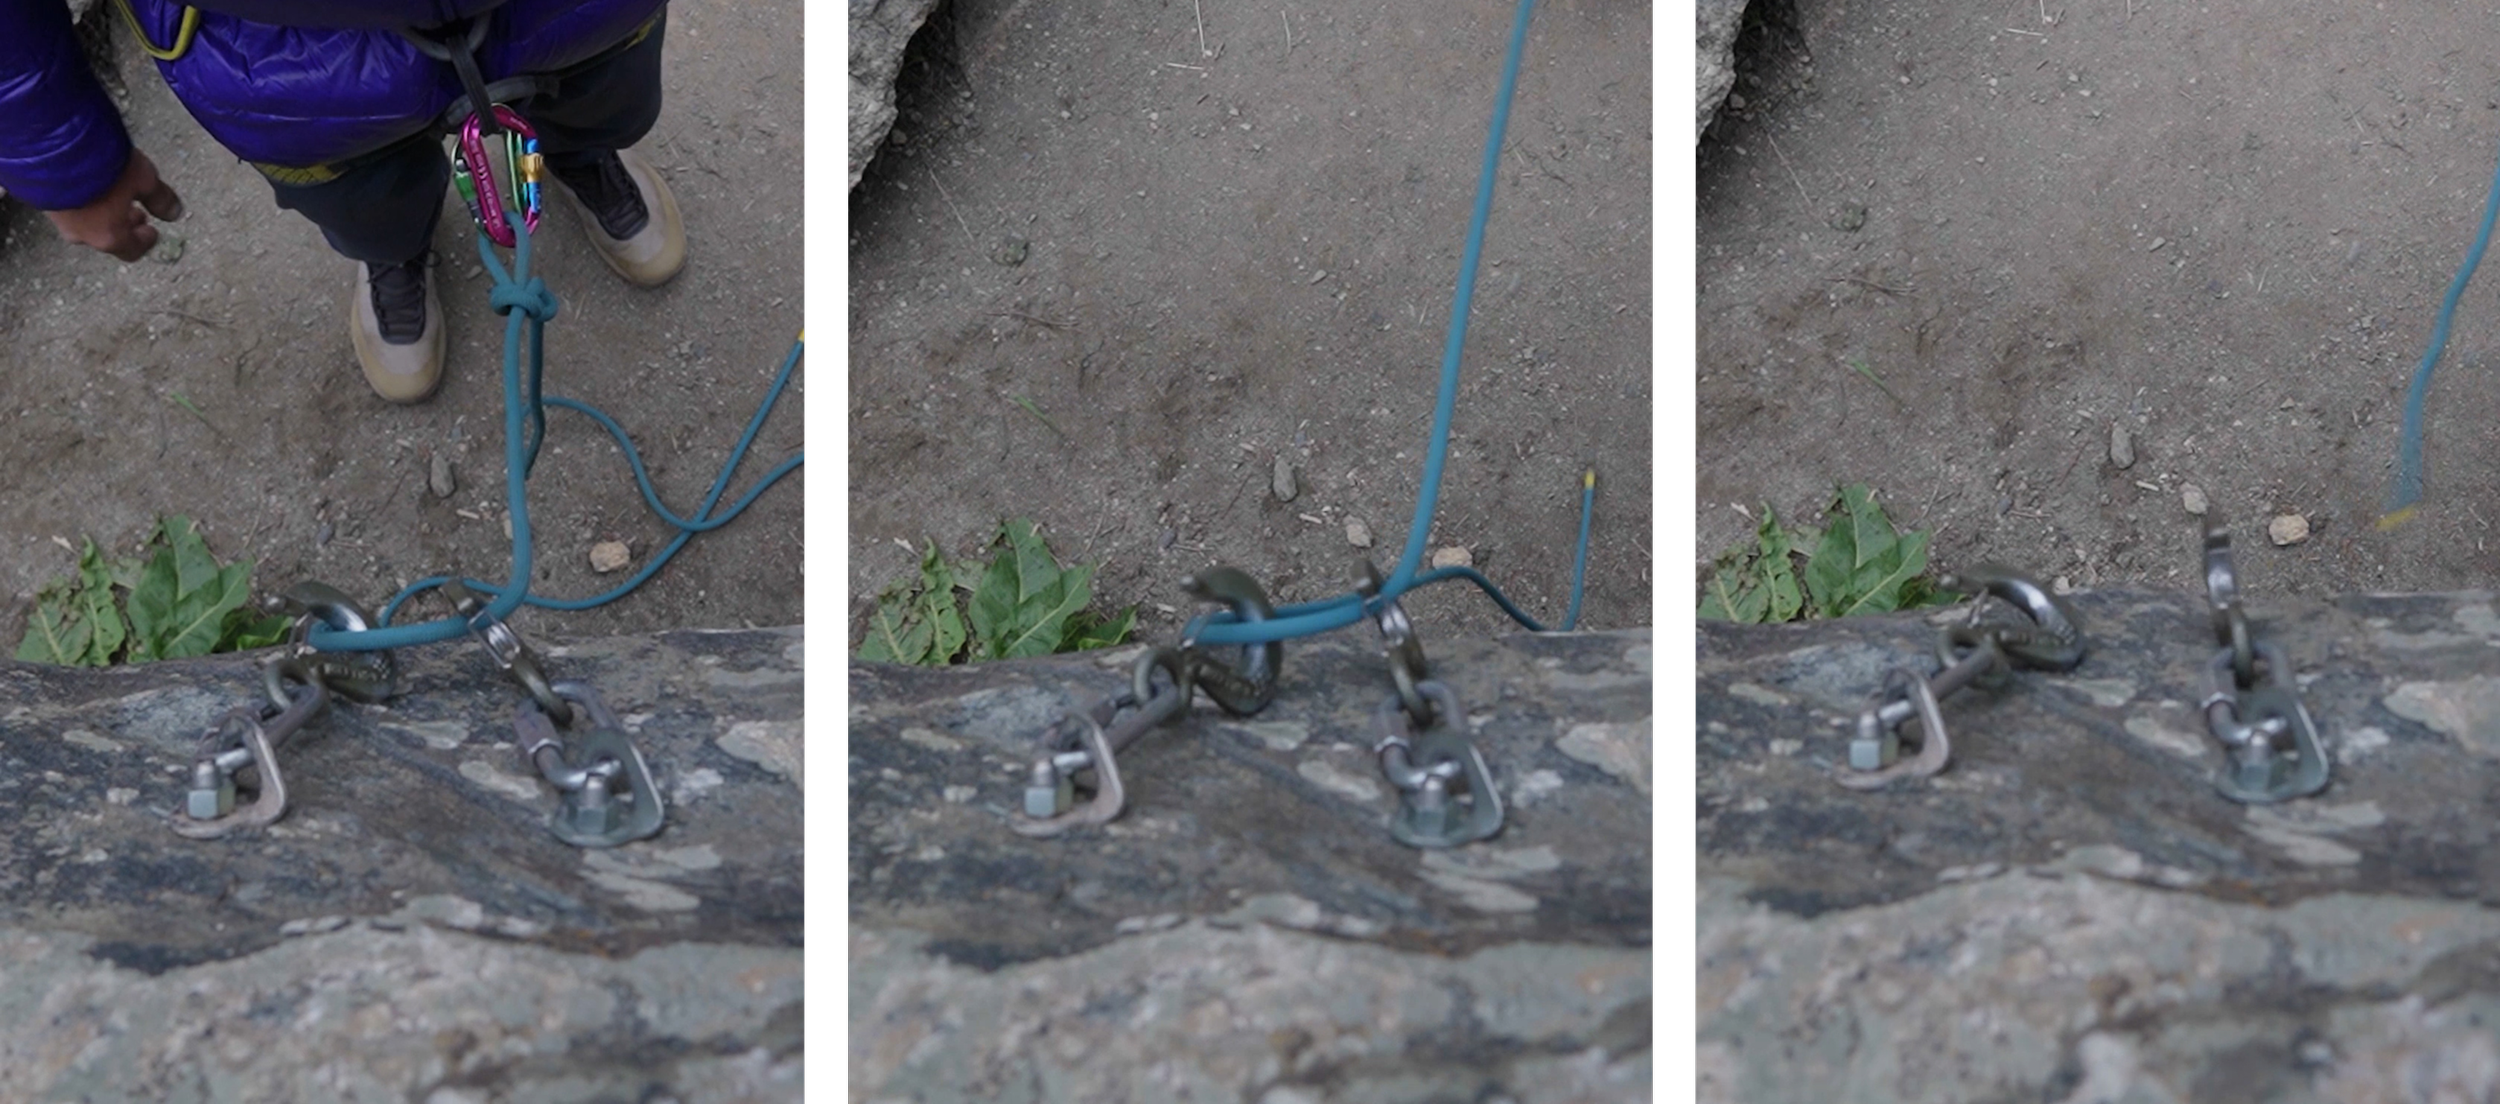
3.     Rappelling. If a rope is somehow fixed or counterweighted, an ABD can be used as rappel tool on a single strand of rope.

single rope rappel; rappelling with a grigri; how to rappel

When a single strand of rope is fixed, blocked, or counterweighted, an ABD can be used for rappelling.

"Rappelling with GRIGRI takes training, and it is important to system check ensuring proper rigging and connection."-Petzl

4.     Rope Ascension. If a rope is somehow fixed or counterweighted, an ABD can be used as a progress capture in an ascension system.

ascension systems for climbing; rope ascension

Many climbing instructors, like this one, learn to use an ABD for rope ascension.  As an improvised progress capture, these tools can be effective.

5.     Direct Belay. ABDs are often used by belayers to top-belay a second climber directly off the anchor. When top-belaying, direct belays are particularly advantageous. ABDs create unique challenges when belaying a leader in direct belay configurations.

belaying from above with a grigri

Direct belay applications must allow an ABD a full and uninterrupted range of motion.  If the device is laying on a slab or crammed against a protruding feature, the assisted braking function can be compromised.

Performance Characteristics.  

ABD manufacturers will each try to convince consumers that their products represent the most secure, reliable, easy-to-use device on the market. The truth is that climbing has diverse contexts with diverse environments, climates, and risks. That diversity is further compounded by the number people who climb: big people, small people, big hands, small hands, right-handed people, and left-handed. Some people are missing digits or limbs, and that might make one product more advantageous than the next.

When combined with function and the need for multi-functionality, each device will also have an array of performance characteristics that depend on each individual user’s style, body type, and unique challenges. Asking the following questions of every ABD will guide a user to the right model.  

Stationary Brake Hand: Does the manufacturer recommend a belay technique that allows the brake hand to remain stationary? Many devices do allow for this movement economy, and it is one of the most persuasive reasons to select an ABD in the first place.

Mechanical Braking or Passive Braking:  Is the assisted braking function mechanical or passive?  Mechanical Assisted Braking Devices, like the GriGri 2 or Vergo, have moving cams, clamps or swivels that pin the brake strand of the rope.  They are typically bigger and heavier than their passive counterparts. Their performance can be challenged in wet, snowy, or icy conditions. They can provide smooth lowers, multi-functionality, and reliable braking, though.

Passive Assisted Braking Devices exaggerate the “grabbing” quality of any aperture or tube style belay device. The “grabbing” effect is so severe, it effectively brakes the rope, providing the belayer with a backup.

Ergonomics:  Does the recommended use of the tool force the belayer to sustain unnatural, painful, or uncomfortable body positions?  Test the ergonomics of a device in all the application contexts. For example, the body mechanics involved in using a GriGri 2 are quite natural and comfortable for rappelling and counterweight belaying. But, lowering with a GriGri in a direct belay configuration requires an awkward manipulation of the GriGri 2 handle.  

Reliability of Assisted Braking Function:  Does the Assisted Braking Function perform reliably in the widest range of conditions and circumstances?  What are the known malfunction conditions? No ABD is automatic and 100% reliable.  They all have quirky and unique failure mechanisms that range from interference in the braking function’s range of motion, interference caused by precipitation (frozen or otherwise), inappropriate carabiner selection, or rope entrapment. Manufacturers don’t always advertise these failure mechanisms. 

Multi-functionality:  Does the device perform more than one function in climbing?  Do all the functions of the tool fall under the device's recommended use?  Are some functions discouraged, or are they simple NOT encouraged?

Smooth lowering and rappelling:  When lowering and rappelling, is the belayer able to control the rate of descent and keep that rate constant, without sudden halts or acceleration?  The ability to adjust the rate and the consistency of the rate varies from one tool to the next, and it can be especially inconsistent when using ropes at the extreme ends of the recommended range, ropes that are wet, or with smaller statured people.

Ambidextrous Usage:  Is the device effectively unusable by a right or left-handed belayer?  Does it function equally well with either handedness?  Many devices do not offer a compelling left-handed technique. Left-handed belayers often learn to use their right hands to belay because there is not a recommended technique, or the recommended technique is not as effective as simply learning the right-handed technique.

Size and Weight:  How big and how heavy is the tool?  Are there lighter options that accomplish the same functions and have the same performance characteristics otherwise?  In climbing, the size and weight of equipment can often make a big difference to the overall enjoyment and success of the team. All other things being equal, why not have a lighter, more compact tool?

Rope twisting: Does the device alter the plane of the rope’s travel?  When ropes move continuously in the same plane of travel, the rope is less likely to twist.  When that plane alters, say from a horizontal to vertical plane, twisting the rope is the unavoidable consequence.

Easy to learn, easy to teach:  How long will it take me to learn to use the tool?  Devices that are not ergonomic, have intricate parts and setups, and operate differently than other tools can often be more difficult for a belayer to learn to use correctly.  It shouldn’t take months and months of practice to learn to use a piece of belay hardware.

types of belay devices

EDUCATE: New Trends in Climbing Accidents—Summer 2023 Edition

Pete Takeda is back on the podcast! As the editor of Accidents in North American Climbing, he's ready to talk about new trends in climbing accidents that he's seen over the course of editing the 2023 edition of the book. Things get a little emotional, existential, and even a little dark, but ultimately we talk about how crowding at our crags, Youtube climbing education, and even grades are contributing to new types of climbing accidents. After all, as Pete says: “gravity speaks with an eloquence rarely found on Youtube.” But Pete’s also seen trends in the way that the climbing community comes together in the face of horrible tragedy. It’s the combination of both these high consequence accidents, and the community, that makes climbing so real. Get a sneak peek of the newest edition of Accidents in North American Climbing by listening in! We also talk briefly to the expert on the AAC's rescue and medical expense coverage....so if you're worried about the accident trends in this episode, you know what to do to make sure you're covered and prepared in the case of an accident.


Anchors

Anchoring is a subject that is often debated and analyzed, and yet much of what is being proselytized or disparaged does not adhere to fundamental principles of physics, human factors psychology, or a working understanding of rock quality and material science. It is not entirely mysterious how American climbers have gotten to this point, but it is certainly mysterious that so many of us insist upon remaining in a scientific and practical abyss.

Anchoring has evolved. It continues to evolve. If we want to continue that evolution, it’s valuable to explore the relationship between the past, the present, and the future. Today, anchoring is considered to be a precise, quantifiable art, but the science many climbers use to evaluate and quantify an anchor is dubious. Trusted and lauded concepts like equalization and no extension can be proven to be over-valued and/or inconsistently applied, which leaves us on uncertain footing.

If what we know about anchoring is questionable, what can we rely on? What does it mean when we say that anchors should be strong, secure, and simple? 

HISTORY OF ANCHORING

The earliest written instructions for anchoring all emphasized the value of finding a reliable and unquestionable protection point. Rock horns, well-placed ironmongery, threaded holes and chockstones, and substantial vegetation all served to give a belayer enough security that his or her body belay would not be displaced by sudden dynamic loads. Importantly, climbers did not spend much time trying to quantify or calculate the properties of an anchor because the anchor was just one part of a system that depended largely on a gigantic human component: the belayer. Anchoring, as a skill set, was inextricable from the belay that relied on it.

history of climbing anchors

This image, taken from The Climber's Bible by Robin Shaw circa 1983, typifies the instruction of anchoring in a previous era.  The belayer uses his stance to guard the anchor.

Modern belay anchoring is much different. A belayer is not guarding the anchor with her own body weight or using the anchor simply to augment her stance. Instead, the anchor is expected to support a falling, resting, or lowering climber entirely, based on its own integrity and load-bearing capabilities. As a result, the anchor and its focal masterpoint have become the foundation of most technical systems for climbing rock and ice. For example, when top-roping, the anchor is usually asked to hold the belayer and the climber in a counterweight arrangement. In direct belays, the anchor and its masterpoint are asked to sustain the weight of the seconding climber and any loads created to assist the seconding climber. In multi-pitch climbing, the anchor is asked to belay the second and then sustain the upward pull of the leader.

modern trad anchors

A modern belayer does not just use an anchor as a backup.  As we can see, this belayer is fully committed to the load-bearing properties of the anchor.  It holds his bodyweight, and the bodyweight of his second.

Whether we’re top-roping or multi-pitch climbing, whether we’re in the gym or at the crag, whether we’re building anchors with bolts or trad gear, we are increasingly dependent completely on anchors. And building them has become a foundational skill in technical climbing.

belaying a follower

Belaying one or two seconds directly off the anchor is called a Direct Belay.  If an anchor is reliable, direct belays are more versatile and more manageable than alternative configurations.

belaying from below and above

Modern anchors are configured to secure belayers no matter who they are belaying.  They might be belaying a second; they might be belaying a leader.

ANCHORING PRINCIPLES AND ACRONYMS

A key aspect of modern anchors has been the development of acronyms used to teach and evaluate them. These acronyms are not without merit. They helped a generation of climbers inaugurate a new era in anchoring.

Anchor builders used such mnemonics like a checklist of key principles, and the anchors they created served climb after climb reliably and predictably. Here’s how a typical anchoring scenario might unfold: The anchor builder, armed with a fundamental principle like SERENE, arrives at a pair of bolts. She begins to work through her acronym. She assesses the bolts and feels they are both strong. Knowing she’ll need to build a redundant and equalized anchor, she selects a 7mm nylon cordelette as her attachment material. She doubles up the cord, clips one side to each bolt, targets the anticipated load, and then ties an overhand knot in such manner that creates two isolated legs and a masterpoint. She clips into the master- point with a locking carabiner and her clove-hitched climbing rope.

Before calling “off belay” she reviews her handiwork:

  • Good bolts. 25kN each, combining to 50kN at the masterpoint. Solid: Check. 

  • One cordellette, one knot, 30 seconds to build. Efficient: Check.

  • If any single part of this anchor up to the masterpoint were to fail, there are backups. Redundant: Check.

  • When weighted, both legs of the anchor are tight. Equalized: Check.

  • If anything were to break, the masterpoint wouldn’t extend. No Extension: Check.

  • She’s built a SERENE anchor.

SERENE anchors; EARNEST climbing anchors

Anchoring acronyms help us ask basic questions about an anchor's qualities, but an absolute loyalty to concepts like redundancy and equalization can be misleading.

Millions of anchors have been constructed in approximately this fashion without incident or mishap, so it would be hasty to suggest that anchoring acronyms do not have value. However, climbers who also happen to be engineers, physicists, or just generally scientific-minded are quick to point out a fact that continues to elude a large number of climbers, climbing instructors, and authors of climbing books: Some of the qualities espoused in these beloved acronyms are not actually achieved in nature, neither practically, mathematically, nor experimentally.

Modern climbers have largely shifted from relying on the belayer’s weight as a key part of the system to relying wholly on the qualities of an anchor, and yet many of the qualities we aspire to achieve are based on nuanced falsehoods. As anchoring situations grow more complex, a climber attempting to tick every box on such an anchor checklist can waste significant time trying to reach unattainable goals. Worse, the climber may be lulled into a false sense of security.

The time has come, as a climbing culture, that we confront the modern science to ensure that it aligns with modern anchors. That might mean that many of our beloved acronyms are best suited to teaching novices, instead of remaining our only checklist as we grow in the sport. But it also might allow our understanding to evolve as rapidly as our sport does. 

anchoring acronyms

Anchoring acronyms still have value when climbers are first learning to build anchors.

THE MYTH OF EQUALIZATION

Anchors never really equalize. That is to say, they never manage to equally distribute the total load of the climbing team equally to all the components in the anchor, unless there is only one component. Yet, much false confidence and unnecessary time is contributed to achieving the elusive goal of equalization.

In experiment after experiment, the most carefully constructed anchor, with the most meticulous care taken to “equalize” all the components, will demonstrate that part of the anchor is holding most of the weight, most of the time. This is especially true if:

• The direction of the load alters in any way
• Any knots in the system tighten
• Any component fails
• The anchor builder intentionally ignores equalization in order to distribute more load to large components and less to small components 

equalizing anchors

Even the theoretical load distribution of many anchors is not "equal."  This anchor builder intentionally rigged to distribute more load to big pieces and less load to small pieces.

As a result, anchors that funnel into a masterpoint do not succeed, as intended, in aggregating the strength of the things they are attached to. A strong anchor thus is only as strong as the component that is holding most of the weight most of the time.

With an appreciation for this reality, many climbers gravitate toward “self-equalizing” anchoring systems. Magic X and quad configurations have become popular, but their ability to self-adjust to variable load direction is not perfect. The climber imagines that the shifting and sliding masterpoint allows equalization to happen, but in truth it only sort of happens...eventually...if the material doesn’t create too much friction. In the meantime, as the masterpoint slides along, the bulk of the load spikes from one component to the next.

quad anchor

What’s more, self-adjusting anchors all create opportunities for extension, despite the familiar anchoring acronyms’ insistence upon no extension. Anchor builders are forced to qualify that rule, applying load-limiting knots that limit or minimize extension.

how to build a climbing anchor

For years, we’ve been loyal to principles that are scientifically inaccurate, encourage us to miscalculate the strength of our anchor, and force us to make convenient exceptions to principles like “no extension.” And while these acronyms enabled a generation of anchor builders to solve basic anchoring problems, in more complex scenarios these principles can easily become a liability.

WHY DO ANCHORS FAIL?

Indisputably, anchors fail because the load exceeds the force that the anchor can withstand. Theoretically, that should never happen because falling or lowering climbers create relatively small forces, given the capabilities of our equipment. So how does the load ever exceed the force an anchor can withstand? It happens in a few predictable and observable ways:

  • We use our equipment incorrectly.  It doesn’t matter if the manufactured strength of a cam exceeds any load we could ever apply to it if we place the cam incorrectly. Similarly, a rope’s strength is irrelevant if we tie knots incorrectly.

  • Our equipment has been damaged. Chemicals or heat or trauma can cause imperceptible weaknesses in our equipment. We have to take good care of our gear.

  • The rock is not as good as we think it is. Evaluation of rock, ice, vegetation, and other anchoring media is a critical skill, on a micro and macro level. If there are hidden weaknesses, an anchor will expose them.

  • We just make mistakes sometimes. We can all appreciate that fatigue, haste, distraction, and peer pressure lead us to do uncharacteristic and dangerous things. It’s part of being human.

  • Acts of nature happen. There is such a thing as a no-win scenario in anchoring. We could do everything right and the mountain we’re climbing could collapse around us. That’s a bad day.

    All this causality is actually good news. The list above is ordered according to factors that we have the most power and knowledge to prevent. We can learn to use our equipment correctly. We can take good care of our gear. We can evaluate the rock more carefully and more skeptically. We can learn to prevent most anchor failures by being careful and knowledgeable.

    Such knowledge and care are part of what is keeping us safe out there, and if there are gaps in our knowledge, addressing the gap is vital. Instead of clinging to ideas like equalization and no extension, we can anticipate lurking dangers in our knowledge deficit.

FAILURE SCENARIOS

The following scenarios could be caused by a simplistic or inaccurate understanding of anchoring.

Small-component anchors. A devout loyalty to simple acronyms can have dangerous consequences when all the components in an anchor are smaller and weaker. If, for ex- ample, an anchor builder takes three small cams with 6kN of holding power each and imagines that an equalized masterpoint offers 18kN of combined strength, all the requirements of a SRENE anchor could be met. However, since equalization never really occurs, one of those pieces will be holding most of the weight most of the time. In that case, a single load that exceeds 6kN could sequentially rip every piece out of the rock, resulting in a catastrophic failure.

Lesson Learned: Avoid building anchors where no single component is strong enough to hold any potential load the climbing team could create.

avoid anchors with only small cams

Anchor builders start to imagine that they can aggregate the load-bearing properties of each component, which might not be true at all.  One tiny piece is probably holding most of the weight most of the time, with only other tiny pieces as backups.

Adjustable anchors. Anchors that self-adjust, like quad and sliding X configurations, do not eliminate extension. Mathematical data suggest the potential shock loads created by extension (even limited and minimized extensions) can be severe. If an anchor is constructed with only two pieces of equipment, like two 10kN cams, all the requirements of a SRENE anchor could be met. Yet a load large enough to make a single piece fail could catastrophically shock-load the second piece as well.

Lesson Learned: If you’re using self-adjusting systems, make sure ALL the components can survive the expected loads AND potential shock loads. Bomber pieces are required. 

self-adjusting anchor systems; sliding x; magic x; quad anchor

Don't forget, adjustable systems do not necessarily create a perfect load distribution.  Add a human factor or a large load and the resulting shock-loads can be more consequential than anchor-builders realize.

Stacked quads or Xs. Just as the self-adjusting properties of a single sliding X or quad configuration are imperfect, stacking these configurations multiplies those imperfections. The failure of a single piece proceeds to shock-load all the remaining pieces.

Lesson Learned: When stacking adjustable systems, make sure the components can handle expected loads AND potential shock loads.

potential extensions are potential shock loads in rock climbing anchors

All these potential extensions are also potential shock-loads.  Can all the placements handle all those potential loads?

MORE COMPLEX ANCHORS

SERENE and EARNEST anchors are usually effective for simple top-rope anchors, but there are circumstances where an inability to escape that thinking could prove problematic. More complex anchors require more complex thinking and problem solving. These scenarios don’t occur that often, but, as climbers’ experience grows, most of us eventually will run into one or more of them:

  • The direction of load applied to an anchor changes. The belayer could lean on an anchor in one direction, the belay might tug the anchor in a different direction, and two climbers at an anchor might fidget and tug and lean in lots of directions. Belay transitions on multi-pitch climbs can offer dramatic direction of load changes too. Typically, the anchor is rigged to belay a second climber, and then the same anchor is used for the lead belayer. The two loads could be completely different.

complex trad anchors; complex climbing anchors

All these different changes in the direction of load will shift the entire load onto a single component.  


  • The components available for anchoring might be vastly dissimilar. Some cams are rated to hold over 14kN, while the smallest cams may be rated to hold less than 6kN. Even if equalization were achievable in an anchor, why would anyone expect these two cams to do equal work? They are not equally valuable components. When anchoring components have vastly dissimilar load-bearing properties, the rigging will have to be more complicated.

how to build a trad anchor

The concept of equalization presumes that each component is equally valuable.  But, even perfect placements in perfect rock do not alway have equal load bearing properties, as pictured here.  Anchor builders might instead make gestures to prioritize the strongest pieces, to equitably distribute load, rather than equalize.
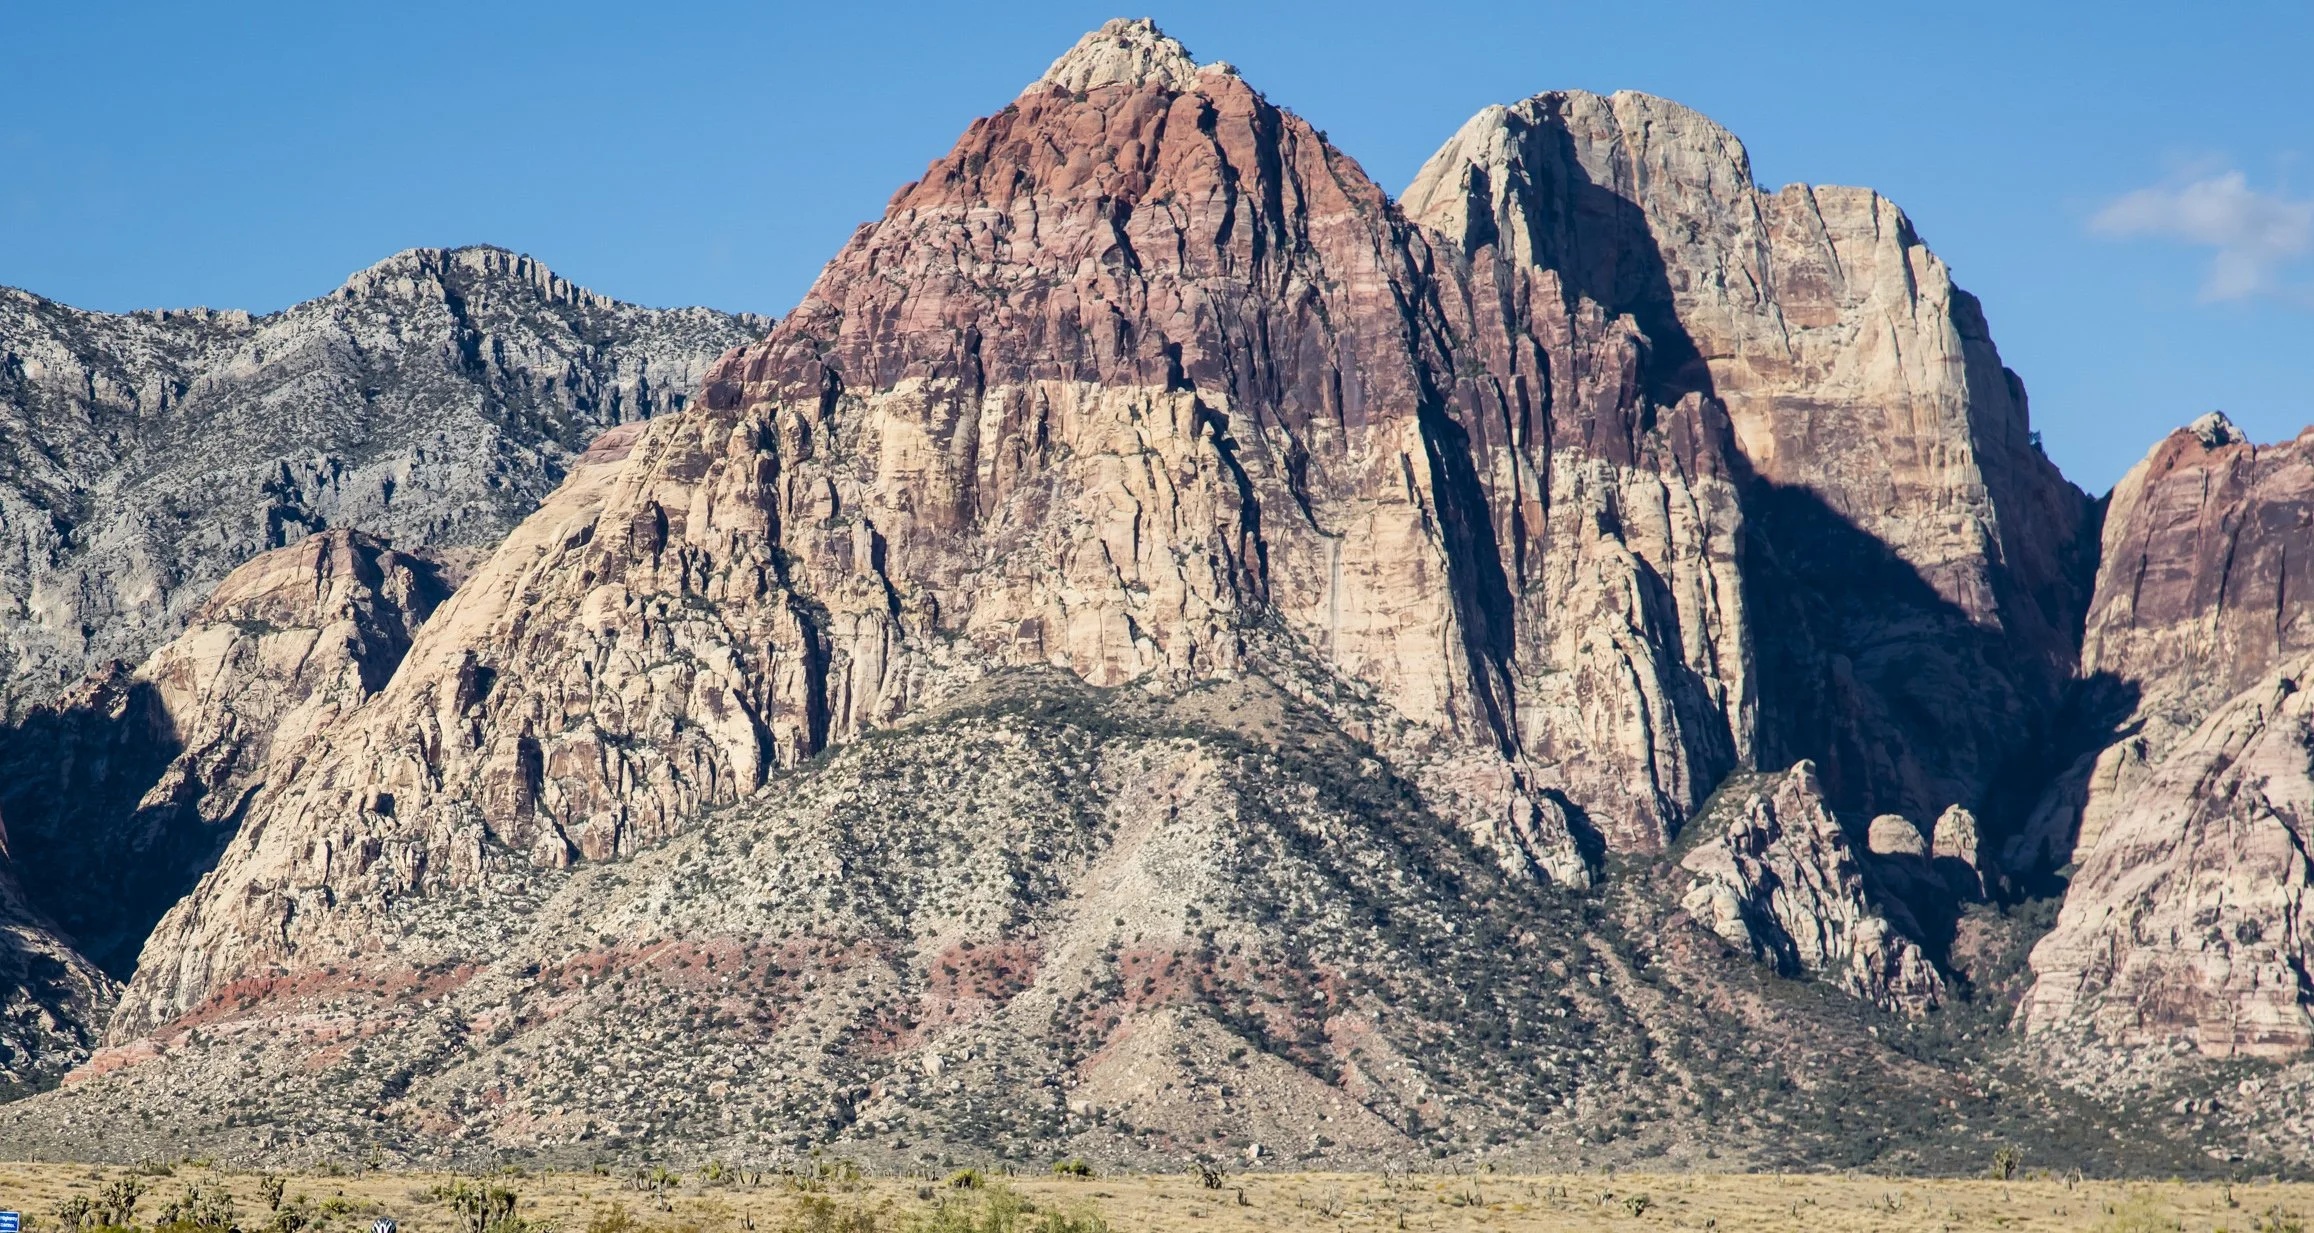
 

  • A climber often has to construct an anchor with limited resources. The values and principles of anchoring do not change, but building a fundamentally sound anchor with limited resources is very challenging. It often requires some innovative and artistic problem-solving, hence the complexity.

How often has this happened to you?  You've got to build an anchor with the gear you have left.  It can get complicated when the resources are limited.

How often has this happened to you?  You've got to build an anchor with the gear you have left.  It can get complicated when the resources are limited.

It should also be mentioned that the circumstances mentioned above might coincide and overlap. Since direct belays rely on fundamentally sound anchors, they may not be an option in some of these extreme scenarios.  Belayers may need to insert their own bodies into the system, using stance to supplement the anchor, relying on the anchor as a backup only. Moreover, there is such a thing as a no-win scenario in climbing and in anchoring, when the available resources, the working skill set, or various dire circumstances will not allow an appropriate anchor to be built. When faced with this scenario, a tactical retreat, a call for assistance, or the aid of another climber is preferable to settling for anchors that may well result in catastrophic failure.

THE TRIPLE S: FUNDAMENTALS OF COMPLEX ANCHORS

When anchoring becomes more complicated, a more sophisticated approach positions the anchor builder to answer three basic questions:

Is the anchor strong enough?
Is the anchor secure enough?
Is the anchor as simple as it can be?

This is a broader, more inclusive way to think about anchors than the SERENE-style mnemonic. Call it the Triple S approach. Triple S anchors do not strive to equalize or to eliminate extensions; they strive to distribute load intelligently, minimize extensions, and avoid edge-case failure scenarios. Triple S anchors do not attempt to aggregate strength; they rely on unquestionably strong component parts and anticipate a human factor in that calculation. Triple S anchors do not muddle into unnecessary complexity; they solve the anchoring problem as efficiently as possible.

Strength. An anchor must be adequately strong to sustain all potential loads applied to it. Then, an anchor’s strength must be padded with a margin of error that could account for any number of mistakes that all humans are wont to make. Let’s be conservative and provide ourselves with a 100 percent margin of error. That would mean that any anchor should be strong enough to sustain all potential loads applied to it multiplied by two.

Security. This means that if anything unexpected happens—components fail, the direction of load changes—the anchor must survive those unexpected changes. An anchor that is secure has backups. It has systemic redundancy all the way to the masterpoint. If any single point in the anchor were to fail, other points would provide adequate backups. We make a few exceptions for anchors that are so titanic in nature (large, stable trees and boulders) that we might rely upon these single features alone, but even these features could be rigged in a redundant fashion. 

Simplicity. A climber needs to appreciate that any anchor can quickly become convoluted and overly complex if it is rigged to solve phantom hazards or improb- able contingencies, or if it slavishly adheres to anchoring principles that are unachievable. For any given anchor, simplicity refers to the overall amount of time to construct and deconstruct an anchor. Simplicity refers to the overall amount of equipment needed, including rope, slings, carabiners, and any amount of padding or edge protection. All this should be minimized. Simplicity also refers to the number of knots being tied and untied, the number of steps needed to construct the anchor, and the distance the components are separated. All these should be minimized too.

When time, equipment, and number of steps are all minimized, and an anchor still demonstrates adequate strength and security, an anchor will have achieved the best end result our current knowledge and technology can offer. 

Gym to Crag

PC: Mo Beck climbing; photo by Will Saunders

It’s one of the hottest topics in climbing these days: how to make the transition from gym climbing to climbing outdoors, and in a way that is safe and responsible. A lot goes into climbing outdoors that you don’t have to think twice about in the gym! In our gym to crag series, we cover some of the key principles so that you can be more prepared, or so that you can educate your friends well as you mentor them outside!

Gym to Crag: New Questions to Consider

Our favorite part of this episode is that it was made a couple years ago, and Kai Lightner is a BABY. Oh how time flies…We also cover things like wearing a helmet, rock fall, the approach, uneven terrain when belaying, catching bigger falls, run-outs and more!

Gym to Crag: Stewardship and Environment

Climbing gets more complicated outside, but so does everything else—like eating, trash, and disposing of human waste. This video covers the outdoor ethics that all climbers need to know and practice to be responsible stewards of the crags we all love. Topics include staying on trail, packing out human waste and litter properly, leaving what you find, and more! Basically: wag bags are your new best friend.

Gym to Crag: Interacting with Others

Not going to lie, we know a lot of seasoned outdoor climbers who could brush up on these skills—especially making a respectful but efficient intervention when someone is climbing unsafely. In this installment of Gym to Crag, we cover the ways that risk and safety is amplified outside—and the best way to make sure those around you are respecting nature and each other as much as you do ;)


The Line — June 2023

The Line is the monthly newsletter of the American Alpine Journal.

Vitaliy Musiyenko following pitch six (5.11), one of the cruxes of Against the Grain on Charlotte Dome. Photo by Brian Prince.

THE BEST 5.11 IN THE HIGH SIERRA?

“Over the last couple of years, I’ve been working on a route which, in my honest opinion, has the potential to become known as one of the five best 5.11s in the High Sierra.” That’s the start of Vitaliy Musiyenko’s report for AAJ 2023 on Against the Grain, a new route up Charlotte Dome in California’s Kings Canyon National Park. Musiyenko, co-author of the new High Sierra Climbing guidebooks, and Brian Prince completed the 1,800-foot 5.11c route in late July of 2022.

“I had just developed COVID symptoms on the day we hiked into camp at Charlotte Lake,” Prince wrote in an email, recalling the first ascent. “The next day, when we climbed the route, I was really pretty wrecked. I think the only way I was able to keep climbing was that the route was so good. I put on a mask at the belays to try and protect Vitaliy, but he ended up testing positive a few days later anyway. It says a lot about Vitaliy that he didn't hate me for giving him COVID when he avoided it after working through the height of the pandemic in an emergency room.”

Against the Grain has about 1,800 feet of climbing on the southeast face of Charlotte Dome. The “Fifty Classics” South Face route ascends the corrugated face to the left. Photo by Vitaliy Musiyenko.

Prince added, “I just felt grateful that Vitaliy asked me to join him to climb the route after he put so much work into it. It felt like a kind of peak in our partnership because he would be moving out of California [to Utah] soon after.”

Against the Grain takes a direct line up the southeast face of Charlotte Dome, well to the right of the classic South Face route (Beckey-Jones-Rowell, 1970), and also to the right of Dance of Dragons, a route that Musiyenko established in 2017 with Jeremy Ross. Curious about the claim that the new route might be among the best 5.11s in the High Sierra, we asked Musiyenko and Prince—two of the Sierra’s most active first ascensionists—to fill out their top five. Perhaps unsurprisingly, they agreed on most of the climbs. Here’s their list in alphabetical order:

Against the Grain (Charlotte Dome) • Friends (Spring Lake Wall) • Positive Vibrations (The Hulk) • Tradewinds (The Hulk) • Valkyrie (Angel Wings)

Prince also mentioned Sky Pilot on Mt. Goode and Sword in the Stone on Mt. Chamberlin, but added that he hadn’t done the latter. He said the new route on Charlotte Dome might be the best of them all: “Not just the top five…. It is vertical face climbing on a backcountry granite dome for pitch after pitch. There's just nothing else like it.“

Do you have a favorite long 5.11 in the High Sierra that ought to be on this list? Name it in the comments below.


The south side of Cerro Iorana at sunset. Photo by Andrew Opila.

THE WILDS OF TIERRA DEL FUEGO

In a “Recon” article for AAJ 2020, geographer and exploratory climber Camilo Rada described the history and climbing possibilities in the remote Cordillera Darwin of Tierra del Fuego, at the southern tip of South America. Inspired in part by this article, Spanish climbers Eñaut Izagirre and Ibai Rico organized an expedition to the Cordillera Darwin in 2022 to attempt unclimbed peaks and study the snow and glacier dynamics in the range. With a base camp aboard the yacht Kotik, the seven-person expedition found great success, making the first ascents of the central summit of Monte Roncagli and Cerro Sara, as well as a new variation on Monte Francis. The team also collected snow samples from extremely remote sites and recovered thermometers and recording devices placed by Izagirre during a previous expedition in 2018. Among the early findings: The Roncagli (Alemania) Glacier has retreated at the alarming rate of more than a kilometer in just four years.

Izagirre and Rico’s article about the expedition will appear in AAJ 2023, which will be mailed to AAC members at the end of this summer. In the meantime, here’s a gallery of the team’s photos from the wild and beautiful Cordillera Darwin.

Photographer and climber Andrew Opila has produced a 30-minute film about the expedition, Into The Ice, which premiered in Bilbao, Spain, and was shown at the Wasatch Film Festival in April. More festival dates are pending. See the trailer here.
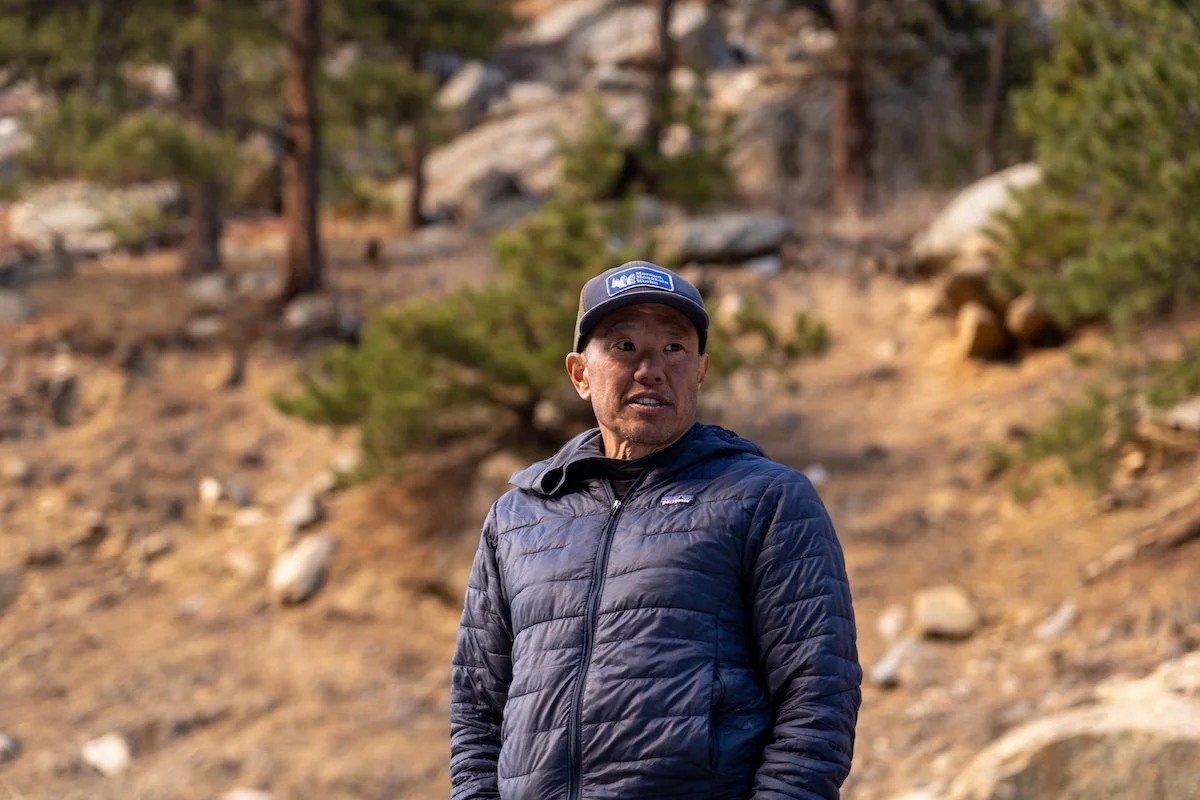

THE CUTTING EDGE IS BACK!

Season five of the AAJ’s Cutting Edge podcast kicks off with an interview featuring Jackson Marvell, the 27-year-old alpinist from Utah who just climbed his second new route up the mile-high east face of Mt. Dickey in Alaska. Listen here or wherever you get your podcasts.


The Line is the newsletter of the American Alpine Journal (AAJ), emailed to more than 80,000 climbers each month. Find the archive of past editions here. Interested in supporting this online publication? Contact Billy Dixon for opportunities. Questions or suggestions? Email us: [email protected].
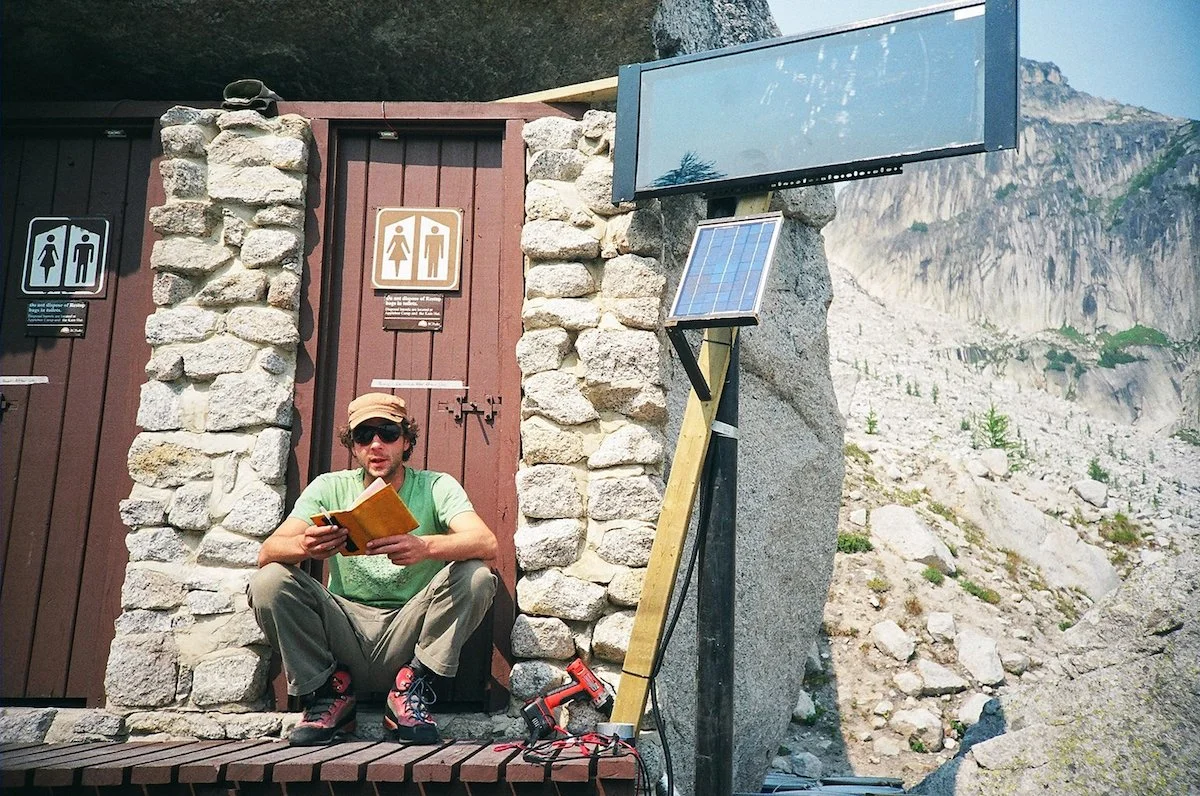
Snow Climbing

Know the Ropes: Fundamentals to Save Your Life

Originally Published in the 2014 Edition of Accidents in North American Climbing

Author: Dunham Gooding & Jason D. Martin // Photos: Erik Rieger.

“Slip on Snow.” The phrase seems innocuous enough. It certainly doesn’t sound like something that might lead to an injury or a fatality. But the reality of those three words in Accidents is quite different. If a slip or fall on snow appears in the heading of an abstract, it usually means that something terrible has happened. It might mean that someone has died.

cause of snow travel accidents

In the last 10 years more than 300 snow travel accidents have been recorded in Accidents in North American Mountaineering. Many, but not all, of these accidents were precipitated by deficient equipment or skills, including “Improper Crampon Use” or “Failure to Self Arrest”; others by illness, exhaustion, or injury; and yet others were the result of objective hazards like avalanches, rockfall, or icefall. Many, but not all, of these accidents could have been avoided had the climbers developed a better understanding of the skills required to move over snow—a dynamic and dangerous setting.

Effective snow travel is a baseline skill that is often overlooked by beginners and advanced climbers alike. In many cases, climbing clubs and even some professional guide services do not spend adequate time teaching effective movement and fall avoidance on snow. This leaves all of these climbers—beginner to advanced—open to the possibility of making mistakes that result in injury to themselves or others.
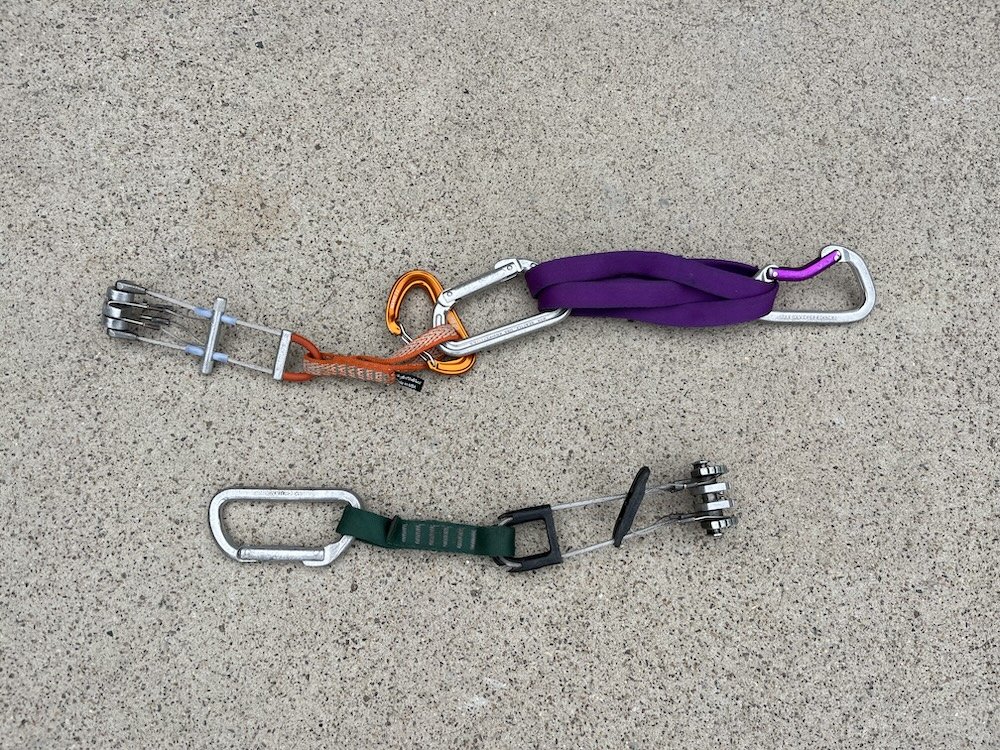
In the following pages, we will discuss the baseline skills that every mountain traveler must master in order to move efficiently over snow, maximize safety, and minimize risk. For both ascending and descending snow slopes, there are two main techniques that we will address: using your feet and using your ice axe. Effective snow travel requires synchronization of both techniques, matching those techniques to the proper terrain, and ensuring the equipment matches as well. Finally, we’ll briefly discuss strategies for choosing the route, time of ascent, and when to belay or unrope on snow.


USING YOUR FEET

Good footwork is the first line of security against slips on snow. And good footwork requires mountaineering boots, with rigid or semi-rigid soles and ample lugs for traction. (Inadequate footwear is frequently a contributing factor in snow-travel incidents reported in Accidents.) In soft snow, without crampons, there are three recommended techniques. All three can be adapted for use with crampons when snow conditions require it.

Duck Walk

Lower-angle, soft to mildly hard spring and summer snow often allows one to travel effectively without crampons. In this terrain—often up to 35 degrees—the most effective technique is the “duck walk.”

Splay your toes out so that your feet make a V in the snow. As you move up the slope, feet splayed, kick the surface of the snow, using the inside edge of your boot to cut a platform. Move your weight onto the platform as soon as you have cut it, and then repeat the process with your other foot. If your little platform gives way under your weight, kick again and create subsequent steps with a more vigorous swing of your foot to cut deeper into the slope.

step kicking; snow travel; mountaineering; how to climb snowy mountains

Step Kicking

As the angle increases, you will find it more comfortable to kick steps straight into the slope. Step kicking straight up the fall line is more strenuous than moving on a diagonal, but it is an effective way to increase your security. If the snow is consolidated but soft enough to kick good steps, you will have a good platform on which to stand. You will also be facing the slope, which is an excellent position from which to perform a quick self-arrest in the event of a slip.

Diagonal Ascent

If the snow is not soft enough to kick good steps, but is too steep for the duck walk, you may wish to make a diagonal ascent, switchbacking up the slope. The standard technique for moving up a steep slope at a diagonal is to employ a crossover step.

When moving up at a diagonal, there will always be a downhill foot (on the side of your body away from the slope) and an uphill foot (on the side closest to the slope). To move up the slope, cross your downhill foot above your uphill foot and then step up. Now bring the other foot around from behind to return to the uphill position. Once you’ve completed this crossover step, you should be in the same position from which you started. You’ll note that when you’re in the awkward crossed position you’re “out of balance.” When you’re in your original position, you’re “in balance.” If you’re using an ice axe to increase stability, it should be on the uphill side of your body and you should only move it when you’re in balance. Only stop to rest when in balance.

If you have trouble keeping track of which position is in balance and which is not, remember that the position that tends to make you face the slope is out of balance, and the one that tends to face you out slightly from the slope is in balance.

In order to change the direction of your ascent, bring your downhill foot up into an out-of-balance step, and then match that foot in a V position with your other foot, creating a duck stance. From there, make an in-balance step and kick a stance with the new uphill foot, pointing in the new direction. Note that the duck stance is always in balance, so it is possible to switch the ice axe from one hand to the other at any time while securely in that stance.

In harder snow you will have to shear each stance by cutting into the slope with a brisk forward swing of your foot, using a combination of the edge and the sole of your boot. In good conditions you should be able to cut your foot into the slope using a single movement. On hard snow you may need to kick several times to cut an appropriate stance.

Effective Crampon Use

In the past, a number of climbing clubs taught that crampon use was “required” for glacier travel. Thankfully this practice is far less common today, but there are still a lot of climbers out there who believe this to be true.

The reality is you should only wear crampons when the conditions require it. Crampons are dangerous. You can stab yourself with them or catch a point on a piece of clothing and trip. Crampons are required only when you walk or climb on firm snow or ice. It doesn’t matter whether you are on a glacier or not. If wearing crampons doesn’t increase your security, you should stow them until the conditions change.

It is common to start a climb early in the morning when snow slopes are thoroughly frozen. In a temperate climate, as the day unfolds, rising temperatures and direct sunlight on the snow can rapidly change frozen snow to soft snow or mush. Recognize when crampons are no longer needed and take them off.

When wet snow begins to ball up on the bottom of a crampon, the possibility of slipping and falling becomes very real. If the snow is soft enough, consider removing your crampons. In some cases a thin layer of wet snow on top of ice or hard snow makes crampons essential. For this reason mountaineers should always employ crampons equipped with anti-bot plates. These plastic inserts help keep snow from balling up between the crampon spikes.

The crampons you choose should be compatible with your boot and should be appropriate for the objective. If you elect to wear crampons with a toe bail or a heel bail/clipper, confirm that the rand/welts on the boot are appropriate for these crampons before you leave for the mountains. Try pulling down on the center bar and pulling the front points side to side. Does the crampon shift or lose contact with the boot, even if the sole is flexed? If the crampons do not fit securely, they must be adjusted or a different crampon/boot combination should be chosen. Never ignore a badly fitting crampon or just hope that it will improve.

Tripping is a significant hazard with crampons, often a result of the frontpoints snagging on clothing or gear. It’s not uncommon to see climbers wearing gaiters on the wrong feet, with the buckles on the inside of the legs—this provides a prominent place for a frontpoint to catch, causing a stumble. Be sure extra crampon straps are tucked away and that—if not wearing gaiters—the cuff of your pants has a low profile. (Many modern mountaineering pants have grommets to attach elastic cords that run under the boots, eliminating the need for bulky gaiters.)

Once you put on your crampons, you should continually focus on good technique, using thoughtful and controlled steps. Running down a slope, climbing while tired, or stepping out of balance are all good ways to either trip or stab yourself with a crampon point.

French Technique (Flat Foot)

French technique is the art of flexing the ankle so provide purchase for all of the crampon points on the bottom of your boot. Most modern crampons have 10 points on the bottom and two frontpoints on each toe. An individual employing proper French technique will engage all 10 of the bottom points to create a high level of security in the step. This is also referred to as the flat-foot technique or, in French, pieds à plat.

In hard snow or icy conditions the flat-foot technique may be used in combination with both the duck walk and a diagonal ascent. The techniques are the same as described without crampons, with one significant difference: You must flex your ankles sideways so that all of the crampon points bite into the surface.

American Technique (Hybrid or Pied Troisième)

demonstrating American technique of walking with crampons; how to use crampons; mountaineering

As the slope angle increases (usually above 45°) it becomes difficult to maintain diagonal French technique without shifting the toe of your boots so radically downhill—in order to engage all of the crampons’ bottom teeth—that you end up walking up the slope backward. Moving this way is physically demanding and isn’t terribly secure.

Instead, shift one foot out of the French stance and engage the frontpoints in the snow. The other foot should remain flat-footed against the slope. This technique allows you to face the slope and move quickly, while saving the strength in your calves. As the calf in the frontpoint position tires, simply switch feet and allow the pumped calf to rest in a flat-footed French position while the rested foot and leg take over the frontpointing.

Austrian Technique (Frontpointing)

The third crampon method is the Austrian technique, or frontpointing. This technique is reserved for very steep angles—usually in excess of 70°—though some climbers prefer it on somewhat lower-angled terrain.

Frontpointing requires one to kick their crampons straight into the slope, and then to drop the heels approximately 10° below a level stance. Dropping the heels engages not only the frontpoints but the next two points on the crampon as well. The result is that a climber stands on four points, instead of just two, which increases the stability of the placements.

Frontpoint crampon technique tires the calf muscles, and because fatigue is a significant contributor to slips and falls on snow and ice, climbers should use the American technique rather than frontpointing whenever it’s reasonable.


USING AN ICE AXE

Many mountaineers tend to see the ice axe primarily as a tool for self-arrest. But an ice axe should be used primarily to increase security while climbing, in order to decrease the likelihood of a fall. Being able to execute a good self-arrest is important, but the first goal is always not to fall.

Ice Axe Choice

For mountaineering routes, a straight-shafted axe with a gently curved pick and no molded plastic grips or handles, roughly 60 to 70cm long (depending on the climber’s height), will provide the most versatility and security for snow travel, self-arrest techniques, and creating snow anchors.

However, many climbers opt for shorter technical tools for alpine routes and ice climbs, even those that may require serious snow travel en route or during the approach or descent. Some technical tools work better than others in such applications. Consider tools with lower-profile finger guards and grips, a generous spike, and a less radical curve to the shaft.

Leashes

In most mountaineering settings, there is no compelling reason to leash an ice axe to your wrist. The tool is always to be carried in the uphill hand, and using a leash requires the climber to switch the leash to the other hand every time he changes direction on a diagonal ascent. This takes time, decreases security, and takes focus off the task at hand. In most settings, the danger of dropping an ice axe is lower than the risk of destabilization during a transition.

However, using a leash makes sense in contexts where the likelihood of a drop increases. For example, when wearing mittens in extremely cold weather or on high-altitude climbs, a leash is imperative because of the lack of dexterity. (In some cases, it may be preferable to tether the axe directly to your harness, because switching a leash with bulky mittens and clothing can be nearly impossible.) When climbing steep ice, wearing some kind of leash or tether makes sense, because dropping an axe in such a setting could be catastrophic.

How To Hold the Axe: Cane Position vs. Self-Arrest Position

While climbing moderately steep snow, mountaineers have two primary choices of ice axe positions: carrying the axe in the cane position, with the pick forward, or carrying the axe in the self-arrest position, with the pick backward. It is not uncommon to hear climbers argue about which is better. But it’s clear which way is better: The cane position is better when you are actively climbing the mountain, and the self-arrest position is better when you are actively falling off the mountain.

how to use an ice axe; how to use a piolet

All joking aside, the cane position (piolet canne) provides more stability and should be used in most cases while ascending, for two major reasons. First, it’s easier to firmly set the axe’s spike in the snow when you have the palm of your hand seated comfortably on the flat surface of the adze. Placing the spike effectively in hard snow with the axe in the self-arrest position will eventually bruise the palm of your hand on the narrow edge of the pick, causing you to be less aggressive with the axe. Second, as the angle of the slope increases, it is more natural to transition from the cane position into one of the dagger positions with the axe.

Obviously, one will be slightly slower to move into a self-arrest with an ice axe in the cane position. Some would argue that this compromises one’s safety. But the best way to address that compromise is to practice self-arrest from the cane position until it is second nature and can be employed as effectively as from the self-arrest position. Switch to the self-arrest position only when there is an obvious danger—like crossing a heavily crevassed area on a rope team or traversing a very steep slope—when the climber must be prepared to self-arrest.

Self-Belay Position (Piolet Manche)

The self-belay or “deep plunge” position is a secure technique for steep snow climbing. The axe is pushed down vertically into the snow as deeply as possible, while you continue to hold the head of the tool. The head of the axe becomes a handhold. (In French, manche means “handle” or “sleeve.” Imagine the shaft of the axe down in a sleeve of snow that will keep it in place, creating a good handle.)

There are two ways to hold the axe while employing this technique. In softer snow, when the majority of the shaft is buried, you can hold the head of the axe with both hands. This is very secure.

If the snow is too hard or icy for the axe to penetrate very far, it isn’t effective to have both hands on the head because in a slip you may simply lever the spike out. Instead, one hand can be placed on the head of the axe while the other grips the shaft at the point where it disappears into the snow. In the event of a slip, the hand on top of the axe should push forward, while counter pressure is applied to the hand that is lower on the shaft. In other words, you should be pushing in on the top and pulling out with the hand just above the spike. If pressures are applied correctly, the slip will be arrested by this technique before it becomes a fall.

Anchor Position (Piolet Ancre)

Occasionally a climber will need to make a quick placement with the pick of his axe in order to pull over a bulge or assist with a crevasse crossing. To do this, hold the axe in your dominant hand just above the spike and swing it over your head like you’re pounding in a nail. Right at the end of the swing, flick your wrist forward; this will allow the pick to bite more deeply. Once the pick is placed, you can use both the shaft and the head of the axe as handholds while you climb up over your obstacle.

Low, Middle and High Dagger Positions

On steep snow and ice, most commonly on terrain between 45° and 70°, one or more of the dagger positions may be useful. The climber holds the ice axe at the top of the shaft or on the head while seating the pick of the axe in the snow. Dagger positions work well in hard snow or on névé, but are less effective on hard ice, where the only way to create an effective pick placement is to swing the axe.

The first of these three techniques is the low dagger position, or piolet panne. In this position, place the palm of your hand on the top of the adze as you press the pick into the slope at waist level. This is a quick technique that doesn’t require any changes to the way you hold your ice axe, assuming you started out in the cane position, but it doesn’t feel as secure as some other techniques because the pick is so low. It will be most useful for downclimbing.

In the middle dagger position (piolet appui), place your hand on the shaft of the axe right below the head. This position allows you to push the pick into the slope more forcefully, making each stick feel more secure.

In the high dagger position (piolet poignard), hold the head of the axe, wrapping your fingers over the pick in front of the shaft while you wrap your thumb under the adze behind the shaft. To place the axe, reach high and stab the pick into the slope. A high dagger placement often provides better security on very steep slopes than the other two dagger positions.

Self-Arrest

Failure to self-arrest is a common contributor to the incidents found in these pages, and many climbers are almost obsessively fixated on their ice axe as a tool to arrest a fall. But many times a slope is too steep or the snow too hard or icy for an effective self-arrest. Think of an icy slope of 40° or more and you’ll get the picture: The falling climber starts sliding too quickly to control a slide.

arresting a fall on snow; how to arrest a fall on snow

When a fall takes place, a mistake has already been made. Therefore, as we’ve said before, although it is important to practice self-arrest it is perhaps more important to practice the art of not falling. Work on proper foot technique, practice using the ice axe as an aid to decrease the likelihood of a fall, and develop situational awareness by paying attention to your surroundings and managing risk on exposed terrain.

Your risk management strategy should take into account both the condition of the snow and the angle of the slope. In soft snow conditions, even on 40° terrain, a self-arrest may be effective. But in icy conditions, even on a lower-angled slope, a self-arrest may well be unsuccessful. If it doesn’t appear that a self-arrest will be feasible, you may have to alter your climbing strategy, including roping up and belaying or choosing an alternate line.

Depending on the circumstances, you may end up sliding down the slope after a slip in any number of different ways: feet-first on your back, head-first on your stomach, etc. It doesn’t matter how you fall, the goal is the same: Roll into a self-arrest position with the shaft of the axe across your body, place the pick in the snow, look away from the adze, then torque the spike up while lifting with your legs. This should bury the pick deep in the slope’s surface and bring you to a stop. It’s beyond the scope of this article to explain self-arrest in depth: Seek instruction and practice repeatedly. Find a low-consequence slope and take a variety of mock slips and falls in varying positions to get the hang of it. Building good instincts takes repetition.

Most climbers practice self-arrest with a standard alpine piolet. These ice axes were designed with self-arrest in mind and work well for it. Shorter, technical ice tools are not as easy to manipulate into the self-arrest position, and the picks may skitter off hard snow or ice. Those who climb with technical tools should practice self-arrest with such tools until it is second nature.

One great debate over the practice of self-arrest is whether the climber should kick his feet up during an arrest, in order to ensure he doesn’t get flipped over by his crampons, or whether he should bury his toes into the snow no matter the cost. Many climbing clubs still teach the former technique, whereas most guides now teach the latter.

In the event of a fall, the most important thing is to stop. Style points don’t matter. Indeed, even injury doesn’t matter. What matters is that you fight with everything that you have in order to arrest a fall.


DESCENDING ON SNOW

Many snow-climbing accidents occur while descending. Often this is because the climber is tired and not paying attention to the surroundings and the conditions under foot. It is important to stay alert on the way down, and to focus both on the slope below you as well as on your feet.

Plunge Step

descending a snow field; mountaineering

The plunge step is an aggressive and direct way to descend a slope of soft snow. Think of it as reversed step kicking. To do it effectively, bend your knees slightly, spread your feet shoulder width apart, and step straight downhill, striking the slope with the heel of your boot. The heel will cut into the snow and create a platform for the rest of the boot.

In harder snow conditions, it is imperative that the heel aggressively hits the slope on every step and that the toe is pointed slightly upward. Try to plunge down and kick back to achieve the proper step. Often people who are not aggressive plunge-steppers may slip and then become more timid in their steps, which leads to more falls and more timidity. If you fall once, don’t back off—be more aggressive in your steps to ensure that your heel cuts deeply enough to create a secure step.

Most climbers will feel comfortable with the plunge step in soft conditions on slopes up to about 40°. In semi-hard conditions, aggressive plunge-stepping should be reserved for slopes that are 35° or under. If the conditions are too hard to plunge-step securely, descending with crampons is a better option.

Shuffle Step

If the terrain is steeper or more exposed, climbers may resort to the shuffle step to increase the security of their descent. This technique is not fast, but is very secure and can be done with crampons on or off, depending on the conditions.

Face perpendicular to the slope and step down with your downhill foot. Now move your uphill foot down into the step your downhill foot occupied a moment earlier. Your ice axe should be in your uphill hand in the cane or self-arrest position, with the spike planted firmly in the snow. Once your feet are next to one another, move the ice axe down, planting the spike once more.

Downclimb

Downclimbing steep slopes on frontpoints or with American (pied troisième) technique is often faster than setting up a rappel. Indeed, in conditions where it’s hard to build a good rappel anchor, downclimbing may even be safer.

Some climbers might feel comfortable downclimbing 60° snow, while others wouldn’t dream of it. If one member of a team is uncomfortable downclimbing a given slope, it may be better to belay him and then solo down. Alternately, you might consider setting up a rappel for the entire team.

Descending with Crampons

The biggest thing to remember when descending with crampons is that it is easy to trip over a gaiter, shoelace, or pant leg while walking or plunge-stepping downhill. For this reason, it is important to splay the toes of your crampons out a little bit on the descent and keep your two feet away from each other. Also, beware of snow balling up under the crampons. From an in-balance position, knock snow off the crampons by banging the sides of them with your ice axe or by kicking one crampon against the side of the other.

Glissading

Many mountaineers ascending lower-angled mountains look forward to the adventure of glissading down snow slopes after their climb. There are three types of glissade that a climber can employ: standing glissade, three-point glissade, and sitting glissade. But losing control of a glissade is a contributing factor to many accidents. Following four guidelines can help minimize the risk.

Never glissade with crampons on. People get injured every year because they wear crampons while glissading. If you’re wearing crampons, it’s probably icy, and if it’s icy you probably shouldn’t be glissading. Second, and perhaps more importantly, if you’re wearing crampons while glissading quickly, you could easily snag a spike on hard snow or ice, with the possibility of breaking an ankle or leg.

Never glissade while tied into a rope team. If you are roped up, it should be because there are hazards that require a measured and controlled approach. Sliding down the hill is the antithesis of measure and control.

Never glissade on a glacier. If you are on a “wet” glacier, then it is likely that you are roped up to manage the crevasse hazard. The preceding rule states that glissading while roped up is never advised. If you’re not roped up, glissading on a glacier opens the possibility of a crevasse fall, which almost always has severe consequences.

Always make sure you can see where you’re going. You should not glissade if there is any fog or rollovers to negotiate. Glissading off a cliff, into a moat, or onto talus is a terrible way to end your day.

SNOW CLIMBING STRATEGIES

snow climbing strategies; mountaineering

There are many snow-climbing situations where climbers may choose to move together while roped to one another. The most common is to protect against a crevasse fall. But this technique also may be used to protect a team from a fall down snow or ice through the use of a running belay.

To rig a running belay, the leader places snow or ice protection and then clips the rope to it. As the second approaches, he can either clip the rope behind him as he passes the protection to safeguard the remaining climbers or—if on a two-person team—remove the protection. If an individual on the team falls, he may pull the others off, but the protection between the climbers will theoretically arrest the fall, limiting the damage of the incident.

In some settings, it might be more efficient and perhaps even safer for the climbers on a team to unrope and “solo” a slope. Imagine a slope that’s not steep enough to require belaying individual pitches, and that, in order to move quickly, you make a team decision not to employ a running belay. On steep or icy slopes where self-arrest is unlikely, the slip of a single climber roped to the rest of the group could result in the loss of the entire team. In such a situation, it might be safer for the individual climbers to unrope.

The decision to unrope should not be made lightly. First, you must consider the reasons that you employed a rope in the first place and determine if those risk factors are still valid. Second, you must feel confident in the ability of each member of your team to solo the slope safely. If you have any doubts about a team member’s skill, you should continue to use the rope and either employ running belays or stop and belay each climber up or down the slope.

Timing the Climb

Many accidents take place because of unstable snow. In a spring or summer context, this often includes the combination of wet slide avalanches, collapsing cornices, and weak snow bridges over crevasses. These dangers may be mitigated by an early morning ascent.

On glaciated peaks and on peaks with a lot of objective hazard, it’s not uncommon for spring and summer climbing teams to leave camp between midnight and 4 a.m. Teams should estimate how long it will take to climb the mountain and descend, and then plan a departure early enough to ensure they are off the snow before the sun dangerously warms the slopes.

During the colder months and in colder regions, parties often elect to climb during the day. The cooler temperatures provide a margin of safety that is similar to that experienced by night climbers in the spring and summer. However, it is not uncommon for temperatures to warm and for parties to have to adapt their schedules to the weather. Those who do not adapt to the conditions put themselves at risk.

Ideally, mountaineers will encounter firm, easily climbed snow during the ascent and softer snow—but not too wet or soft—for a rapid, easy descent. Timing a climb to find such conditions is a key aspect of the craft of mountaineering.

Making Good Choices

Effectively moving on snow involves a matrix of skills and decisions. An individual who has mastered such techniques will not be immune from appearing in these pages under the heading that reads “fall on snow,” but he or she will certainly be much less likely to have an accident.

Most importantly, a casual, “make it up as you move along” approach to snow travel is not safe. You will most successfully deal with each slope angle and each type of snow or ice under foot by applying a specific technique, and the techniques required can change repeatedly over a relatively short distance. When you have learned and practiced the complete repertoire of fundamental skills discussed here, you always will be making “best choices” for each step of your climbs.


ABOUT THE AUTHORS

Dunham Gooding founded the American Alpine Institute in 1975 and has taught courses and guided expeditions in the Cascades, Canada, Ecuador, Bolivia, and Patagonia. He has served as chairman of the National Summit Committee on Mountain Rescue, president of the American Mountain Guides Association (AMGA), and president of the Outdoor Industry Association. Jason D. Martin is the director of operations and a senior guide at the American Alpine Institute. He is on the board of directors of the AMGA and has written two guidebooks and co-authored Rock Climbing: The AMGA Single Pitch Manual.

Special thanks to Bryan Simon, who helped analyze snow-travel accidents reported in the past decade of Accidents editions.